Set up Arduino IDE for micro:bit
Learn how to install and set up the Arduino IDE for use with micro:bit
Written By: Cherie Tan

Difficulty
Easy
Steps
4
Did you know that you can program the micro:bit with the Arduino IDE? Yes, you can.
In this guide, we will show you how to install the Arduino IDE and set it up for use with the micro:bit.
After completing this guide, you will be able to utilise many useful libraries that can only be used in the Arduino IDE, for the micro:bit and various sensors or actuators!
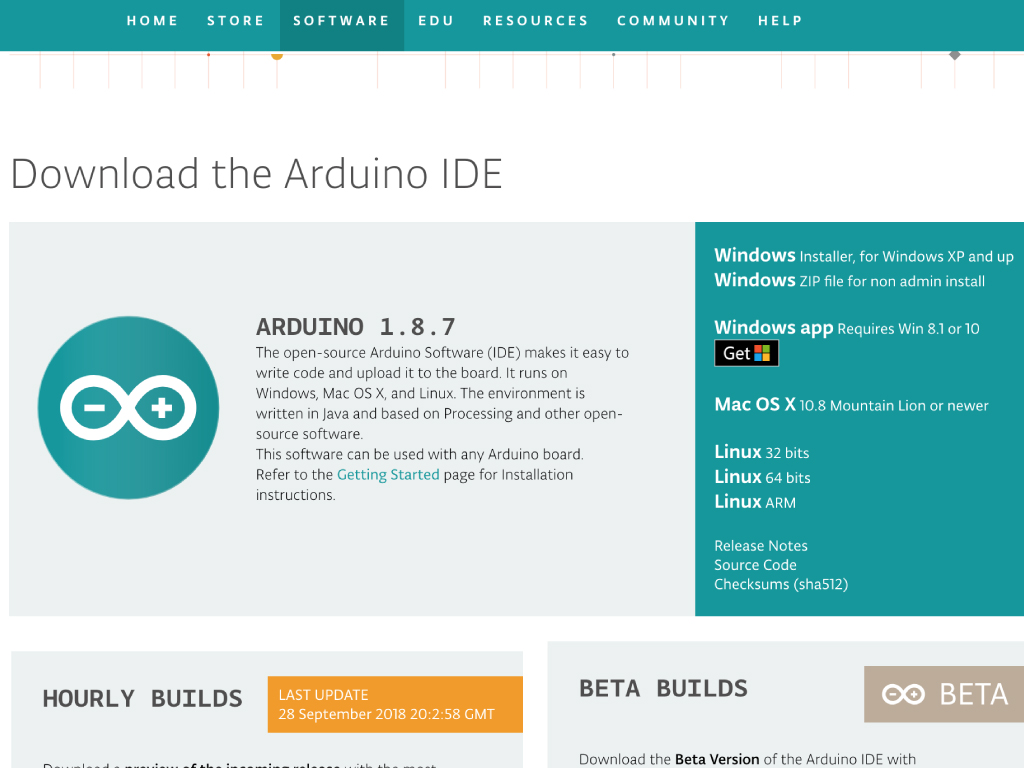
If you haven't already got it installed, let's get you started. Head over to the Arduino IDE website.
Click on the download link for your operating system of choice. In this guide, we are using a Mac OS X.
Wait for it to finish downloading, then double-click to open the downloaded zip folder.
Double-click on the 'Arduino.exe' file to start the IDE!
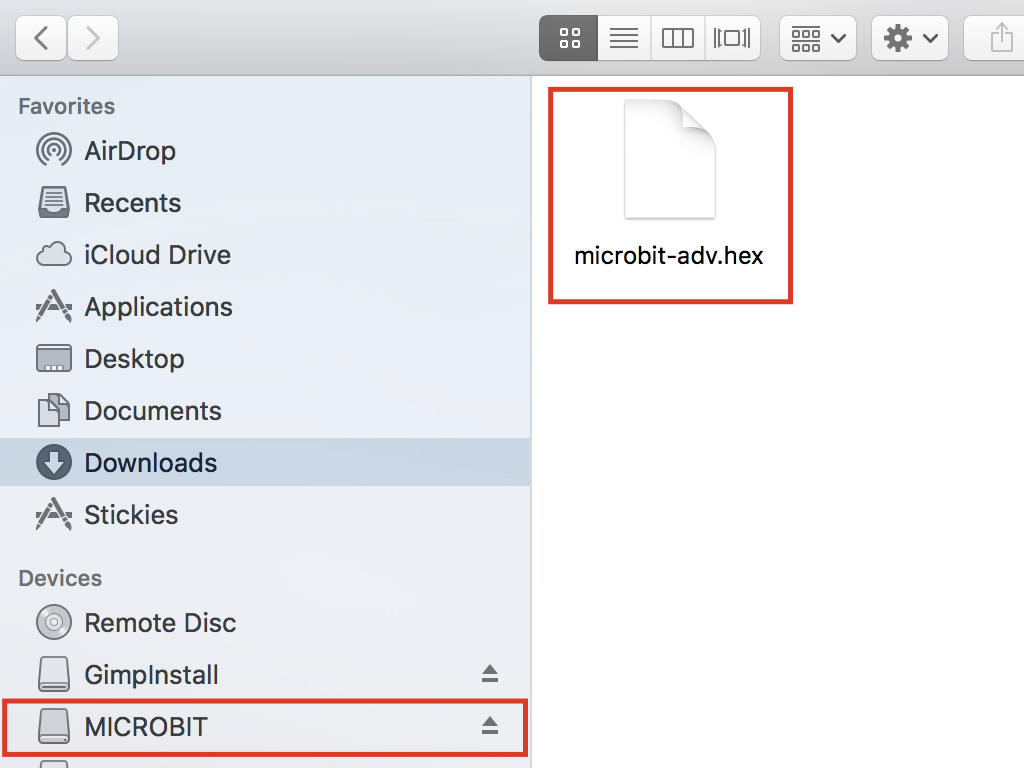
You will need a SoftDevice radio on the micro:bit. If you have used MicroPython with the micro:bit, that SoftDevice would have been erased. Thankfully, it's rather easy to get that back on the micro:bit! Just download this hex file and drag and drop it onto your MICROBIT drive.
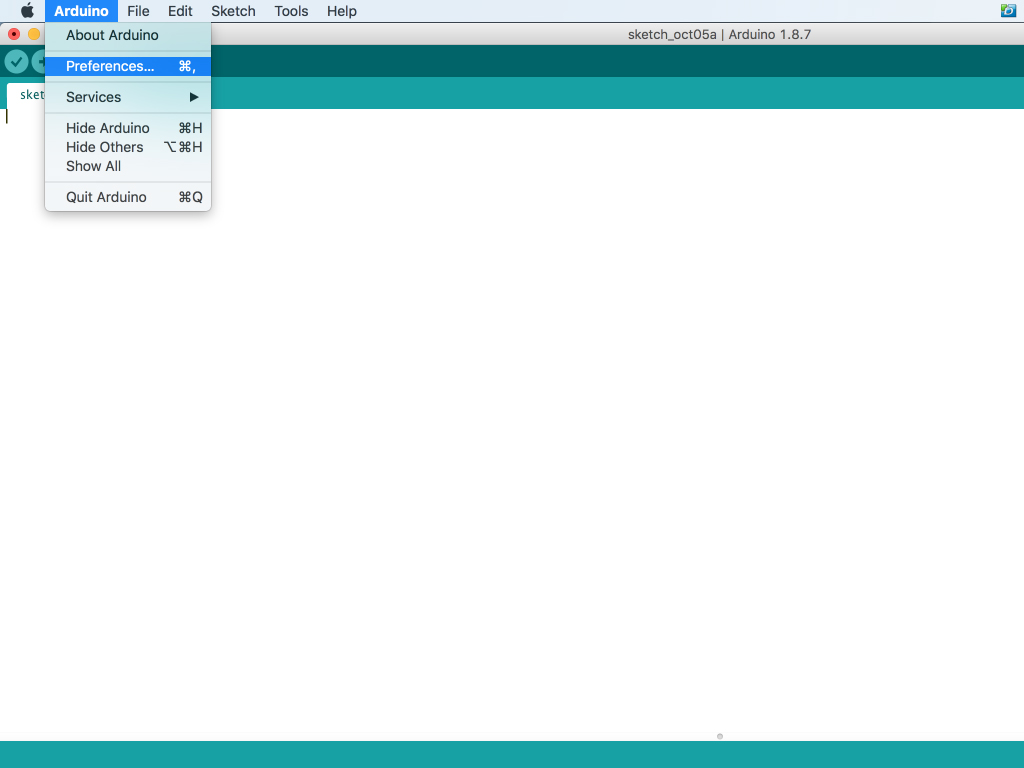
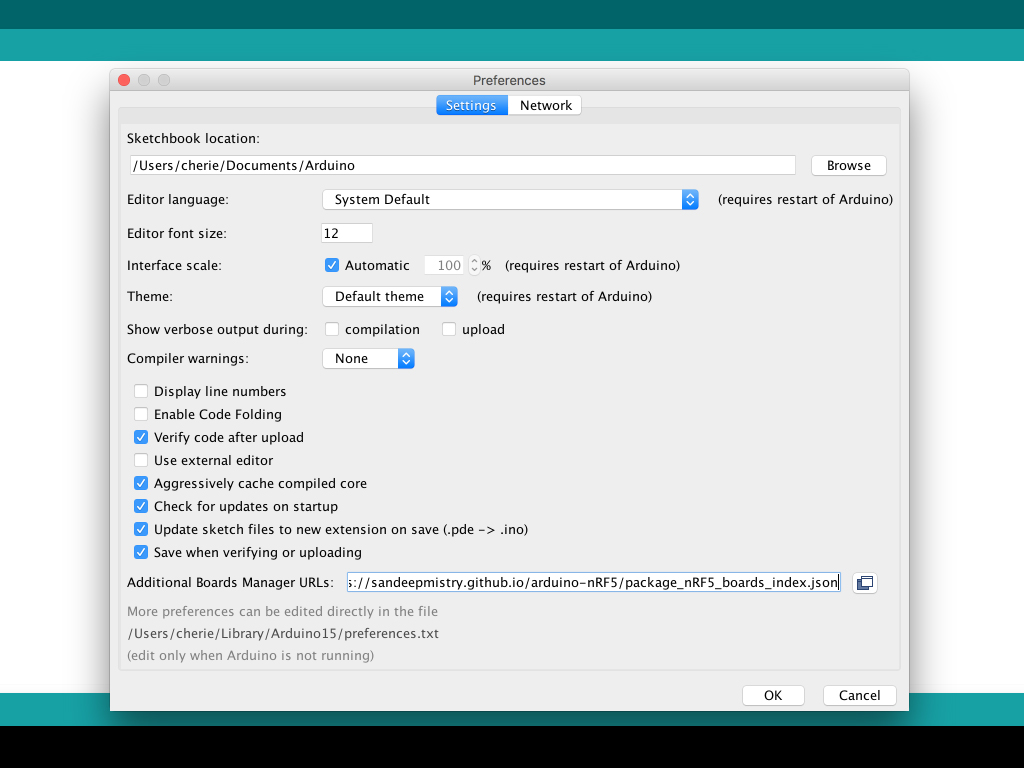
Alright, we're almost set up to program the micro:bit using the Arduino IDE. For Arduino IDE to detect the micro:bit you will need to have added NRF5x board support. In the Arduino IDE, click on 'Preferences'
In the 'Additional Boards Manager URL' field, add 'https://sandeepmistry.github.io/arduino-nRF5/package_nRF5_boards_index.json'
Click the 'OK' button to save
Click on Tools > Board > Boards Manager.
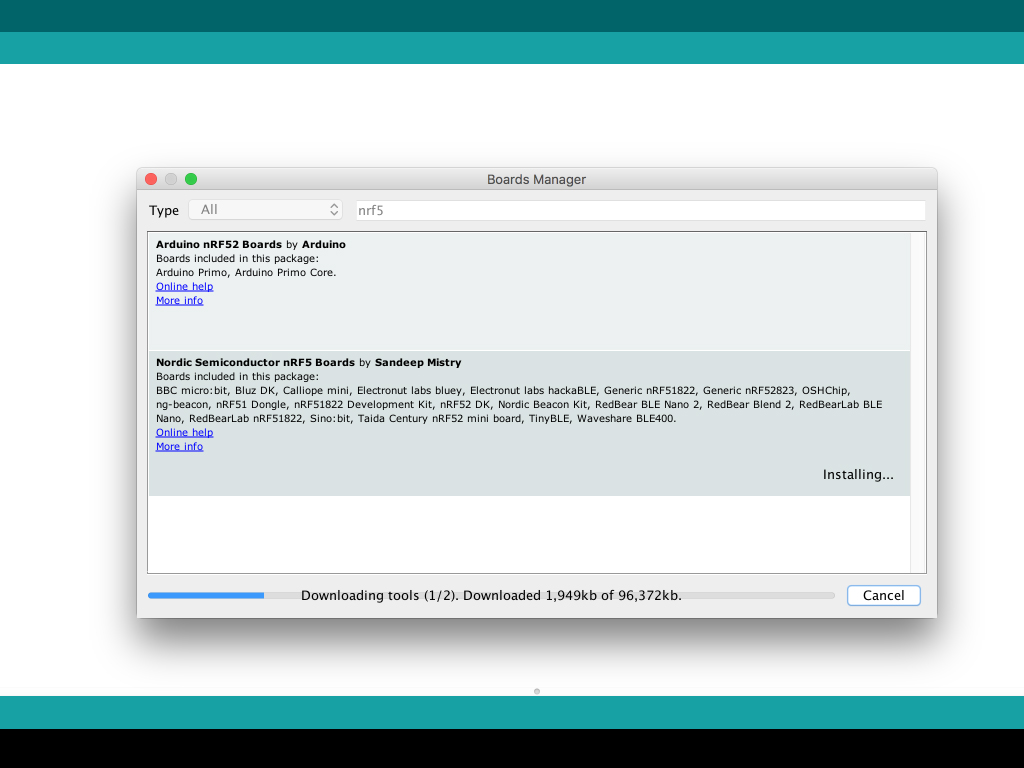
In the search bar, search for 'nRF5'
Click on the install button next to "Nordic Semiconductor nRF5 Boards'


