Accelerometer and Gyroscope Sensor with Arduino
Detect movement, g-force, yaw, pitch, and roll!
Written By: Cherie Tan
Difficulty
Medium
Steps
17
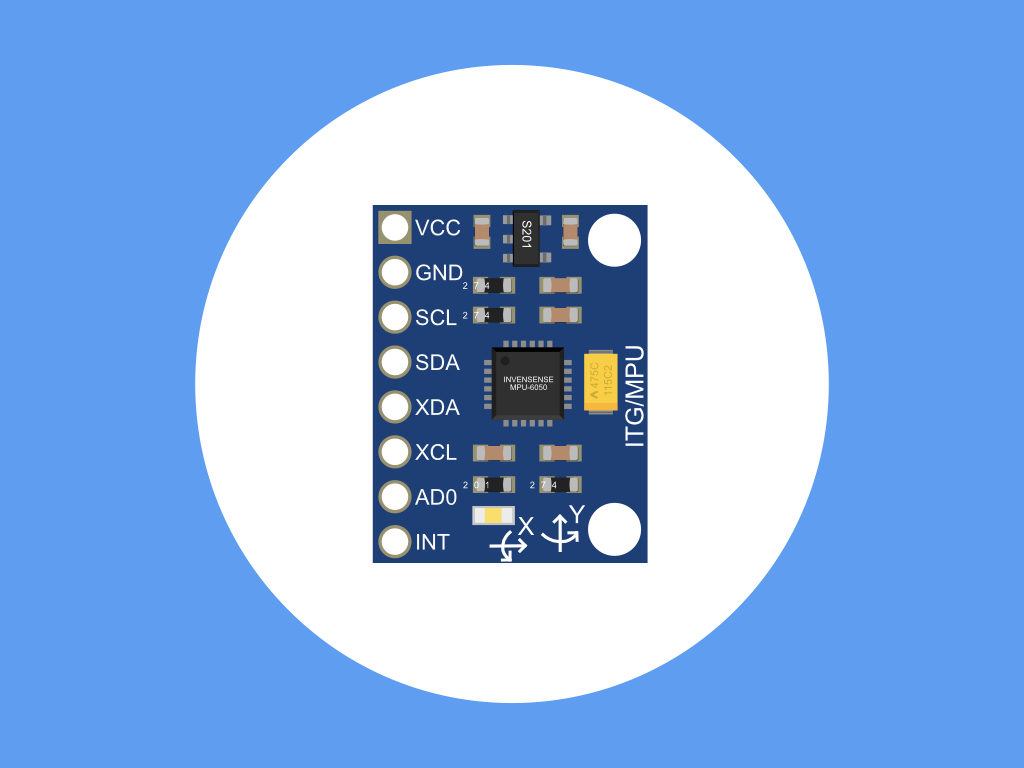
The GY-521 module has an MPU-6050, which is an inertial measurement unit (IMU), an electronic device that measures orientation, velocity, and gravitational forces! It combines an accelerometer and gyroscope on a single chip, as well as a digital motion processor (DMP). So, this sensor enables the detection in the change of orientation in an object, or rather, any change in the location of the chip itself will be registered and used to detect a movement.
In this guide, learn to use the MPU-6050 with a Little Bird Uno R3, first with the Wire library, then with the I2Cdev and MPU6050 libraries.
Complete this guide to get started with detecting movement, g-force, yaw, pitch, and roll!
In this guide, learn to use the MPU-6050 with a Little Bird Uno R3, first with the Wire library, then with the I2Cdev and MPU6050 libraries.
Complete this guide to get started with detecting movement, g-force, yaw, pitch, and roll!
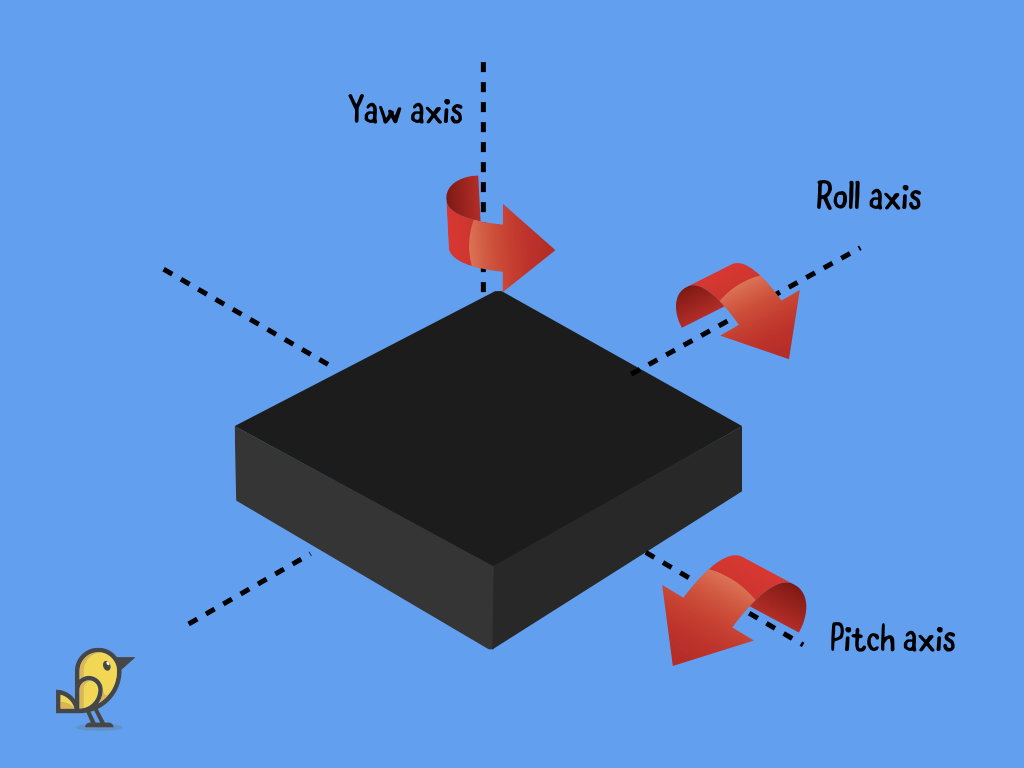
In this guide, get started with using the MPU-6050 with the Little Bird Uno R3. First, we'll just get raw values by using the Wire library, convert this into g-force units, and then utilise the DMP with the I2Cdev and MPU6050 libraries.
The module can run on both 5V or 3.3V as it has an on-board voltage regulator.
While the GY-521 module can be used with both 5V or 3.3V on the Arduino board, when using 3.3V to the VCC the resulting voltage (after the onboard voltage regulator) might be too low for a good working I2Cbus. It is preferred to apply 5V to the VCC pin of the sensor board.
The GY-521 module is a breakout board for the MPU-6050, which is an inertial measurement unit (IMU), an electronic device that measures orientation, velocity, and gravitational forces.
An IMU can be based on various technologies, the most common of these is a technology called microelectromechanical systems (MEMS). This technology is based on the modification of mechanical devices, so that they are both small and fully compatible with integrated circuits, combining the best of both worlds. All this is fabricated onto an integrated circuit like the MPU-6050.
An IMU can be based on various technologies, the most common of these is a technology called microelectromechanical systems (MEMS). This technology is based on the modification of mechanical devices, so that they are both small and fully compatible with integrated circuits, combining the best of both worlds. All this is fabricated onto an integrated circuit like the MPU-6050.
The MPU-6050 combines a 3-axis accelerometer with a 3-axis gyroscope sensor in a single chip, and it also has a digital motion processor (DMP) which offloads computation of motion processing algorithms from the host processor. The DMP acquires data from the accelerometer and gyroscope, as well as from any additional external sensors such as magnetometers, then processes this data. Basically, the DMP is used to minimise power, simplify timing, and simplify the software architecture.
This enables the detection in the change of orientation, or rather, any change in the location of the chip itself will be registered and used to detect a movement.
This enables the detection in the change of orientation, or rather, any change in the location of the chip itself will be registered and used to detect a movement.
An accelerometer is capable of measuring acceleration, which is the rate of change in velocity of an object it is experiencing along the X, Y and Z-axises.
A gyroscope is able to measure the angular rotation of an object along those three axes. When combined together, this gives six degrees of freedom (DOF).
Rotation in three dimensions can be described by rotation along these three axises:
X-axis: left-right (pitch)
Y-axis: forward-back (roll)
Z-axis: up-down (yaw)
X-axis: left-right (pitch)
Y-axis: forward-back (roll)
Z-axis: up-down (yaw)
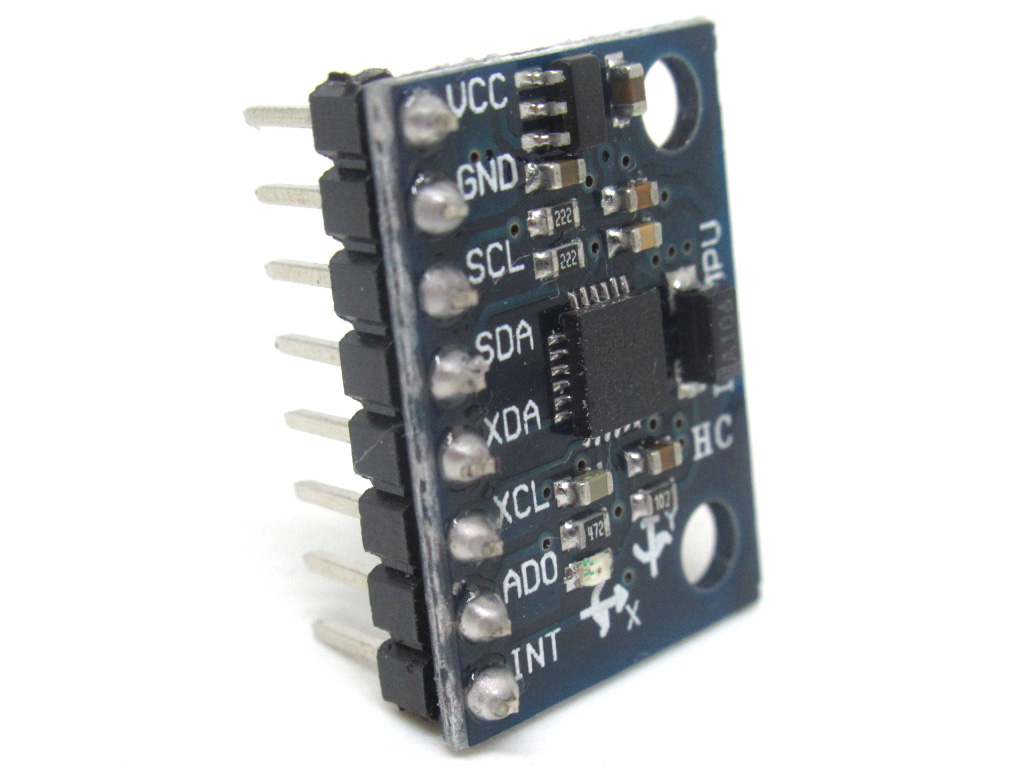
First, align the header pins into the module so that each of the headers is at a 90° angle.
With the headers inserted, solder all 8 pins on each header, soldering a single pin to a header at a time.
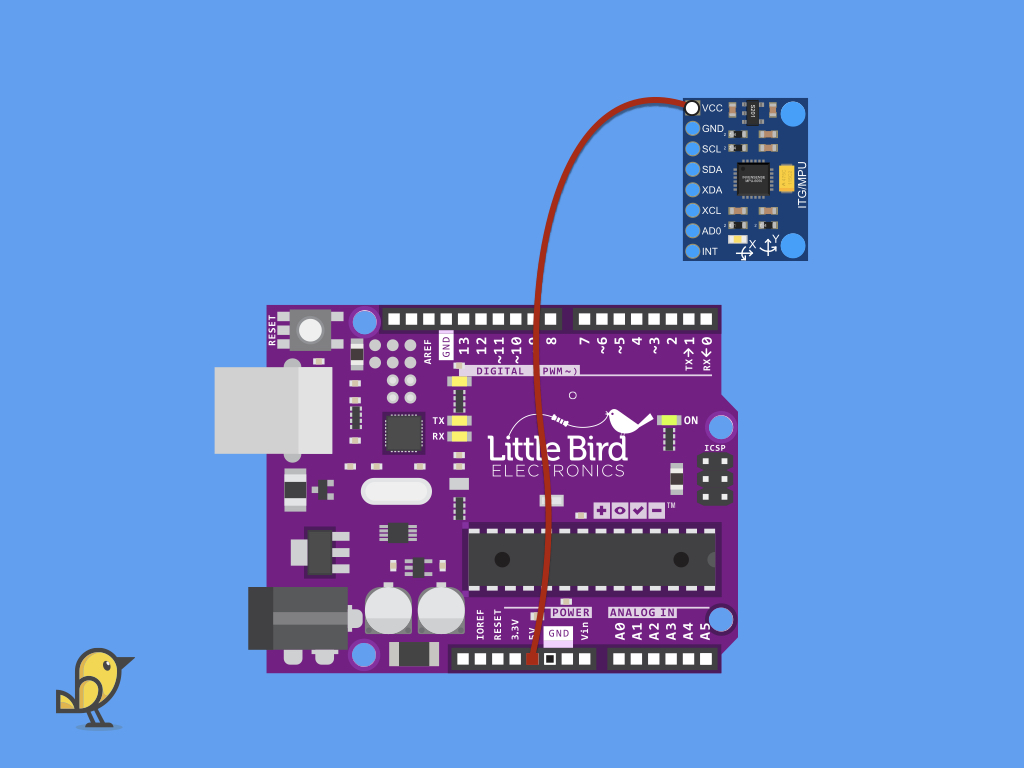
Next, connect another red jumper wire from VCC on the GY-521 module to 5V on Little Bird Uno R3.
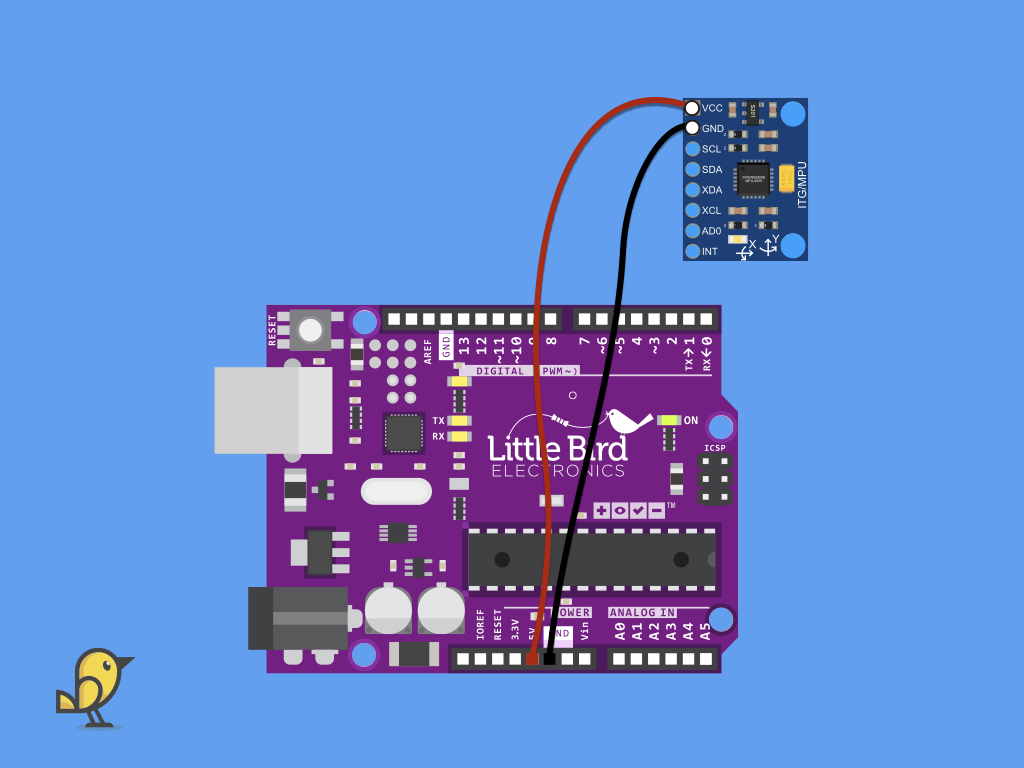
Connect a black jumper wire from GND on the GY-521 module to GND on the Little Bird Uno R3.
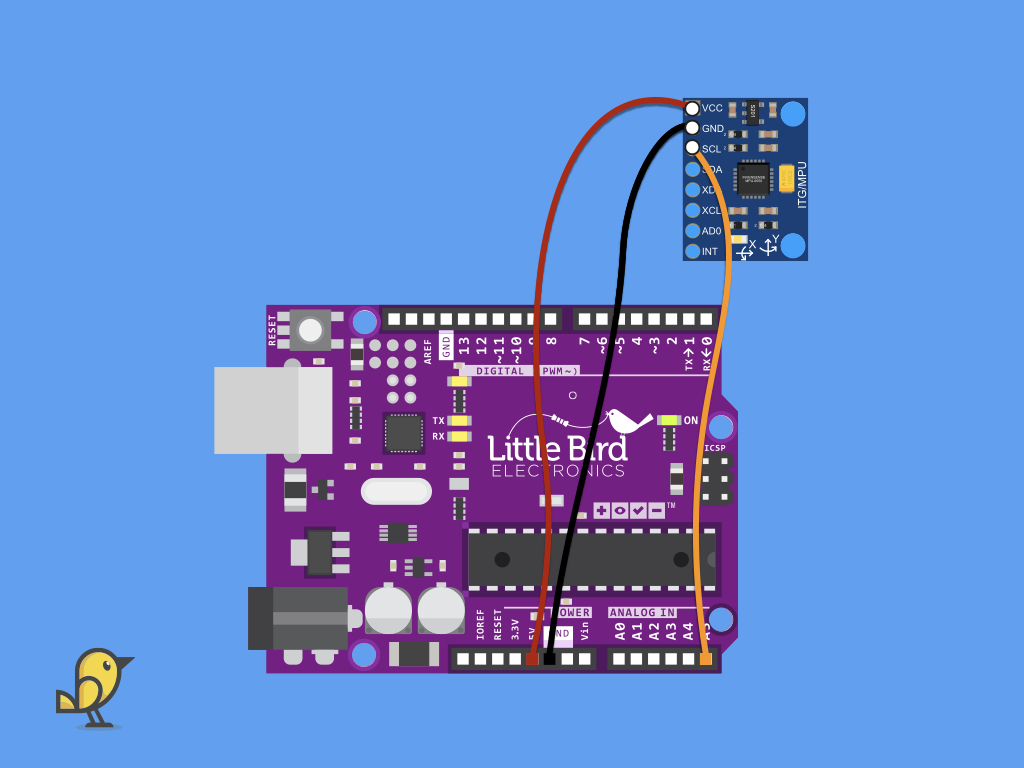
Connect a jumper wire from SCL on the GY-521 module to A5 on the Little Bird Uno R3.
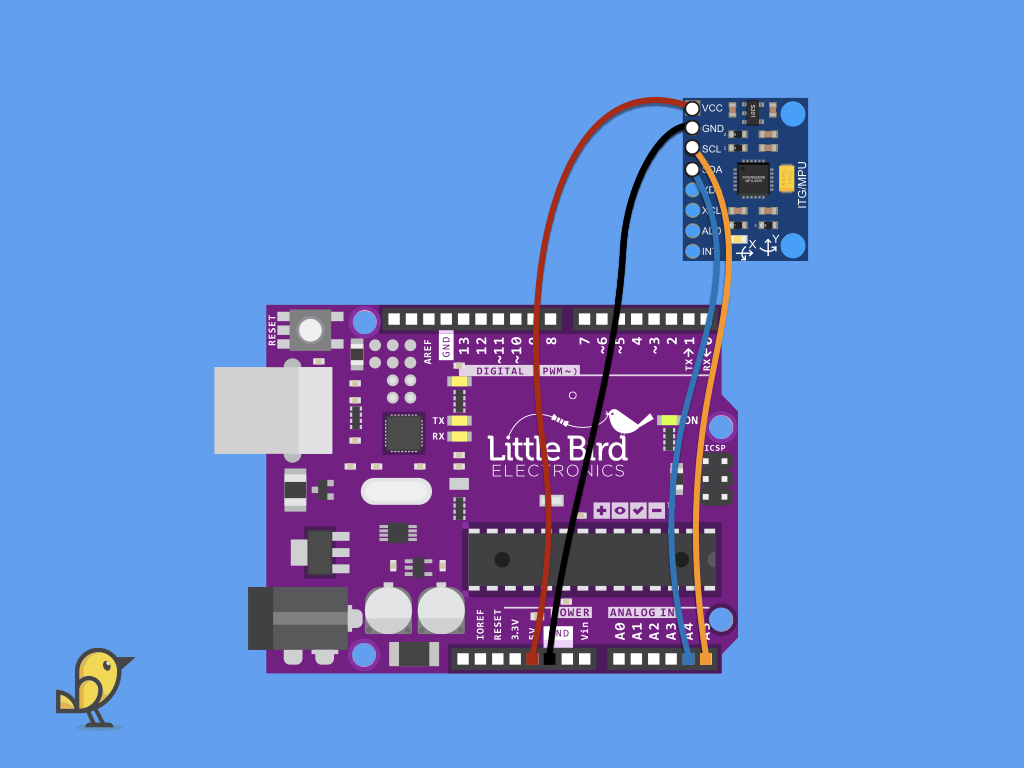
Next, connect the SDA pin on the GY-521 module to A4 on the Little Bird Uno R3.
// --------------------------------------
// i2c_scanner
//
// Version 1
//    This program (or code that looks like it)
//    can be found in many places.
//    For example on the Arduino.cc forum.
//    The original author is not know.
// Version 2, Juni 2012, Using Arduino 1.0.1
//     Adapted to be as simple as possible by Arduino.cc user Krodal
// Version 3, Feb 26  2013
//    V3 by louarnold
// Version 4, March 3, 2013, Using Arduino 1.0.3
//    by Arduino.cc user Krodal.
//    Changes by louarnold removed.
//    Scanning addresses changed from 0...127 to 1...119,
//    according to the i2c scanner by Nick Gammon
//    https://www.gammon.com.au/forum/?id=10896
// Version 5, March 28, 2013
//    As version 4, but address scans now to 127.
//    A sensor seems to use address 120.
// Version 6, November 27, 2015.
//    Added waiting for the Leonardo serial communication.
//
//
// This sketch tests the standard 7-bit addresses
// Devices with higher bit address might not be seen properly.
//

#include <Wire.h>


void setup()
{
  Wire.begin();

  Serial.begin(9600);
  while (!Serial);             // Leonardo: wait for serial monitor
  Serial.println("\nI2C Scanner");
}


void loop()
{
  byte error, address;
  int nDevices;

  Serial.println("Scanning...");

  nDevices = 0;
  for(address = 1; address < 127; address++ )
  {
    // The i2c_scanner uses the return value of
    // the Write.endTransmisstion to see if
    // a device did acknowledge to the address.
    Wire.beginTransmission(address);
    error = Wire.endTransmission();

    if (error == 0)
    {
      Serial.print("I2C device found at address 0x");
      if (address<16)
        Serial.print("0");
      Serial.print(address,HEX);
      Serial.println("  !");

      nDevices++;
    }
    else if (error==4)
    {
      Serial.print("Unknown error at address 0x");
      if (address<16)
        Serial.print("0");
      Serial.println(address,HEX);
    }
  }
  if (nDevices == 0)
    Serial.println("No I2C devices found\n");
  else
    Serial.println("done\n");

  delay(5000);           // wait 5 seconds for next scan
}
Navigate to Tools > Serial Monitor.
You should see "I2C device found at address 0x68 !" on the Serial Monitor.
First, find the I2C address of the MPU-6050 with the following sketch. Upload it to the Little Bird Uno R3. More details on i2c_scanner can be found here.
#include <Wire.h>Before, uploading the final program where we'll use an MPU6050 library, we'll read the raw values from MPU-6050 without one.
Remove the existing code and then include the Wire.h library up the top of the sketch.
Remove the existing code and then include the Wire.h library up the top of the sketch.
#include <Wire.h>
int I2Caddress = 0x68;
Create an int variable called I2Caddress and assign it the value 0x68 which is the address of the MPU-6050 sensor.
#include <Wire.h>
int I2Caddress = 0x68;
float accelX, accelY, accelZ;
Create float variables for accelX, accelY, and accelZ.
#include <Wire.h>
int I2Caddress = 0x68;
float accelX, accelY, accelZ;

void setup()
{
  Serial.begin(9600); //initialise serial communication at baud rate of 9600
  Wire.begin(); //initiatise the wire library and join I2C bus as master device
  Wire.beginTransmission(I2Caddress); // transmit to device at I2Caddress
  Wire.write(0x6B); // access the power management register PWR_MGMT_1
  Wire.write(0); // set to zero to wake the MPU-6050
  Wire.endTransmission(1); // end the transmission
}
Next, in void setup, add the following code.
We first initialised serial communication with the Serial.begin function and set it to be a baud rate of 9600.
Next, we initialised the Wire library and got the Arduino to join the I2C bus as the master device with Wire.begin.
Then, with the Wire.beginTransmission function, the master device starts a transmission to the slave device at I2Caddress, which would be the MPU-6050's address, 0x68.
As the MPU-6050 defaults in sleep mode upon power up, we'll next need to wake it up by using the Wire.write function.
Finally, the transmission to the slave device ends with Wire.endTransmission.
According to the datasheet, the PWR_MGMT_1 register, or 0x6B, allows the user to configure the power mode and clock source. It also provides a bit for resetting the entire device, and a bit for disabling the temperature sensor. By setting it to '1', this puts the MPU-6050 into sleep mode. Setting it as '0' wakes it up.
For more information on the registers and what they do on the MPU-6050, check out the Invensense MPU-6050 datasheet.
For more information on the registers and what they do on the MPU-6050, check out the Invensense MPU-6050 datasheet.
#include <Wire.h>
int MPUaddress = 0x68;
float accelX, accelY, accelZ;

void setup()
{
  Serial.begin(9600); //initialise serial communication at baud rate of 9600
  Wire.begin(); //initiatise the wire library and join I2C bus as master device
  Wire.beginTransmission(MPUaddress); // transmit to device at MPUaddress
  Wire.write(0x6B); // access the power management register PWR_MGMT_1
  Wire.write(0); // set to zero to wake the MPU-6050
  Wire.endTransmission(true); // end the transmission
}

void loop() {
  Wire.beginTransmission(MPUaddress);
  Wire.write(0x3B);
  Wire.endTransmission(false);
  Wire.requestFrom(MPUaddress, 6, true);// Read 6 registers total, each axis value is stored in 2 registers
  accelX = Wire.read() << 8 | Wire.read(); // x-axis raw values
  accelY = Wire.read() << 8 | Wire.read(); // y-axis raw values
  accelZ = Wire.read() << 8 | Wire.read(); // z-axis raw values
  Serial.println(accelX);
  Serial.println(accelY);
  Serial.println(accelZ);
}
Add the following code in void loop.
Using the Wire.requestFrom function, this will request 6 registers. Why 6? Here, we are only focusing on the values from the accelerometer, and each axis value is stored in 2 registers.
#include <Wire.h>
int MPUaddress = 0x68;
float accelX, accelY, accelZ;

void setup()
{
  Serial.begin(9600); //initialise serial communication at baud rate of 9600
  Wire.begin(); //initiatise the wire library and join I2C bus as master device
  Wire.beginTransmission(MPUaddress); // transmit to device at MPUaddress
  Wire.write(0x6B); // access the power management register PWR_MGMT_1
  Wire.write(0); // set to zero to wake the MPU-6050
  Wire.endTransmission(true); // end the transmission
}

void loop() {
  Wire.beginTransmission(MPUaddress);
  Wire.write(0x3B);
  Wire.endTransmission(false);
  Wire.requestFrom(MPUaddress, 6, true);
  //For a range of +-2g, we need to divide the raw values by 16384, according to the datasheet
  accelX = (Wire.read() << 8 | Wire.read()) / 16384.0; // X-axis value
  accelY = (Wire.read() << 8 | Wire.read()) / 16384.0; // Y-axis value
  accelZ = (Wire.read() << 8 | Wire.read()) / 16384.0; // Z-axis value
  Serial.println(accelX);
  Serial.println(accelY);
  Serial.println(accelZ);
}
The raw data gathered from the previous sketch is 16-bit raw data in 2’s complement form. According to the data sheet, the acceleration can be measured in various ranges between ±2 g and ±16 g with 16-bit resolution and a rate of up to 1 kHz.
To do so, we'll divide the raw values by 16384, and this will produce values in g (g force)
We've read the accelerometer's raw values, then converted these readings to the g unit. To obtain pitch and roll values, we'll need to apply some equations to the g unit measurements. All this has already been done via the MPU6050 library.
First, head to: https://github.com/jrowberg/i2cdevlib
First, head to: https://github.com/jrowberg/i2cdevlib
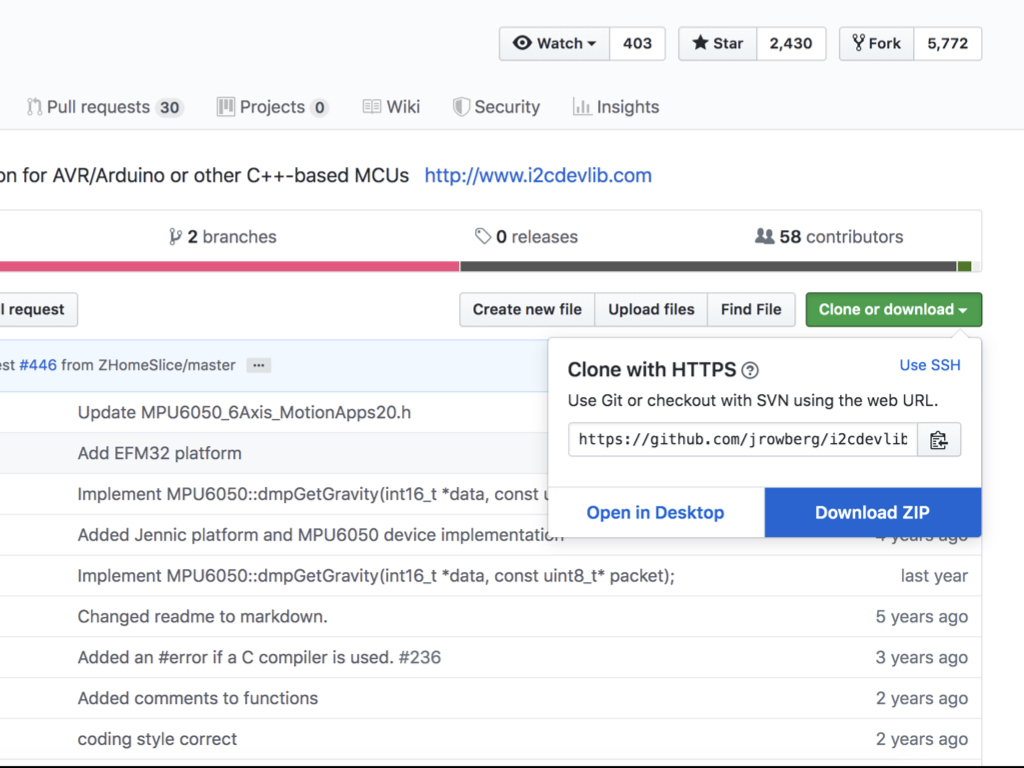
Click on 'Clone or download' button
Click on Download as ZIP
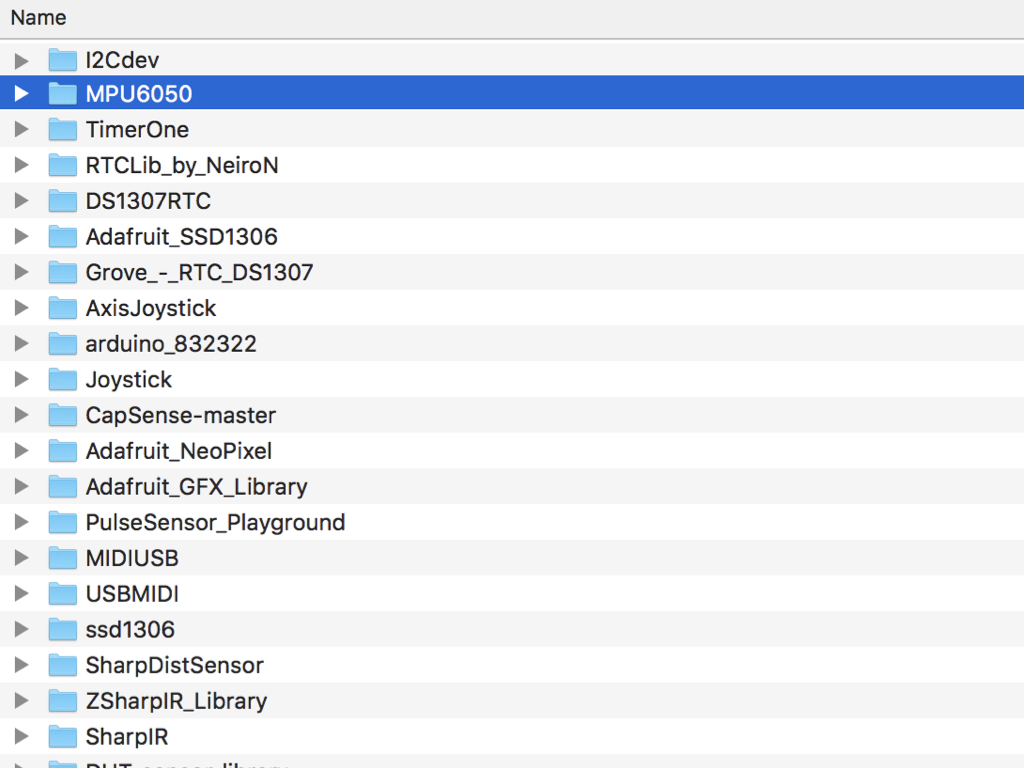
Open up this zip file and place the 'I2Cdev' and 'MPU6050' folders into your Arduino libraries folder.
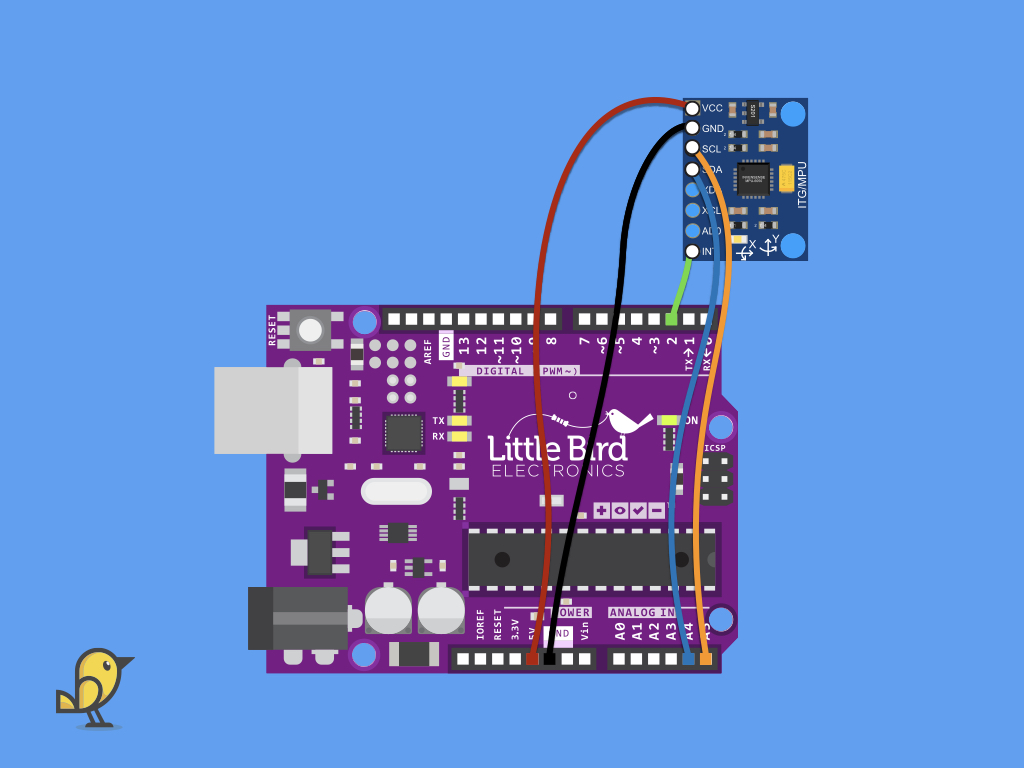
For the following sketch where we'll be using the DMP, the interrupt pin will need to be connected up.
So, connect a jumper wire from INT pin on the GY-521 module to Digital Pin 2 on the Little Bird Uno R3.
So, connect a jumper wire from INT pin on the GY-521 module to Digital Pin 2 on the Little Bird Uno R3.
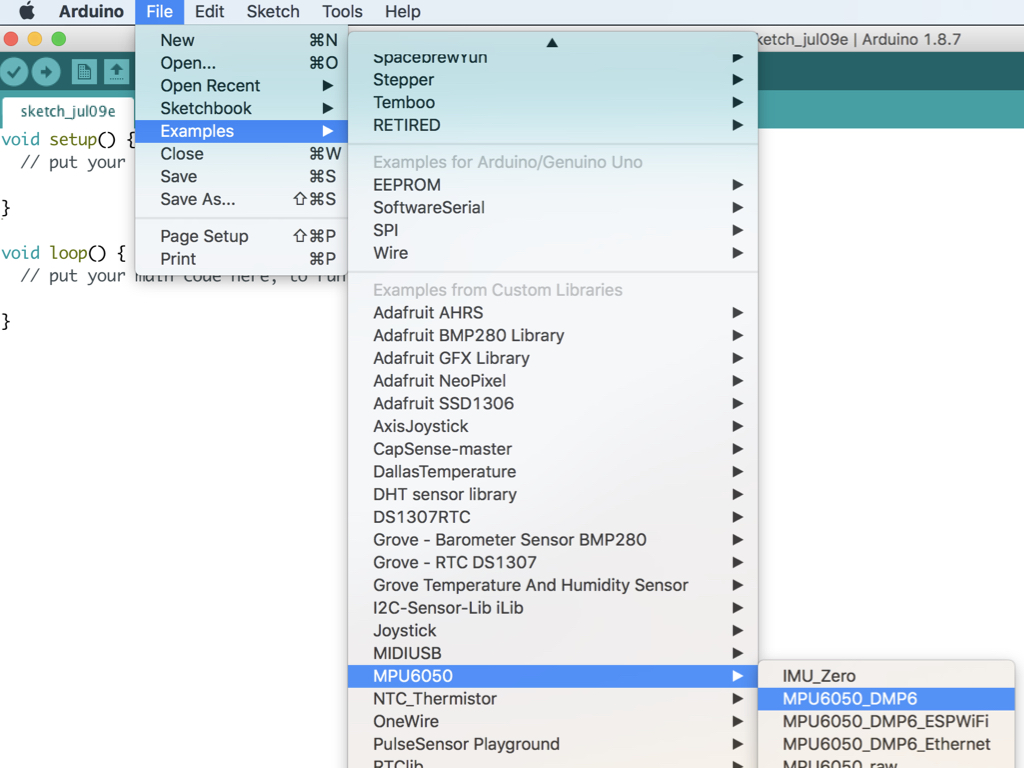
Go to File > Examples > MPU6050 > MPU6050_DMP
Upload this code to the Little Bird Uno R3.

