Get Started with Pi Camera V2
Learn how to set up the Raspberry Pi Camera V2
Written By: Cherie Tan
Difficulty
Easy
Steps
10
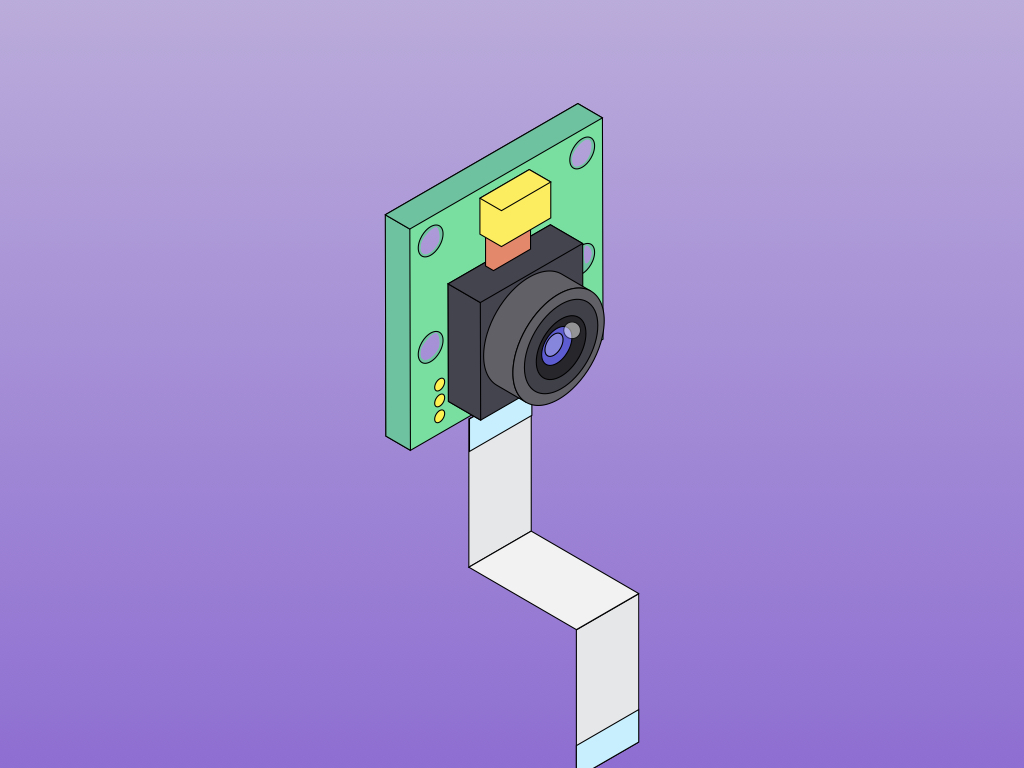
The Raspberry Pi Camera V2 board is a high quality 8 megapixel Sony IMX219 image sensor custom designed add-on board for Raspberry Pi, featuring a fixed focus lens. It's capable of 3280 x 2464 pixel static images, and also supports 1080p30, 720p60 and 640x480p60/90 video. It attaches to Pi by way of one of the small sockets on the board upper surface and uses the dedicated CSi interface, designed especially for interfacing to cameras.
In this guide, you will learn to set up and get started with the Raspberry Pi Camera V2 using Python and picamera.
After this, you will be able to work on more advanced projects such as a time-lapse camera, a home security system, motion detection, time lapse photography, slow-motion video and much more!
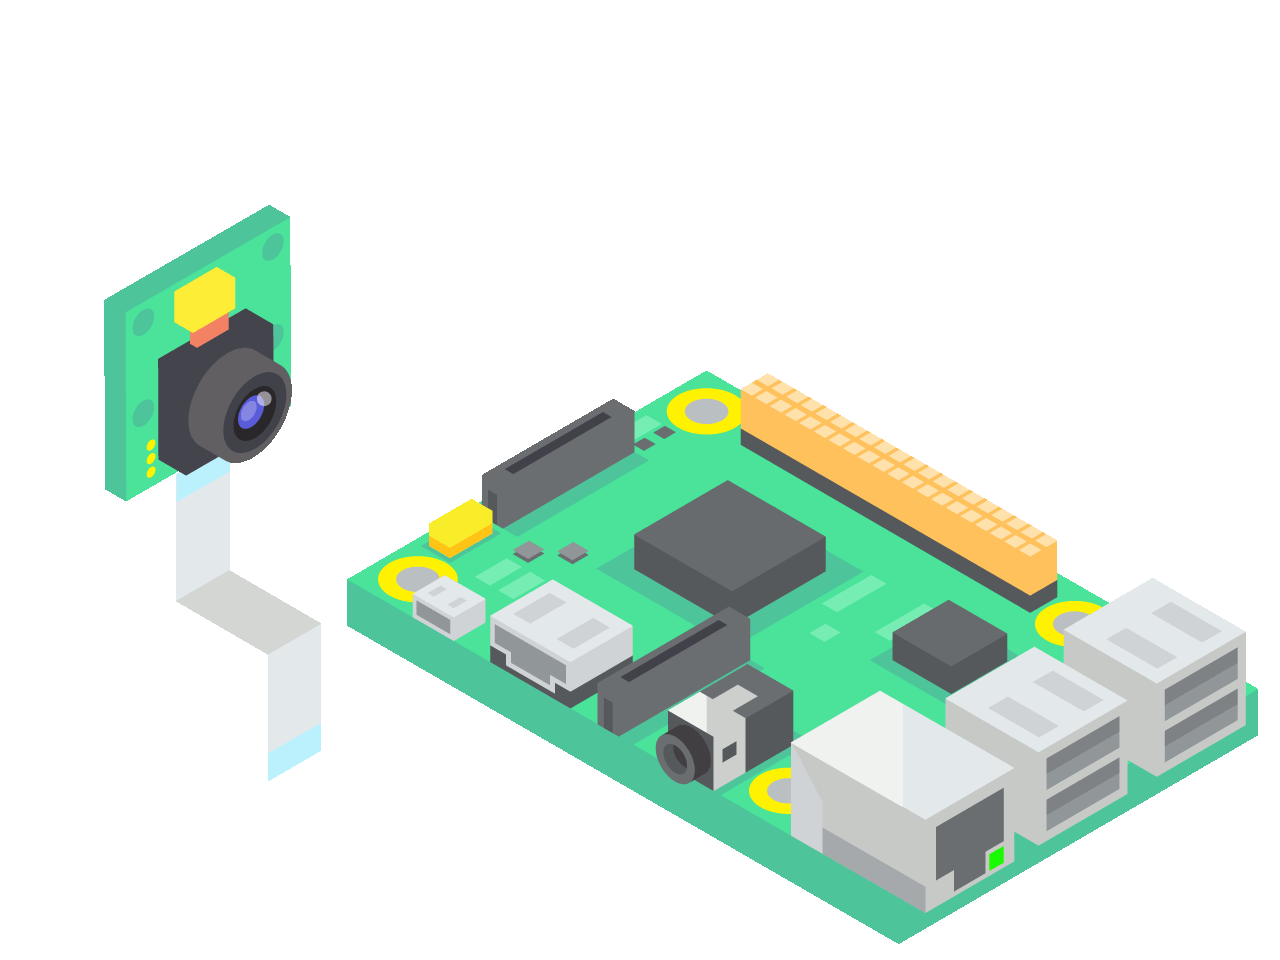
The first step is to connect the camera module to the Raspberry Pi. Make sure that the camera is connected in the right orientation, with the ribbon blue letters facing up as shown in the diagram.
In this guide, the Raspberry Pi 3 Model B+ is used here, but the camera module will work with other Raspberry Pi boards as well. However, with the Raspberry Pi Zero or Raspberry Pi Zero W, where there is a smaller CSI (Camera Serial Interface) port, it is required that you use the Raspberry Pi Zero Camera Cable.
The cable should slot into the CSI port with the cable's silver connectors facing the HDMI port.
After connecting the camera module to the Raspberry Pi, connect it to the official Raspberry Pi power supply, attach it to a display and start it up. You will need to use a keyboard and a mouse here, so connect those as well.
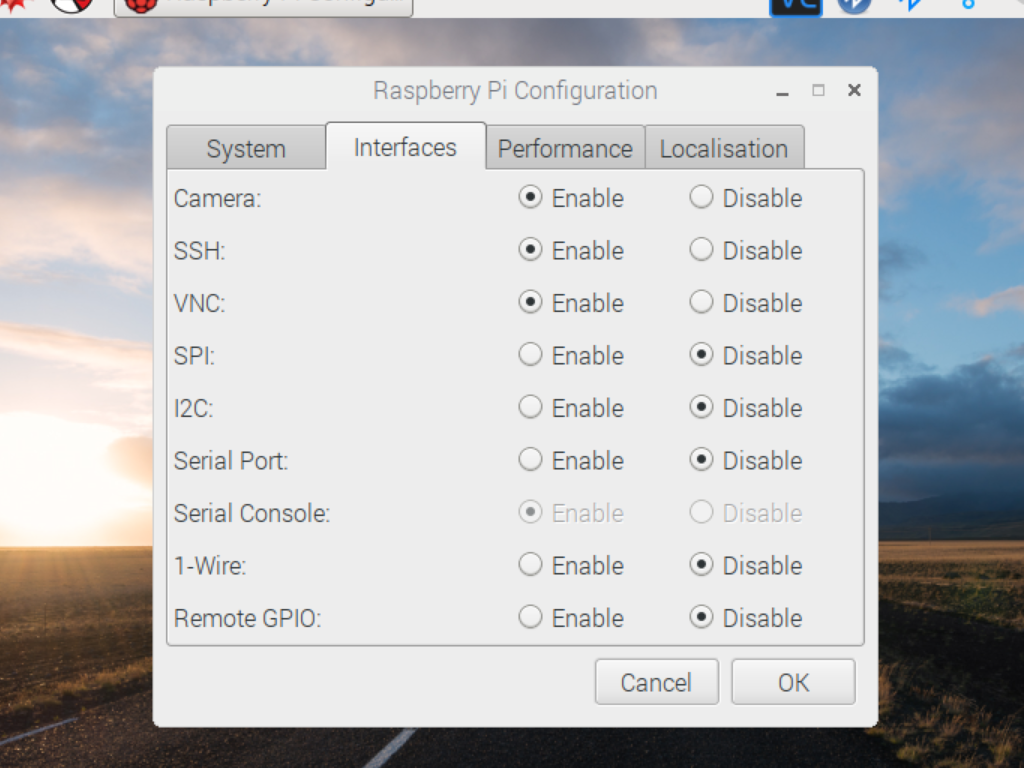
Navigate to the Raspberry Pi Configuration tool from the main menu.
Click on the Interfaces tab, and ensure that Camera is enabled.
from picamera import PiCamera
from time import sleep

camera = PiCamera()

camera.start_preview()
sleep(30)
camera.stop_preview()
After enabling Camera and rebooting the Pi, it's time to start a camera preview!
So, open Python 3 from the main menu. Create a new file and name is camera.py and enter the following code.
Save the file by hitting CTRL + S. To run it, hit F5 and the preview should show up for 30 seconds before closing.
camera.rotation = 180
camera.start_preview()
sleep(10)
camera.stop_preview()
Depending on how your preview turned out, you may want to rotate it if it was upside-down.
Enter the following code to camera.py
Alternatively, camera.rotation can be set to 0, 90, or 270 degrees.
from picamera import PiCamera
from time import sleep

camera = PiCamera()

camera.start_preview(alpha=200)
sleep(10)
camera.stop_preview()
You might want to alter the transparency of the camera preview. To do so, set an alpha level, the value can be anywhere between 0 and 255.
To test it out, enter the following in the code.
camera.start_preview()
sleep(5)
camera.capture('/home/pi/Desktop/image.jpg')
camera.stop_preview()
Now, if you want to take still pictures with the camera, you can. Enter the following code.
Make sure that the sleepvalue is more than 2. This is because it is important for the camera to sleep for at least two seconds in order to give the sensor the time to set its light levels.
After running the code, you will see that the camera preview captures a still picture after 5 seconds. The photo can be found on your Desktop.
camera.start_preview()
for i in range(5):
    sleep(5)
    camera.capture('/home/pi/Desktop/image%s.jpg' % i)
camera.stop_preview()
A loop can be added so that the camera will now take five pictures in a row. Enter the following code, then run the code. Each picture will be taken every five seconds before the preview closes.
The variable i is the current iteration number. You will realize that the image file names will be saved as image0.jpg, image1.jpg, image2.jpg, image3.jpg and so forth.
camera.start_preview()
camera.start_recording('/home/pi/video.h264')
sleep(10)
camera.stop_recording()
camera.stop_preview()
You might want to record a video. To do so, get rid of capture()
Replace it with start_recording() and stop_recording():
omxplayer video.h264
On the top left hand corner, click on the black monitor icon to open a terminal window.
Enter omxplayer video.h264 to play the video!
Enter omxplayer video.h264 to play the video!

Now that you've gained some familiarity with using the Raspberry Pi Camera Module and PiCamera library, you could go on and incorporate it into your own Raspberry Pi projects.
Why not build a Raspberry Pi Security Camera with MotionEyeOS?