Build a Raspberry Pi Security Camera
Use MotionEyeOS and create your own surveillance camera
Written By: Cherie Tan
Difficulty
Easy
Steps
13
Ever wanted to make your own custom yet cost-effective security camera system?
In this guide, we will go through the steps required for you to get started with motionEyeOS and create your own security camera using the Raspberry Pi Zero W and a Raspberry Pi V2 Camera Board.
After completing this guide, you could go on to further customise it: Add a power button or on/off switch, 3d printed case, and much more for your build!
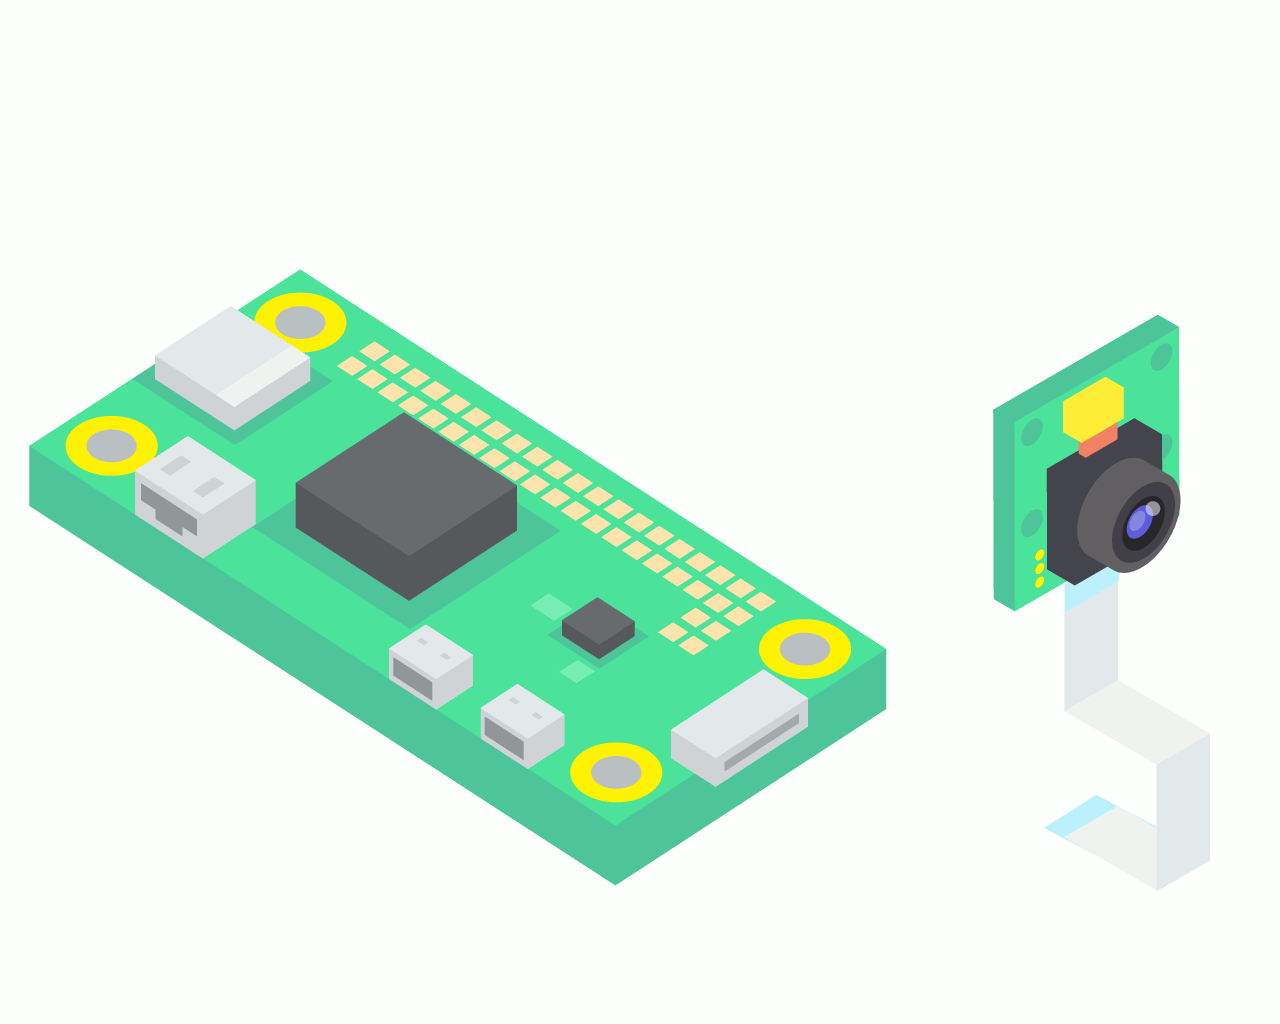
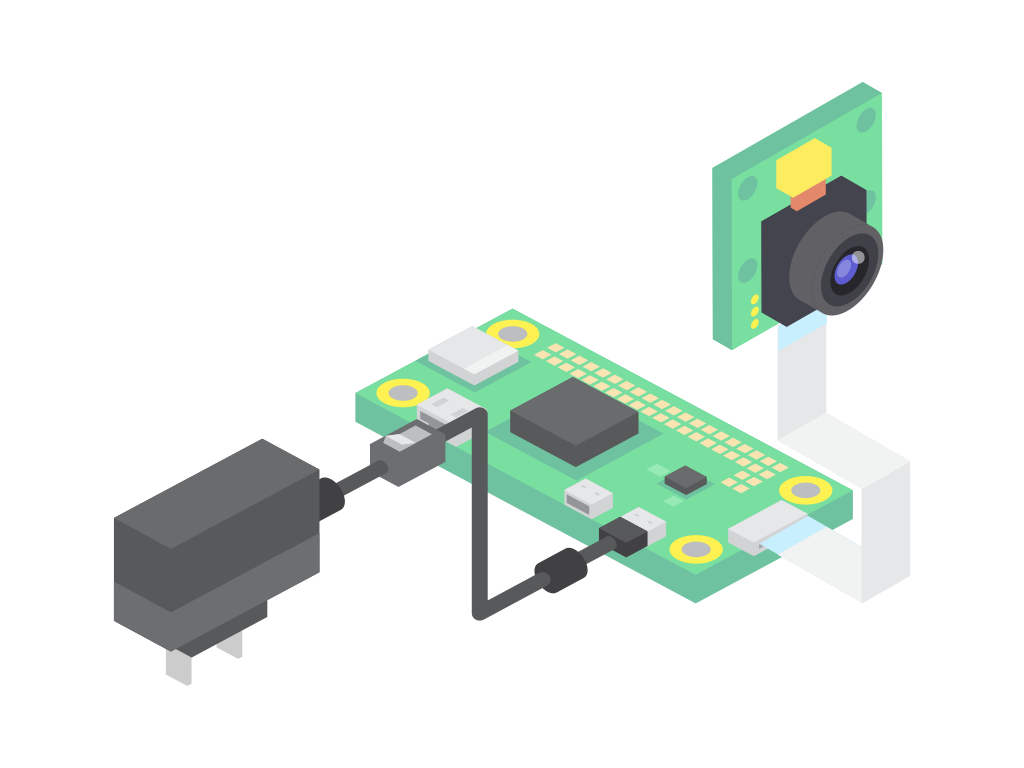
Before doing anything else, we will attach the Raspberry Pi Camera NoIR Infrared camera to the Raspberry Pi Zero W board. If you would like to monitor your environment in low-light settings, it is the ideal choice. Else, there is the Raspberry Pi Camera board V2.
Please note that as the camera port on the Raspberry Pi Zero W is smaller, using either camera board with the Raspberry Pi Zero W requires a shorter camera adapter cable. We have listed the right camera adapter cable in the recommended parts list of this guide.

motionEyeOS is a video surveillance operating system, a Linux distribution that can turn a single-board computer like the Raspberry Pi into a full-fledged video surveillance system.
It also supports other devices such as the Banana Pi, Odroid and Pine single board computers. This is what we will be using on the Raspberry Pi Zero W!
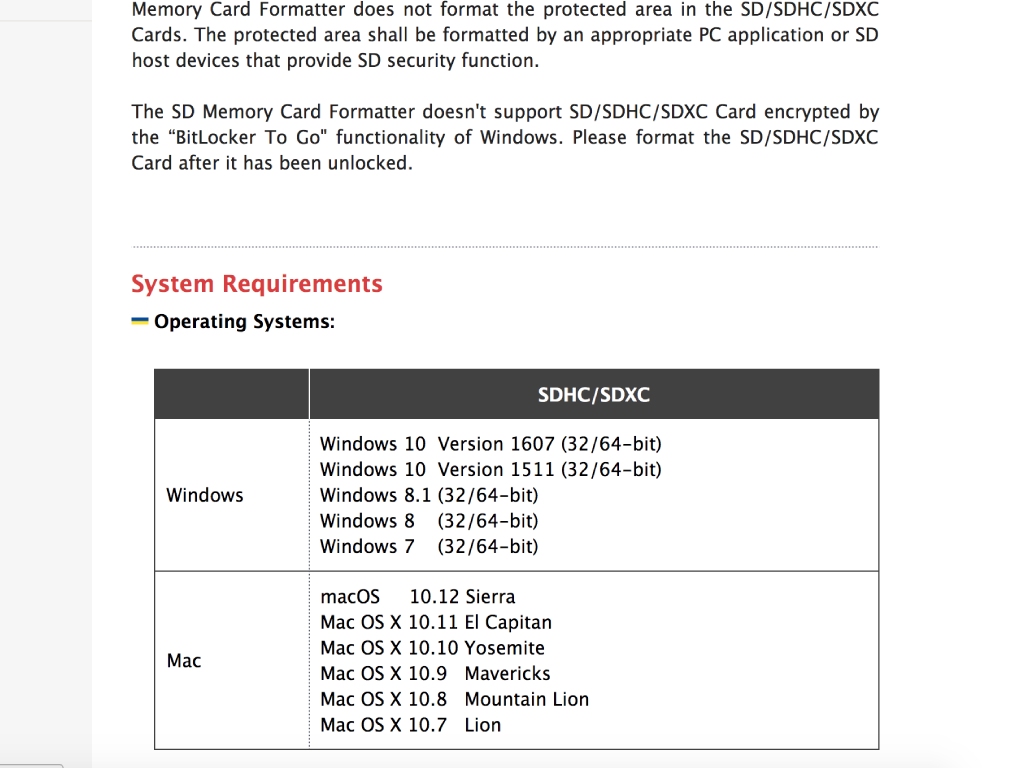
Use a SD card formatting tool like SD Formatter 4.0, please download it if you haven't already got it
Insert your microSD card into either an in-built or external SD card reader, then see the drive letter that shows up in the left hand column of Windows Explorer, or Finder on the Mac
Open SD Card Formatter 4.0
Select the correct letter drive for your microSD card
Choose 'Quick Format' or 'Overwrite Format'
Click on Format button
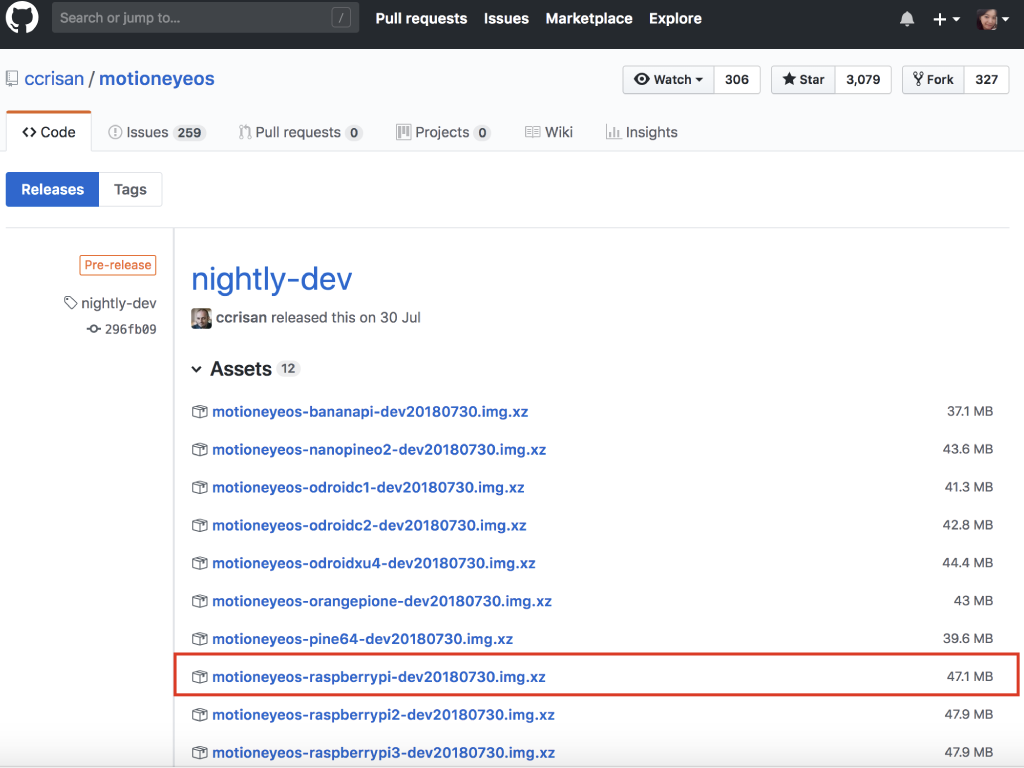
Go to motionEyeOS GitHub repository to download the SD Card Image for your Raspberry Pi Zero W
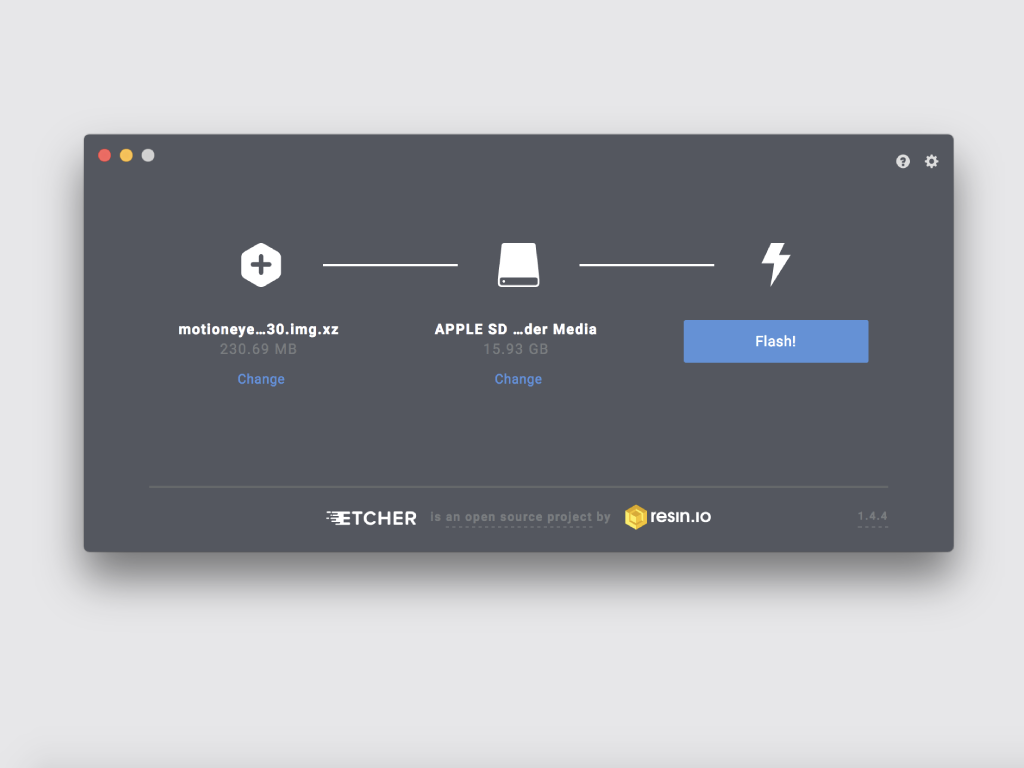
Run Etcher, or download it if you haven't got it installed
Click on 'Select Image' and choose the image you downloaded in step 1
Click on 'Select Drive' and make sure to use the correct drive letter associated with your microSD card
Click on 'Flash' button to flash the motionEyeOS image onto the microSD card!
country=AU
ctrl_interface=DIR=/var/run/wpa_supplicant GROUP=netdev
update_config=1
network={
   ssid="my-wifi-ssid"
   psk="super-secret-password"
}
Save the file
Re-insert the microSD card back into the Raspberry Pi. Now power it up with the official power supply.
With motionEyeOS installed, it's almost ready to be boot up! For simplicity's sake, we will set up WiFi on the Raspberry Pi by manually configuring a file. This can be done by adding a text file to the boot directory of the newly flashed microSD card.
Insert microSD card into SD card reader and computer
Create a file in boot directory and name this file wpa_supplicant.conf
Add the text as shown
Replace "my-wifi-ssid" with your WiFi network name, leaving the quotation marks.
Replace "super-secret-password" with your WiFi password, also leaving the quotation marks as is.

On first boot, it will perform some configuration for a few minutes. You will see: 'Interface wlan0 has IP address (your Raspberry Pi's IP Address will be listed here)'
Enter this IP address onto your web browser, this will bring up the motionEye web interface.
It will prompt you for login details. Enter 'admin' as the username, and leave the password blank.
Click on the 'Login' button and you should now be able to access the settings panel.
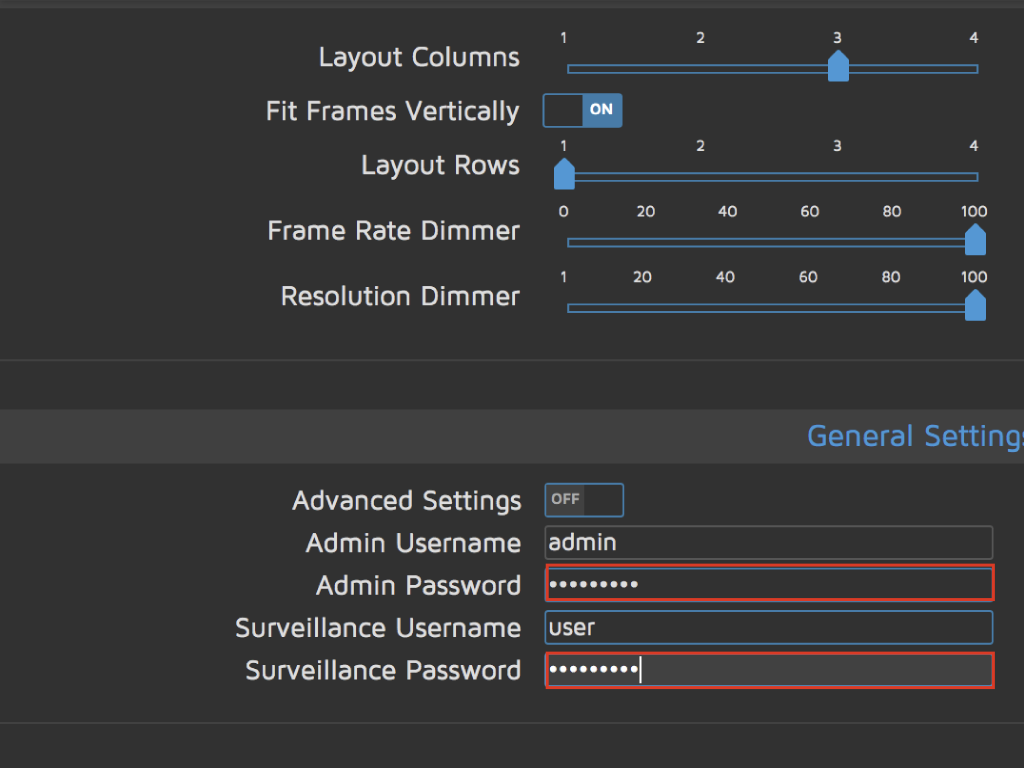
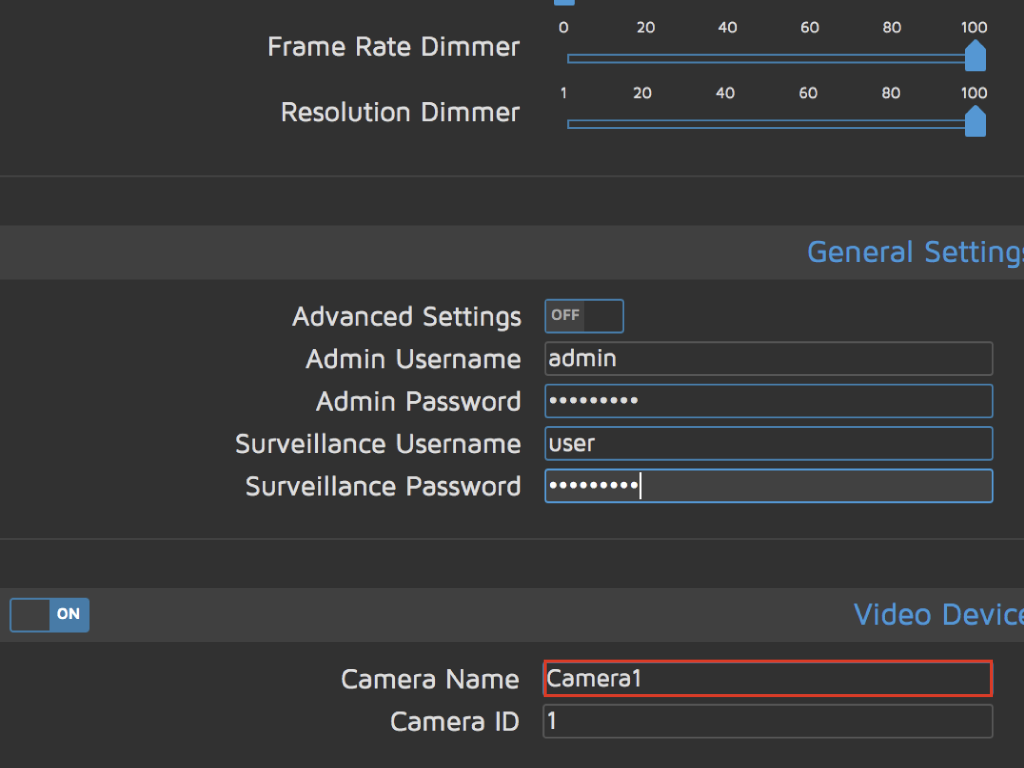
To make it more secure, you will want to change the password. So head over to the general settings menu.
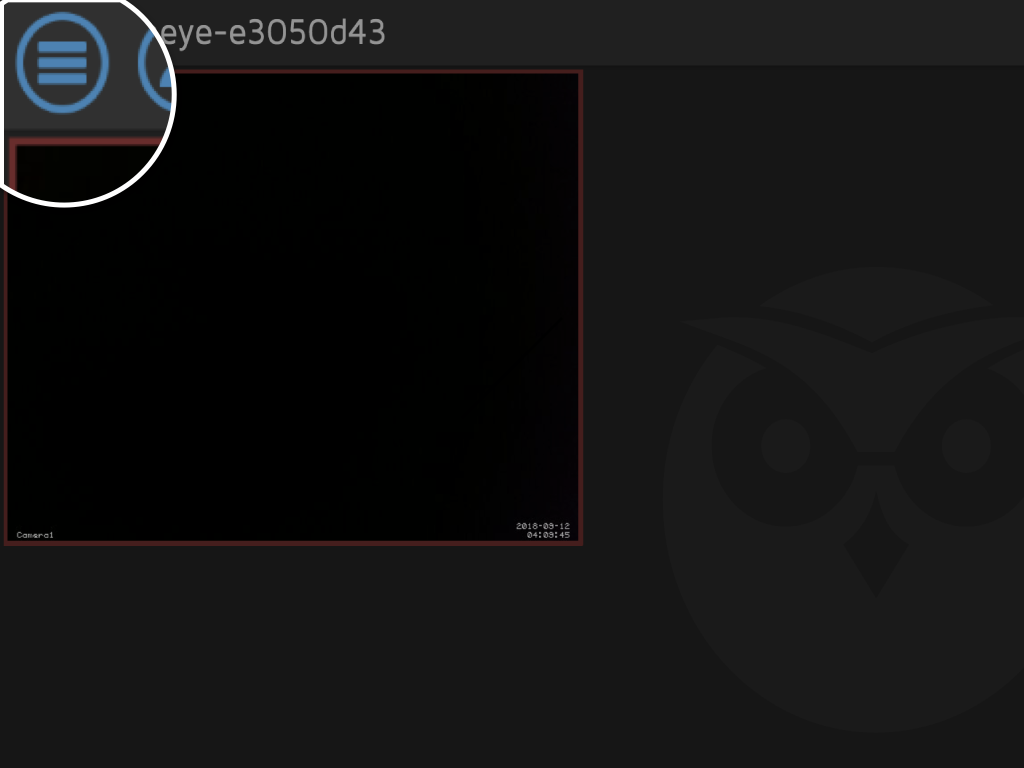
Click on the blue hamburger menu icon on the top left-hand corner
Click on the blue hamburger menu icon on the top left-hand corner
Enter a password in the 'Admin Password' field
Enter a password in the 'Surveillance Password' field
You might also want to change the default camera name under 'Camera Name'
Click the 'Apply' button to save changes.
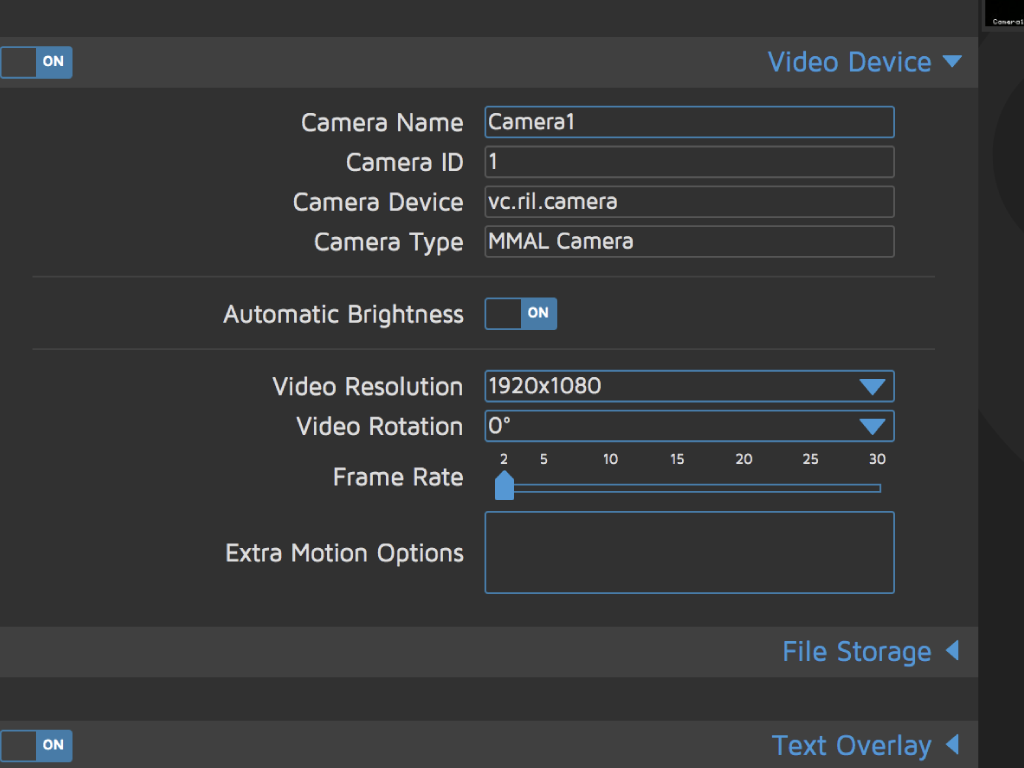
Under video device, you can:
Change video resolution
Change video resolution
Turn on automatic brightness
Change video rotation
Change frame rate
Now that you have motionEye running on the Raspberry Pi Zero W, you can choose to leave it in its Foundation Raspberry Pi Zero case while connected to a power supply, and it will run just fine.
But if you would like to make it even more portable, you can choose to use a portable battery pack such as the USB Battery Pack for Raspberry Pi - 4000mAh.
Alternatively, you could add a lithium ion polymer battery, a power charging board, and a switch to your build. You could even top it off with a custom 3D printed case.
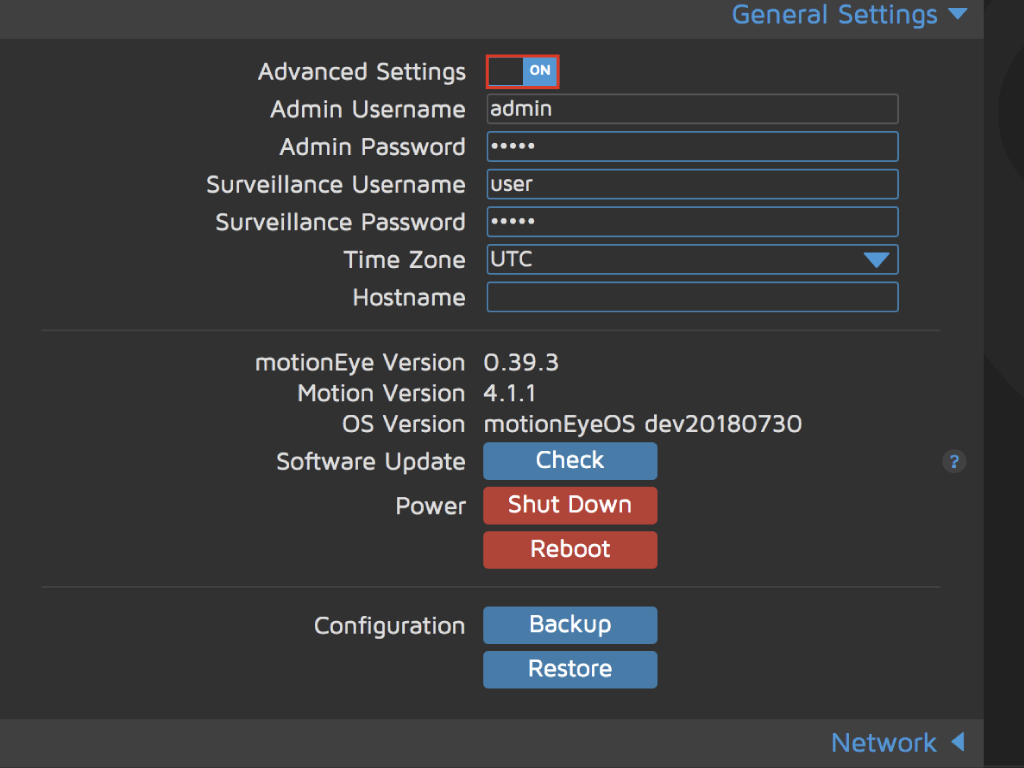
By clicking on the 'ON' toggle button under 'General settings', you will have access to many useful extra settings.
These include:
- Changing timezone
- Changing host name
- Checking for updates
- Shut down
- Reboot
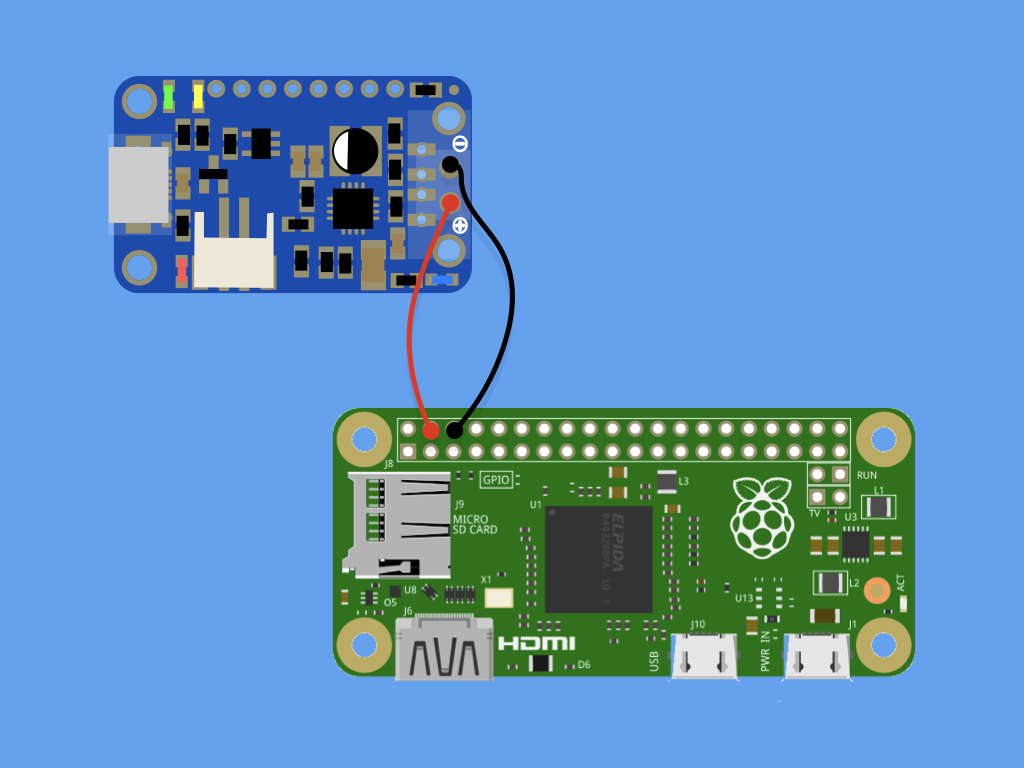
We will connect a PowerBoost 500 Charger with the Raspberry Pi Zero W. First, solder a red wire from the positive end of Powerboost 500C to 5V on the Raspberry Pi Zero W
Solder a black wire from negative end of Powerboost 500C to GND on Raspberry Pi Zero W
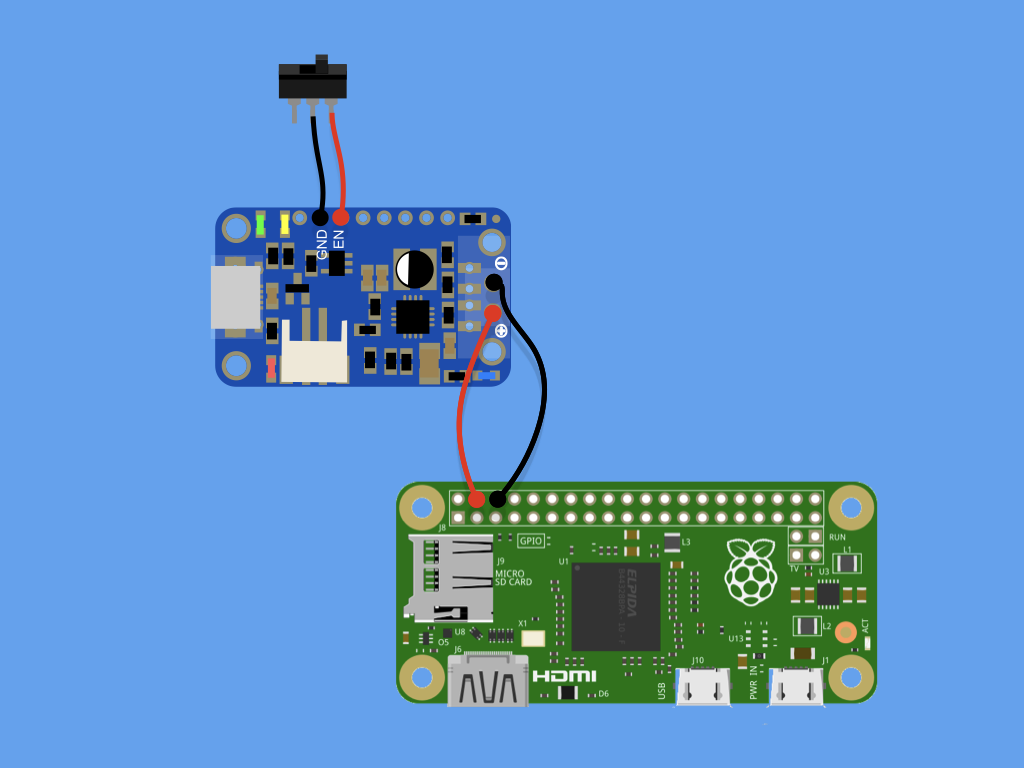
Together with the Powerboost 500C, a breadboard-friendly SPDT slide switch is used here. Solder a red wire from a leg on the SPDT switch to EN on Powerboost 500C
Solder a black wire from another leg on the switch to GND on Powerboost 500C
