Raindrop Sensor with micro:bit
Make a device that detects when it rains
Written By: Cherie Tan
Difficulty
Easy
Steps
17
A raindrop module can detect when it rains and measure the rainfall intensity.
In this guide, we will connect a raindrop sensor module to the micro:bit and prototype a rain detection device!
Finish this guide and get started with creating your own rain detection device.
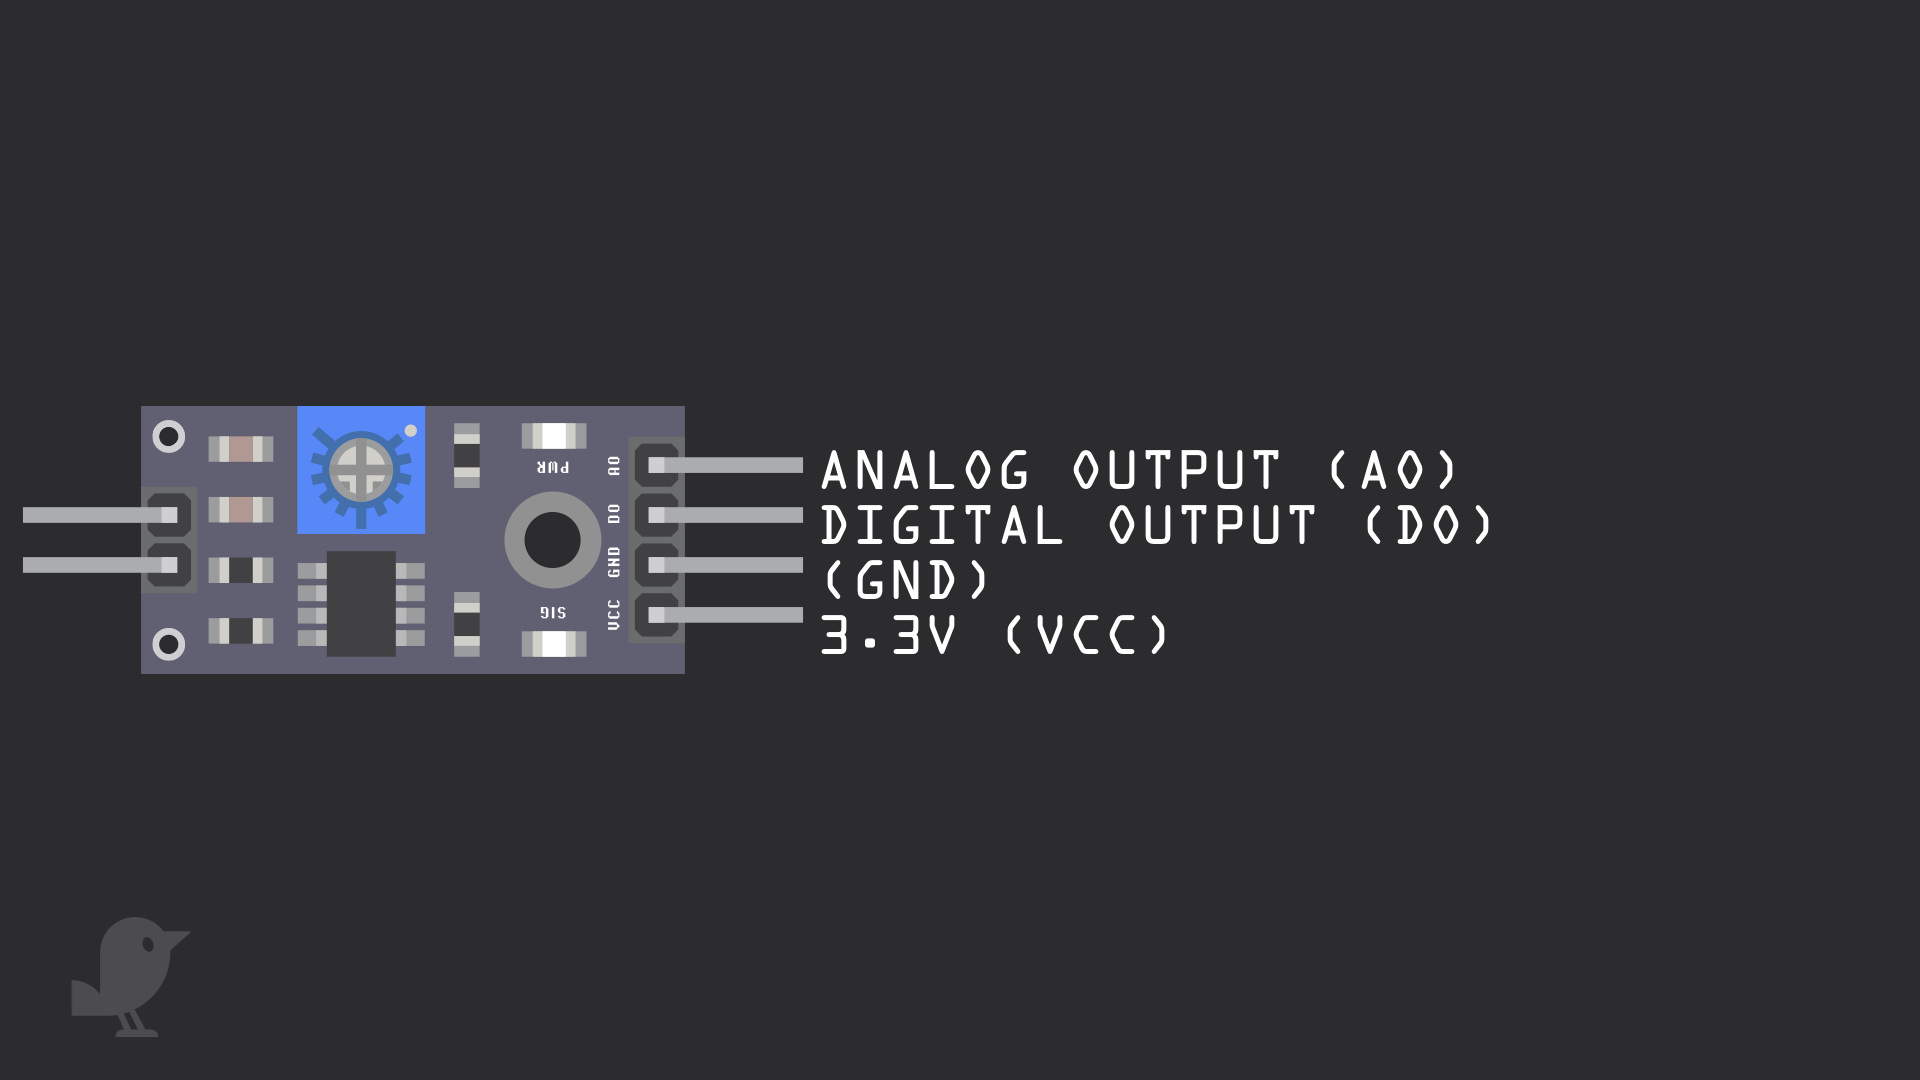
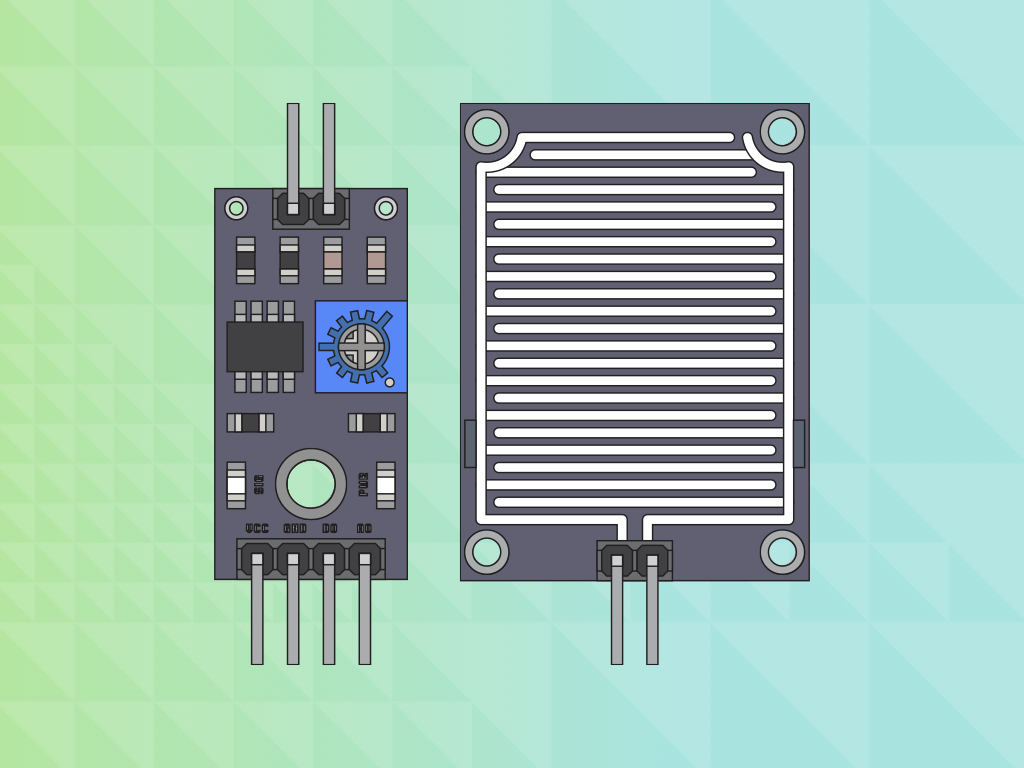
Let's take a closer look at the Raindrop Sensor Module! There are four pins at the bottom:
3.3V : 'VCC' stands for Voltage Common Collector, we'll connect the VCC pin to 3.3V on the micro:bit
GND: In electronics, we define a point in a circuit to be a kind of zero volts or 0V reference point, on which to base all other voltage measurements. This point is called ground or GND.
Digital Output (DO)
Analog Output (AO)
Voltage is the difference in potential between two points. As it is difficult to talk about voltage without a reference point, we need another point to compare it to.
There are also two pins at the top that connect to the second part of the raindrop sensor module. One end connects to ground and has a symbol next to it, that looks like a horizontal version of ⏚
let raindrop_analog_value = 0
basic.forever(function () {
    raindrop_analog_value = pins.analogReadPin(AnalogPin.P1)
    if (raindrop_analog_value < 300) {
        basic.showNumber(raindrop_analog_value)
        pins.digitalWritePin(DigitalPin.P2, 1)
        basic.pause(500)
        pins.digitalWritePin(DigitalPin.P2, 0)
        basic.pause(500)
    } else {
        basic.showNumber(raindrop_analog_value)
        pins.digitalWritePin(DigitalPin.P2, 0)
    }
})
Add this code to the Javascript interface.
First, let's open up the MakeCode editor and start a new project.
Click on the 'New Project' button
let raindrop_analog_value = 0
basic.forever(function () {
    raindrop_analog_value = pins.analogReadPin(AnalogPin.P0)
    basic.showNumber(raindrop_analog_value)
})
basic.forever(function () {
    if (raindrop_analog_value < 300) {
        pins.digitalWritePin(DigitalPin.P2, 1)
        basic.pause(500)
    }
    pins.digitalWritePin(DigitalPin.P2, 0)
    basic.pause(500)
})
If you uploaded the previous MakeCode now, it will first display the analog value and then if the value is less than 300, the LED lights up. But what if you wanted there to be no delay between the number showing, and the LED lighting up? You can use two forever loops to do just that.
Replace the existing code with this in the Javascript interface.
Alright, now let's upload the hex file to the micro:bit. Connect the micro:bit to your computer using a microUSB cable
Click on the Download button on the bottom left-hand corner of MakeCode editor
Find the hex file
Open up Finder on the MacOS or Explorer on Windows, and drag the hex file into MICROBIT under 'Devices' on the macOS.
The micro:bit will flash for a few seconds while the code uploads
Optionally, the Micro:bit can also be programmed using the Arduino IDE. If you haven't got the Arduino IDE already installed, please refer to our previous guide on how to set up the Arduino IDE to program the micro:bit.
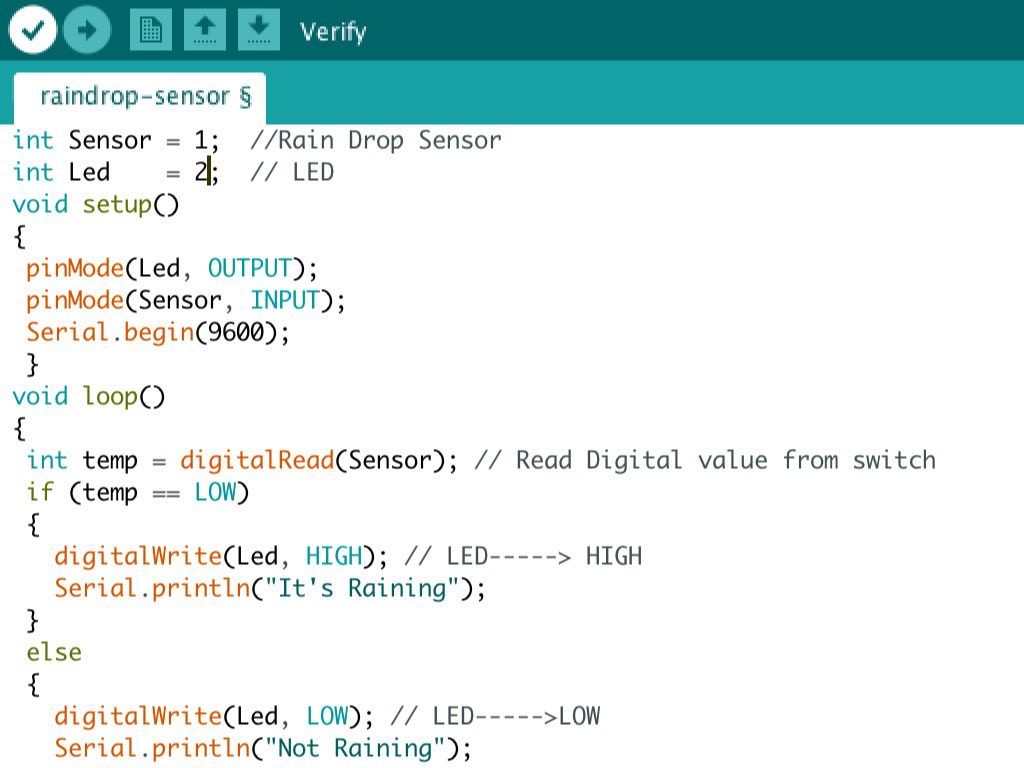
Click on the check icon on the top left hand-corner to verify the code
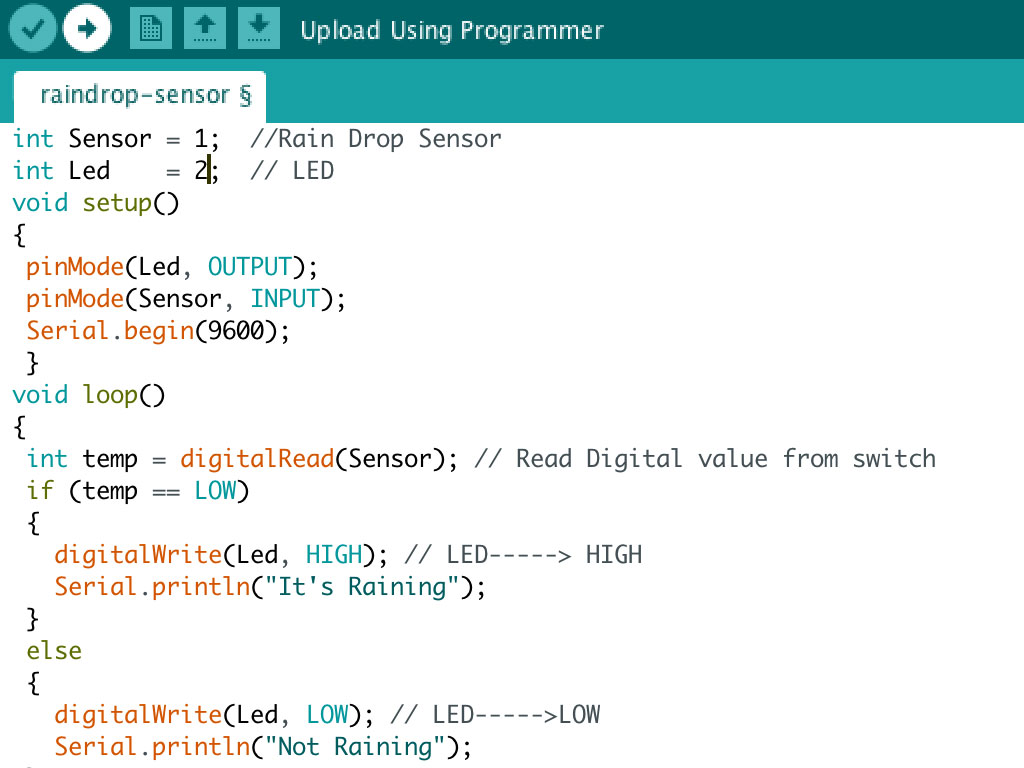
Click on the upload icon next to it to upload the sketch
int Sensor = 1;  //Raindrop sensor
int Led    = 2;  // LED
void setup()
{
 pinMode(Led, OUTPUT);
 pinMode(Sensor, INPUT);
 Serial.begin(9600);
 }
void loop()
{
 int temp = digitalRead(Sensor); // Read Digital value from raindrop sensor
 if (temp == LOW)
 {
   digitalWrite(Led, HIGH); // LED-----> HIGH
   Serial.println("It's Raining!");
 }
 else
 {
   digitalWrite(Led, LOW); // LED----->LOW
   Serial.println("Not Raining");
 }
}