Wakey Wakey with ShakeUp
Create an alarm clock with the ShakeUp and Raspberry Pi
Written By: Cherie Tan

Difficulty
Medium
Steps
20
What do you get by combining a Raspberry Pi with the ShakeUp's 'shake' feature? An alarm clock that snoozes on button press, and stops sounding when you throw something at it (at the ShakeUp, not the Raspberry Pi)!
In this guide, learn to use the ShakeUp with the Raspberry Pi, and prototype your own alarm clock. It will be programmed with the simple Scratch programming language that is easily accessible on the PIXEL desktop.
Complete this guide to get started with using the ShakeUp's 'shake' feature.
In this guide, learn to use the ShakeUp with the Raspberry Pi, and prototype your own alarm clock. It will be programmed with the simple Scratch programming language that is easily accessible on the PIXEL desktop.
Complete this guide to get started with using the ShakeUp's 'shake' feature.
The ShakeUp has an on-board ATmega32U4 which has a USB transceiver. This means it can emulate a HID (Human Interface Device) USB device such as a keyboard or mouse. Besides that, it also has a 'shake' feature which allows the detection of movement of the board.
Previous guides have shown how easy it is to use the ShakeUp with Scratch, but it is a bit limiting to drag around a desktop computer! So, why not use a Raspberry Pi instead?
In this guide, we'll show you how to create your own alarm clock using the ShakeUp and a Raspberry Pi. On button press, the alarm will snooze. Throw something at the ShakeUp to activate its 'shake' feature, and it will turn off the alarm. All this will be programmed with the super simple Scratch programming language.

First, you'll need a Raspberry Pi with a microSD card that has the PIXEL desktop installed. The easiest way to do so, is by following our previous guide on Getting Started With the Raspberry Pi.

Scratch is already installed onto your Raspberry Pi by default with the most recent release of the Raspbian operating system.
In this guide, we'll connect speakers to the 3.5mm audio jack and program it with Scratch that will give our alarm the ability to sound.
One of the ShakeUp's inputs will act as the snooze button. The ShakeUp will simply be connected to the Raspberry Pi via a microUSB cable.
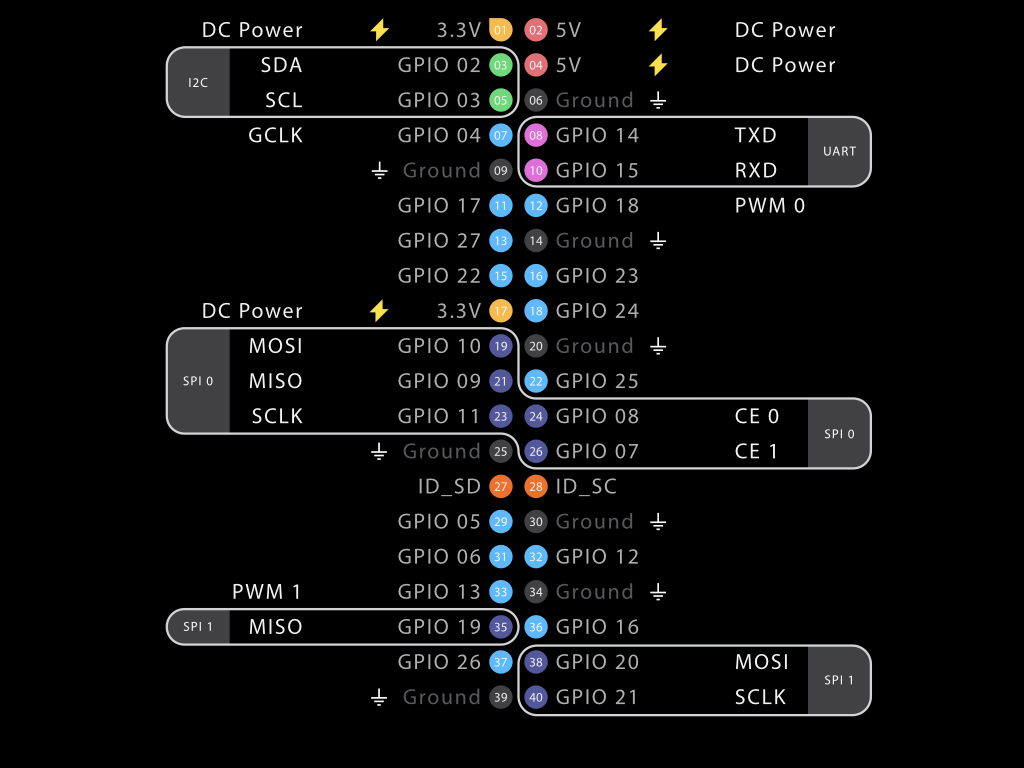
This version of Scratch has the ability to communicate with the GPIO (General Purpose Input Output) pins, allowing you to connect the Raspberry Pi to a range of other devices such as push buttons, sensors, lights, and much more.

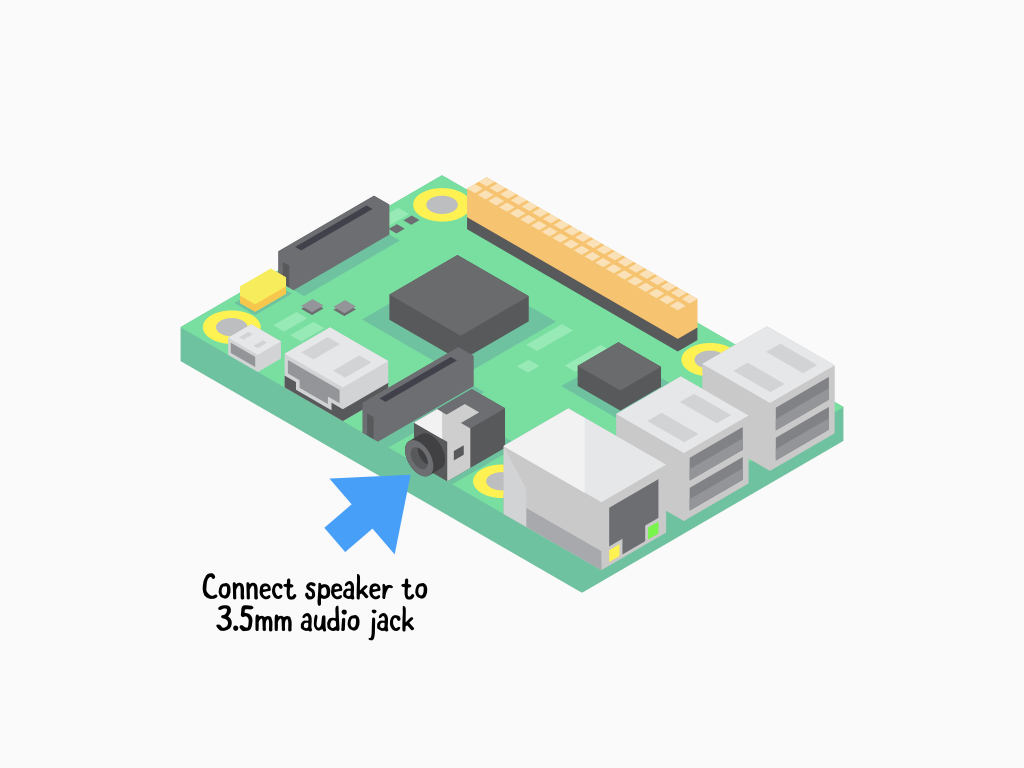
Next, connect speakers to the Raspberry Pi 3 Model B+ through its 3.5mm audio jack. In this guide, we've connected regular computer speakers to the Raspberry Pi.
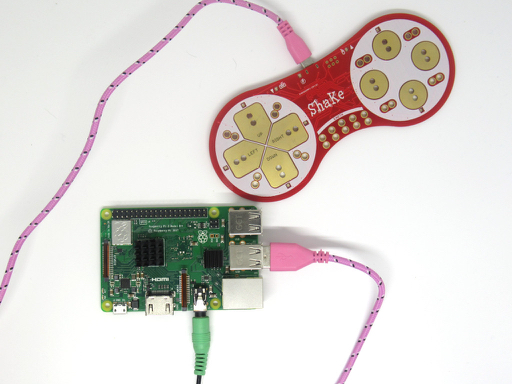
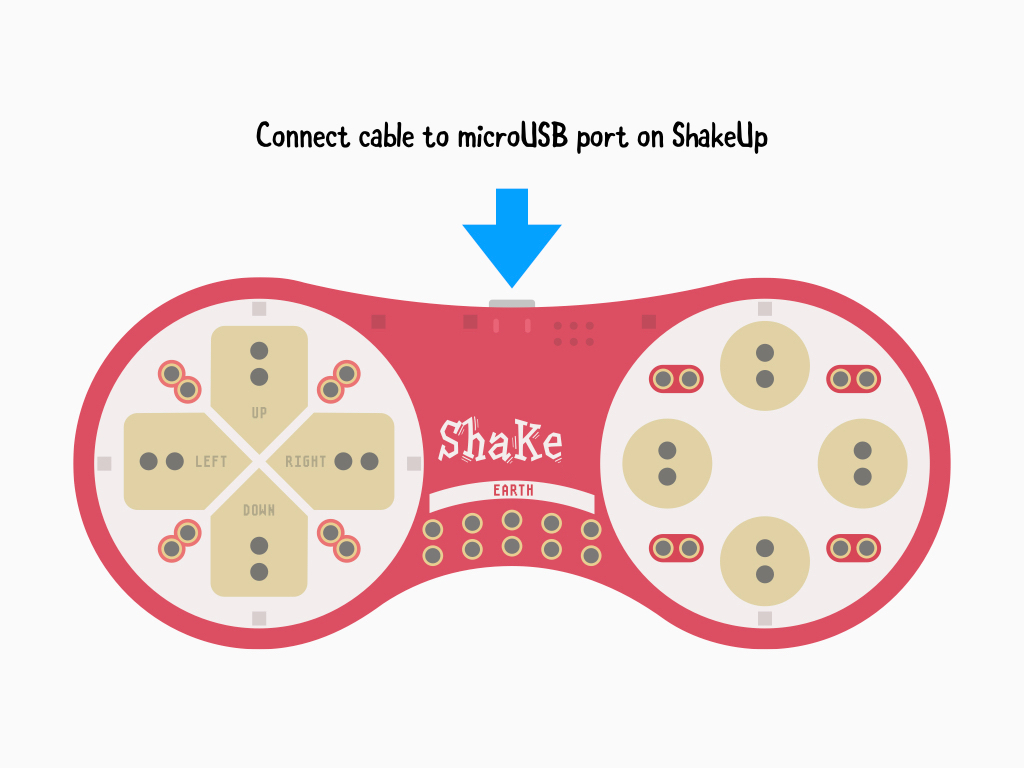
Next, connect a microUSB cable to the ShakeUp.
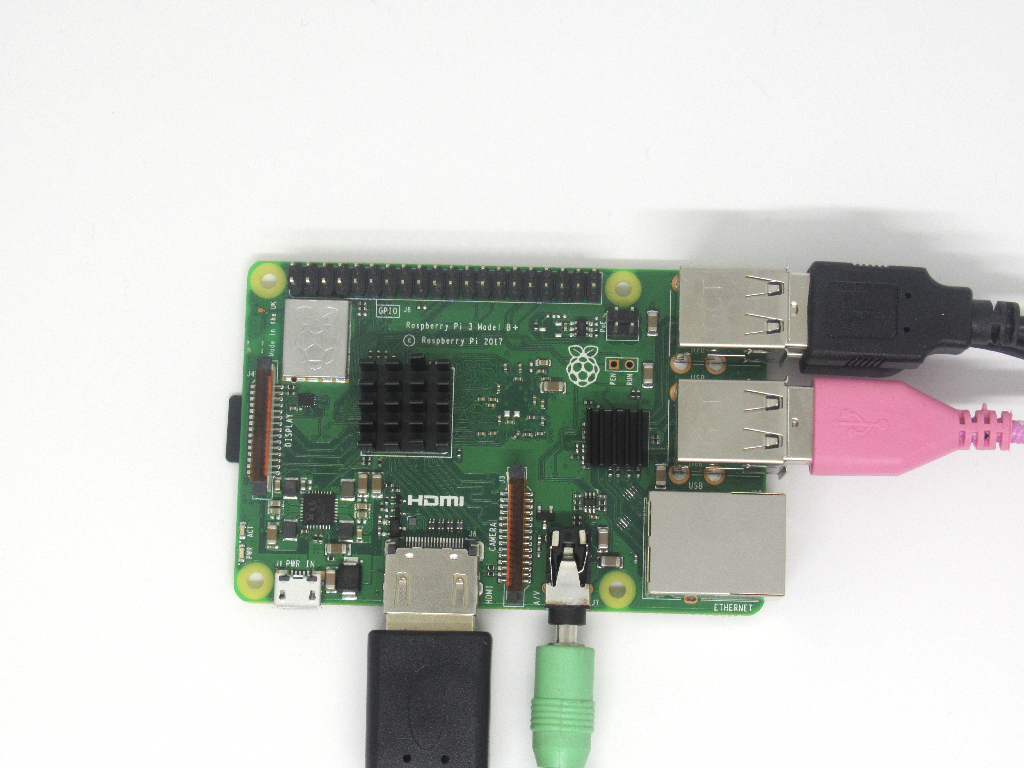
Connect the USB end of the cable to one of the Raspberry Pi's USB ports.
Go on and attach a keyboard and mouse to the Raspberry Pi as well, as we will be writing our Scratch program on it.

The HDMI port on the Raspberry Pi is OUTPUT ONLY for connecting to HDMI monitor devices, do not connect to the HDMI output of the Raspberry Pi to the output of laptops or tablets.
Insert a HDMI cable into the Raspberry Pi's HDMI port. Then connect it to a monitor using the same cable.
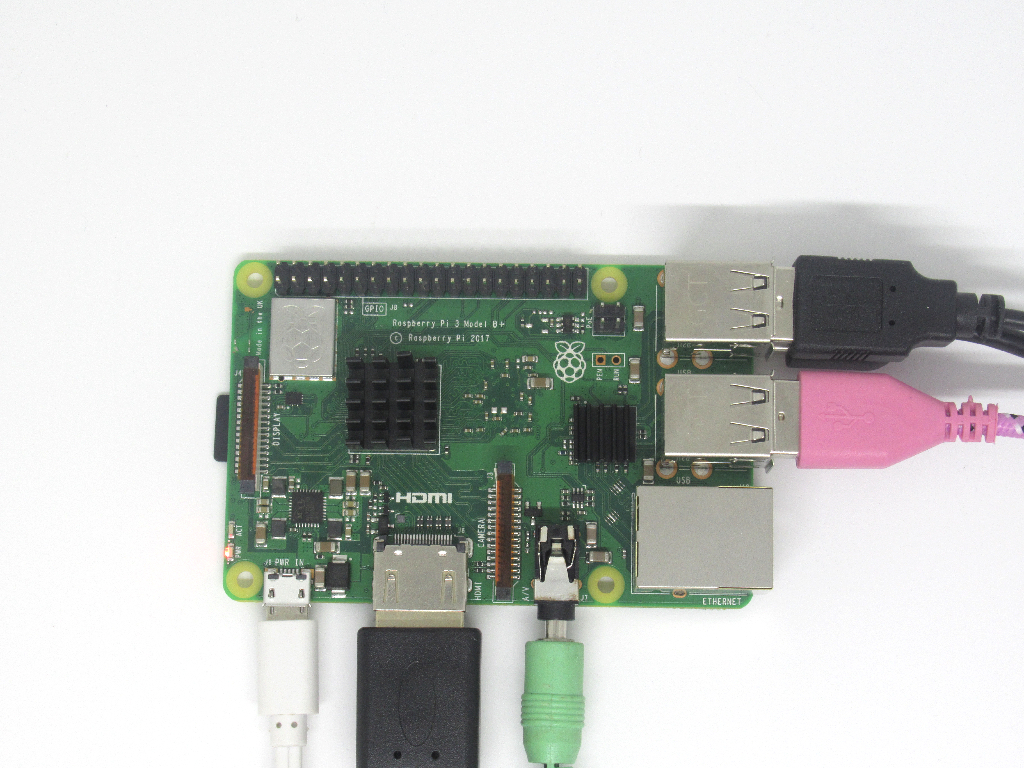
Next, insert the power supply cable into the 5V microUSB port.
If you are using the Raspberry Pi 3 Model B+, the power supply has to be 5V DC at 2.5 amps or greater, like the Raspberry Pi power supply used in this guide.
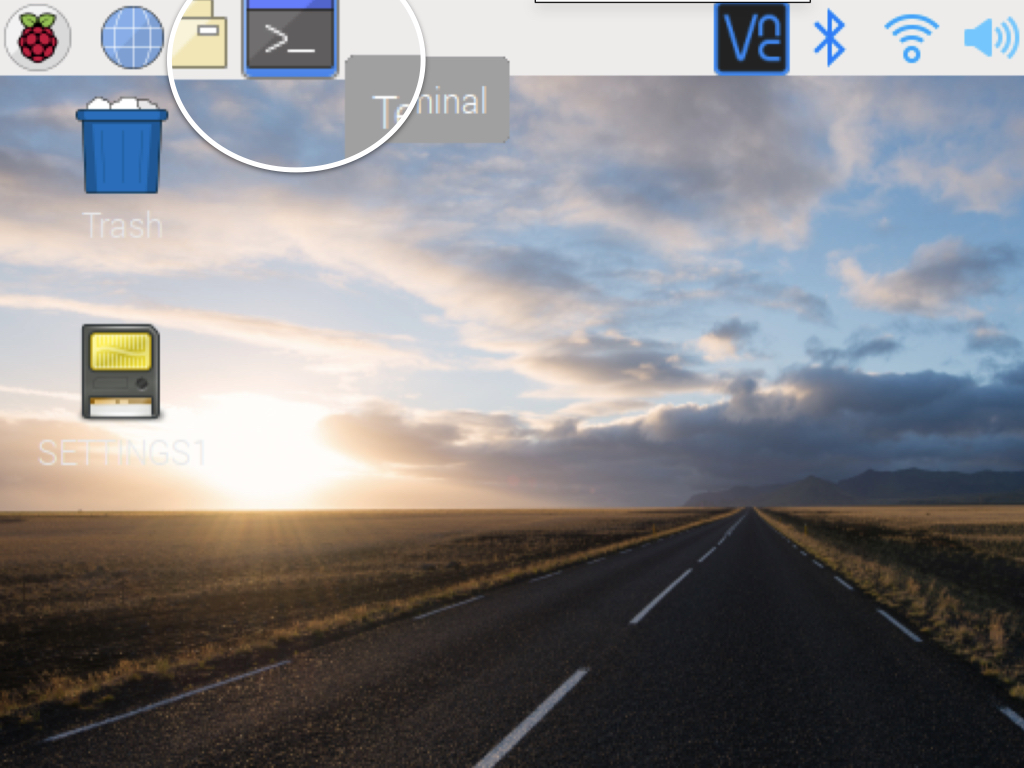
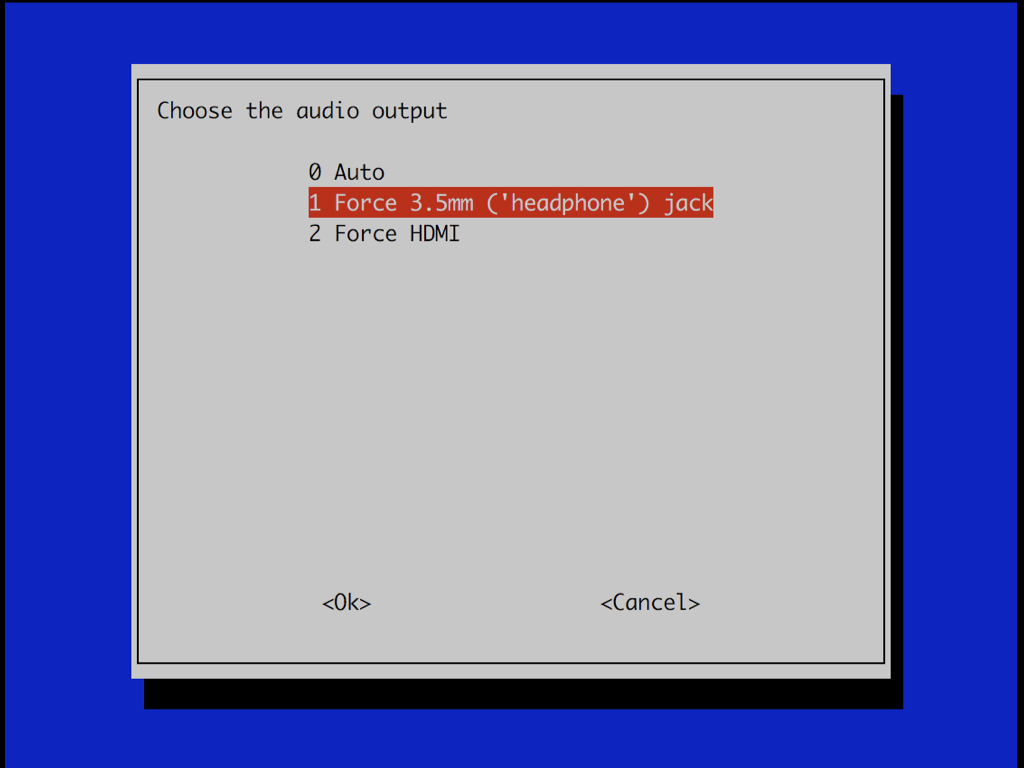
Before we start programming, let's set up the audio output so that sound will be output through the 3.5mm jack on the Raspberry Pi. To do so, first, click on the 'Terminal' icon up the top left-hand corner.

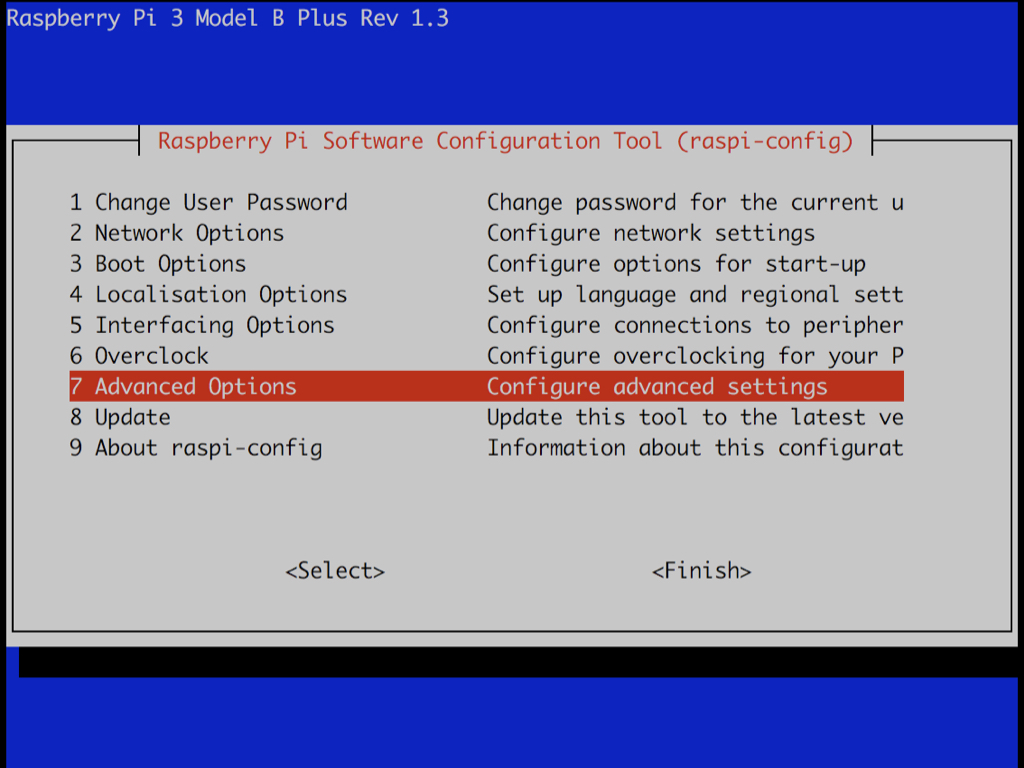
Use the arrow keys to navigate down to Advanced Options
Press the Enter key on your keyboard
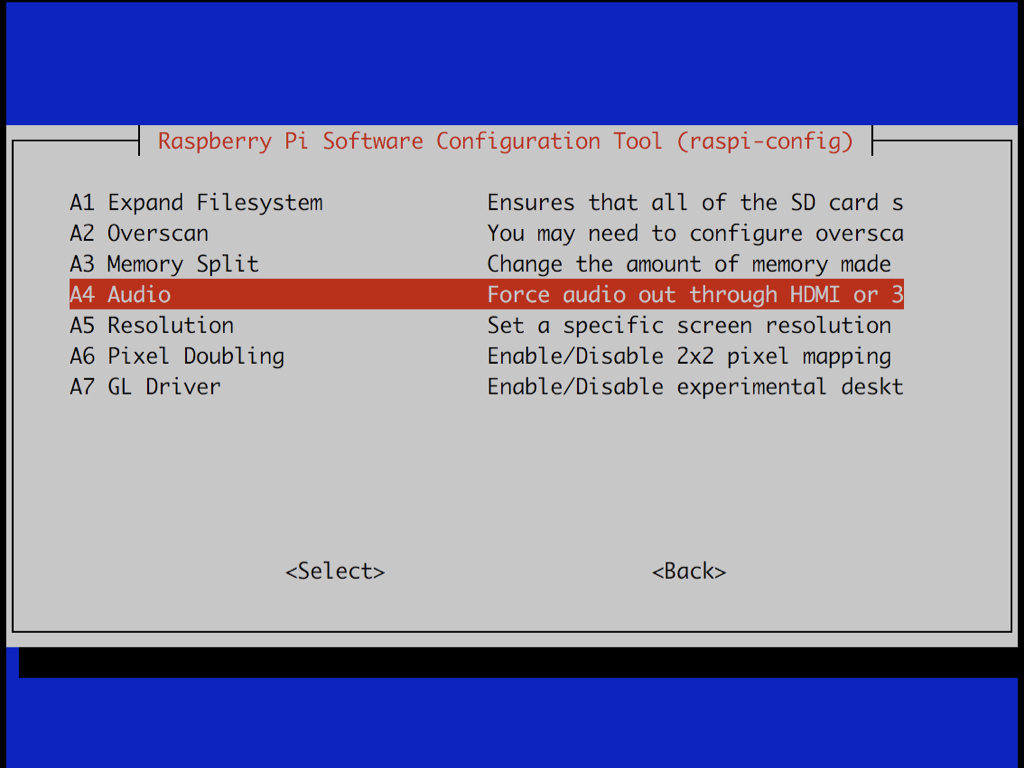
Use the arrow keys to navigate to A4 Audio and again, hit the Enter key
Navigate to 1 Force 3.5mm ('headphone') jack and hit the Enter Key
Navigate to <Finish> and hit Enter
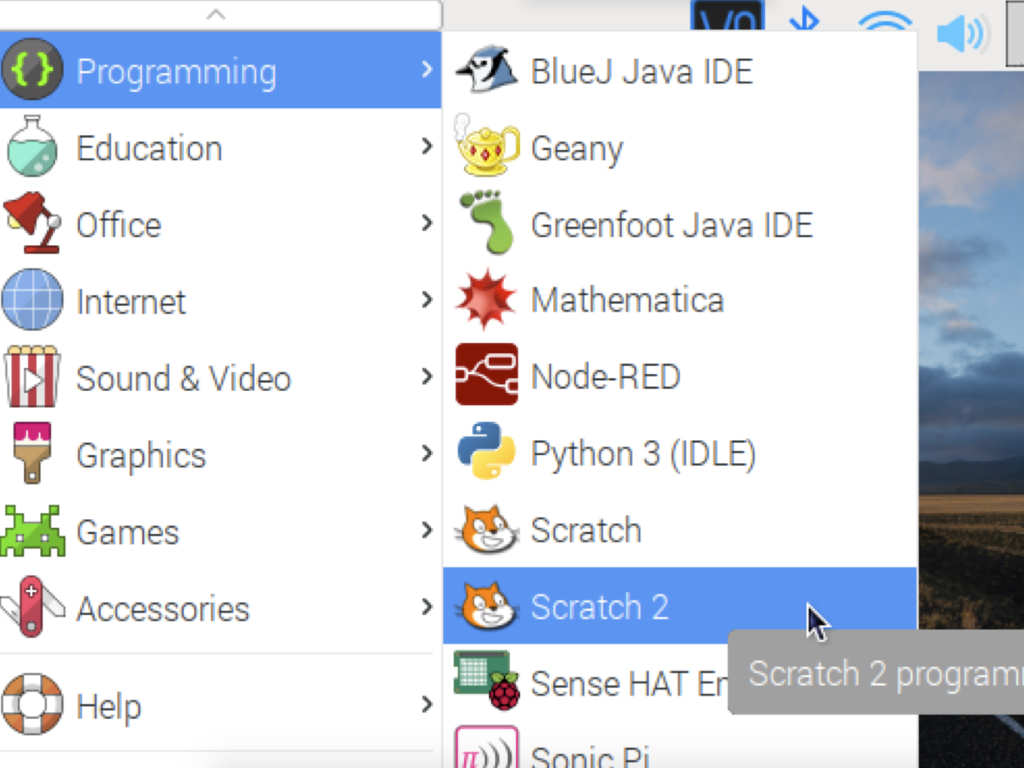
Click on the Raspberry Pi icon on the top left hand corner to access the main menu.
Click on Programming > Scratch 2
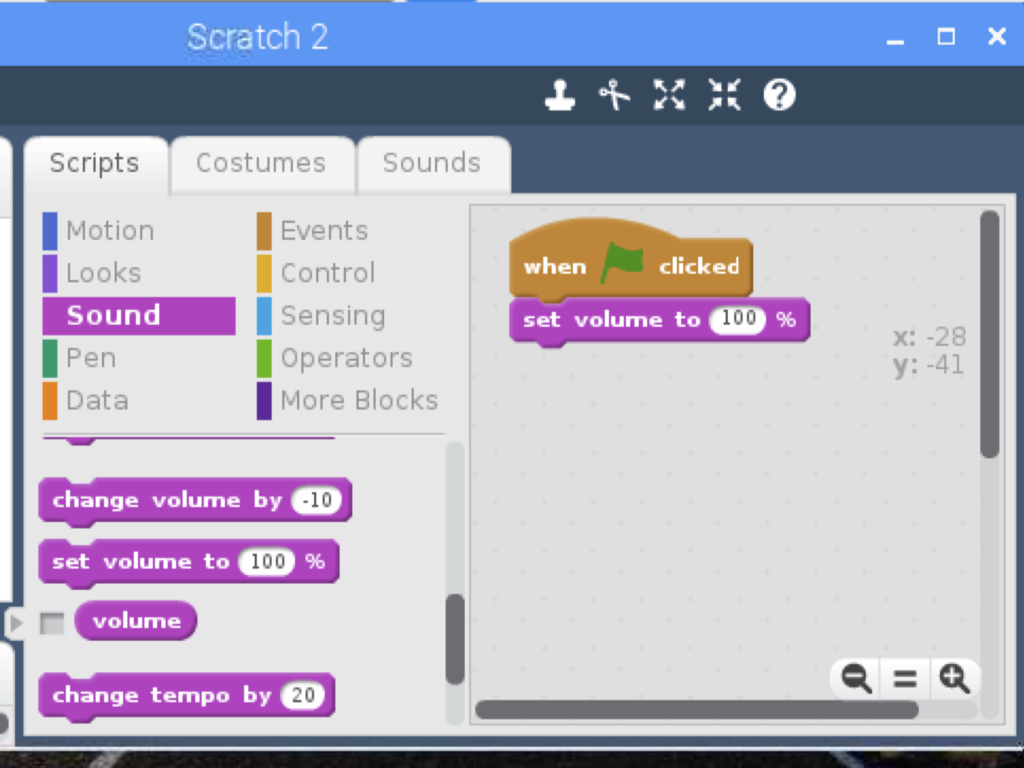
First, click on Events and get out a 'when green flag clicked' block
Next, in Sounds grab a 'set volume to 100%' block
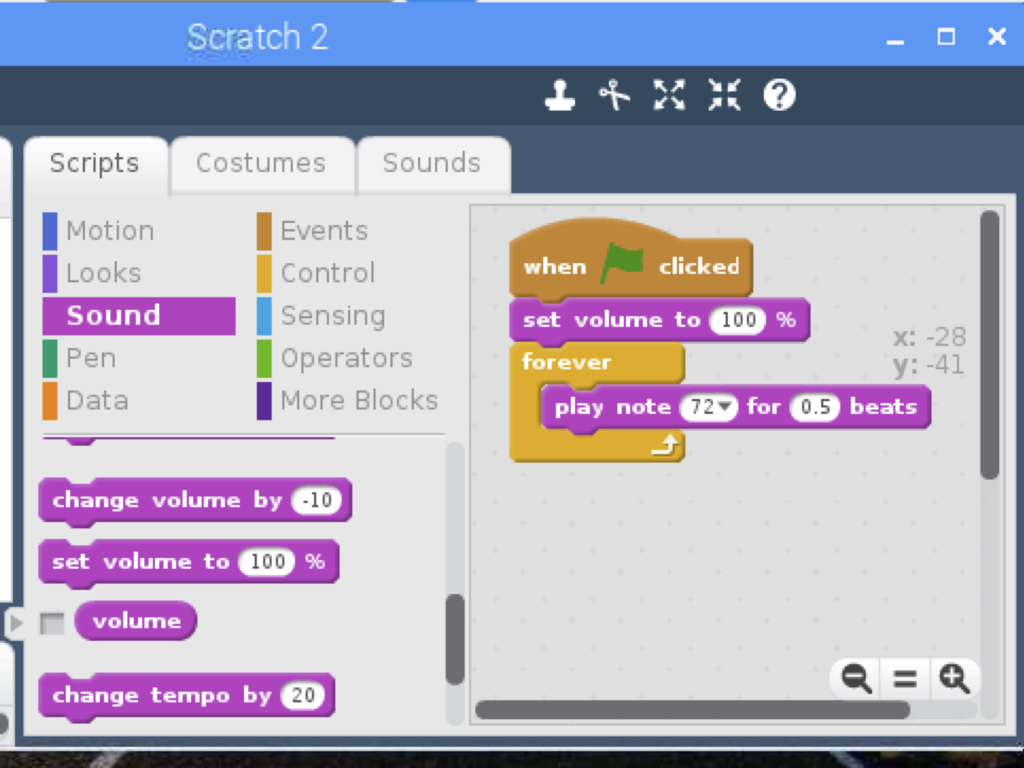
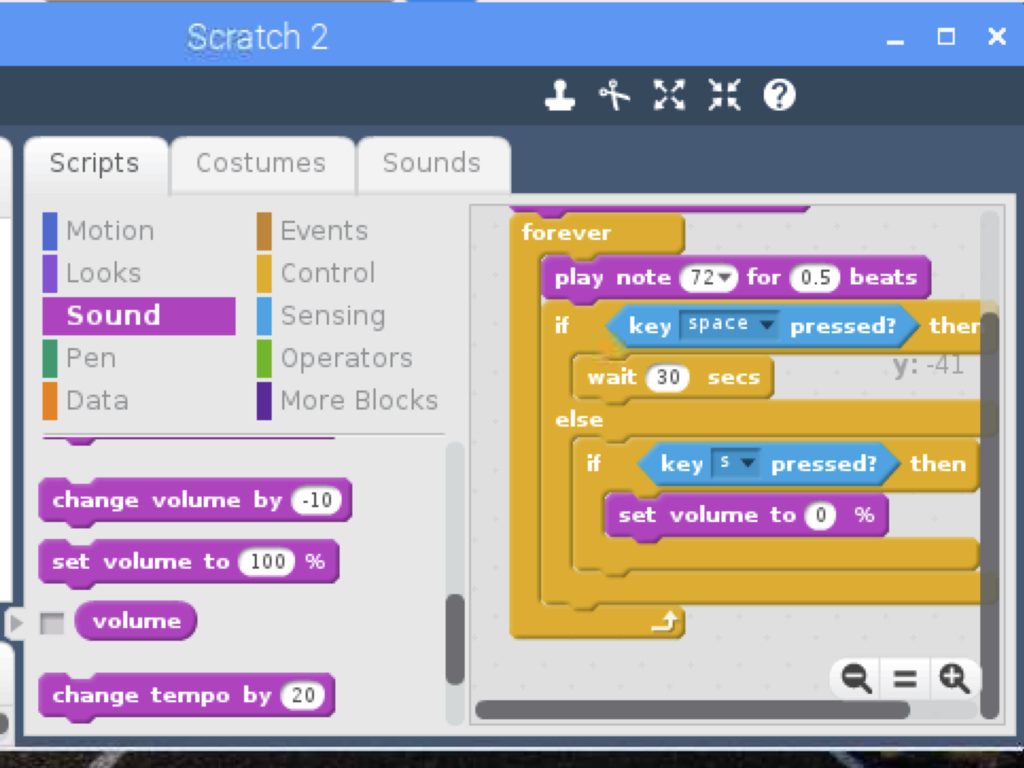
From Control, add a 'forever' block
Add a 'play note ... for ... beats' block from Sounds, and set it to whichever note you would like.
From Control, grab an 'if ... then ... else ... ' block
Still in the Control tab, get out an 'if ... then ...' block and place it within the 'if ... then ... else ...' block
From Sensing, get out two 'key ... pressed?' blocks and set them to register key presses from 'space' and 's' accordingly.
Place the 'key ... pressed?' blocks to the control blocks as shown.
Get a 'wait ... seconds' block from the Control tab and place this within the 'if key space pressed?' then ...' block. This will snooze the alarm for 30 seconds when the space button on the ShakeUp is pressed.
Finally, from Sounds get out a 'set volume to ... %' block and set its value to '0'. This will make it so that when the ShakeUp is shook, the alarm will stop sounding.
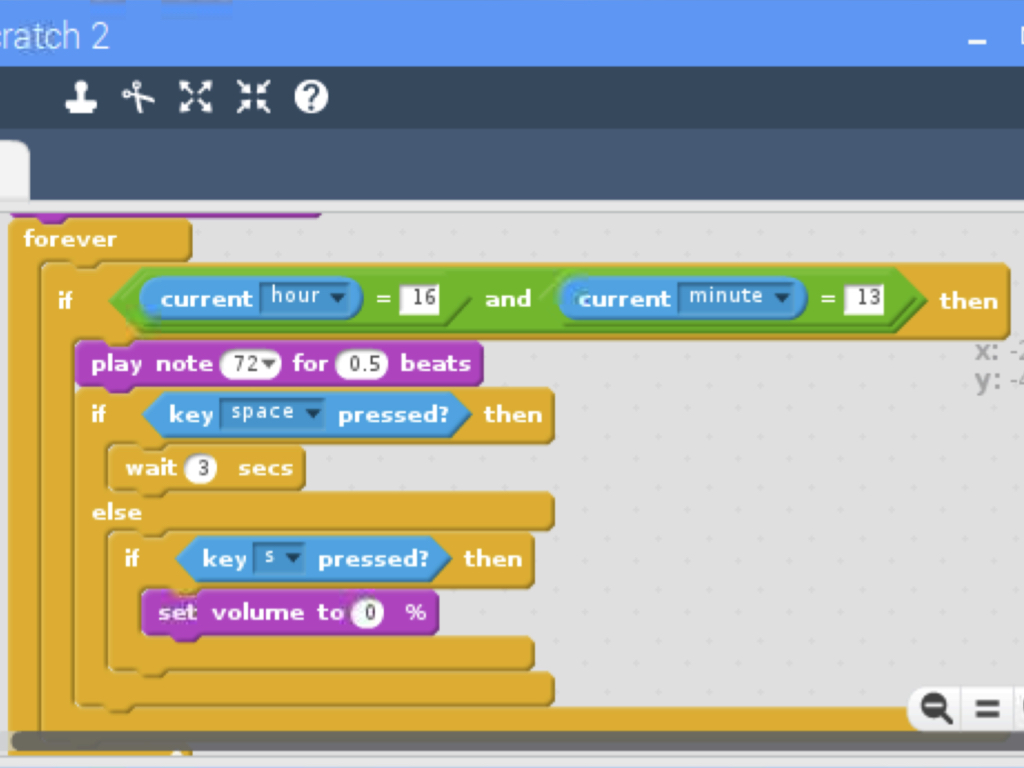
From Operators, get out two '... = ...' blocks
Still under Operators, get out a '... and ...' block
From Control, get out another 'if ... then ...' block
Place the two '... = ...' blocks within the '... and ... ' block.
Under Sensing, drag out two 'current ...' blocks.
Set one as 'current hour' and the other as 'current minute'.
Place them within the '... = ...' blocks and set the value as the time you'd like to set the alarm to go off at i.e. 'current hour = 9' and 'current minute = 30' to set the alarm for 9:39am.
To set the alarm for the afternoon, 2pm will need to be set as 14:00
The Current () block is a Sensing block and a reporter block. It reports either the current local year, month, date, day of the week, hour, minute, or second, depending on the argument. The block gets the data based on the user's computer's clock (in this case, the Raspberry Pi) and it uses 24-hour time.
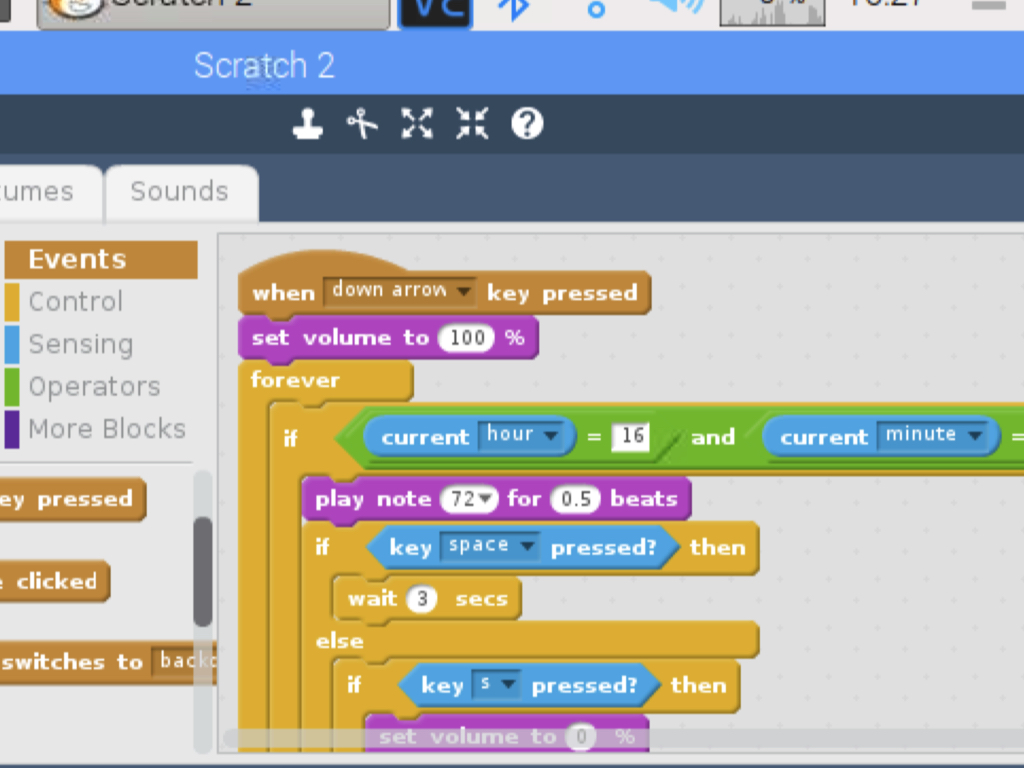
With the current Scratch program, the green flag icon needs to be pressed to reset the program each time. This would mean a monitor will need to be connected to the Raspberry Pi! To reset the program without the hassle of clicking the green flag icon, make the following changes to the code.
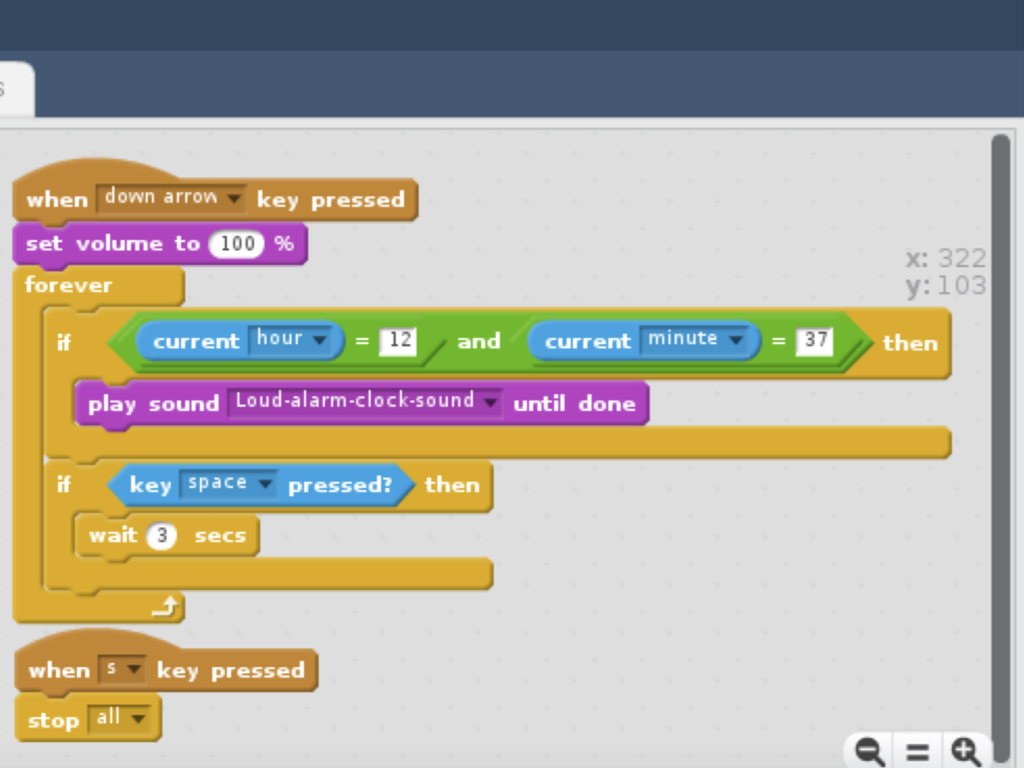
Replace the 'when green flag arrow clicked' block with a 'when down arrow key pressed' block. With this block in place, now when the 'down arrow' button on the ShakeUp is pressed, the program will be restarted and this will set the ShakeUp alarm for the next day.
Next, replace the 'if ... then ... else ...' block with just an 'if... then...' block. This will set the condition for 'if key space pressed? then wait 3 secs'.
Change the value within 'wait ... secs' to the amount of time to snooze the alarm.
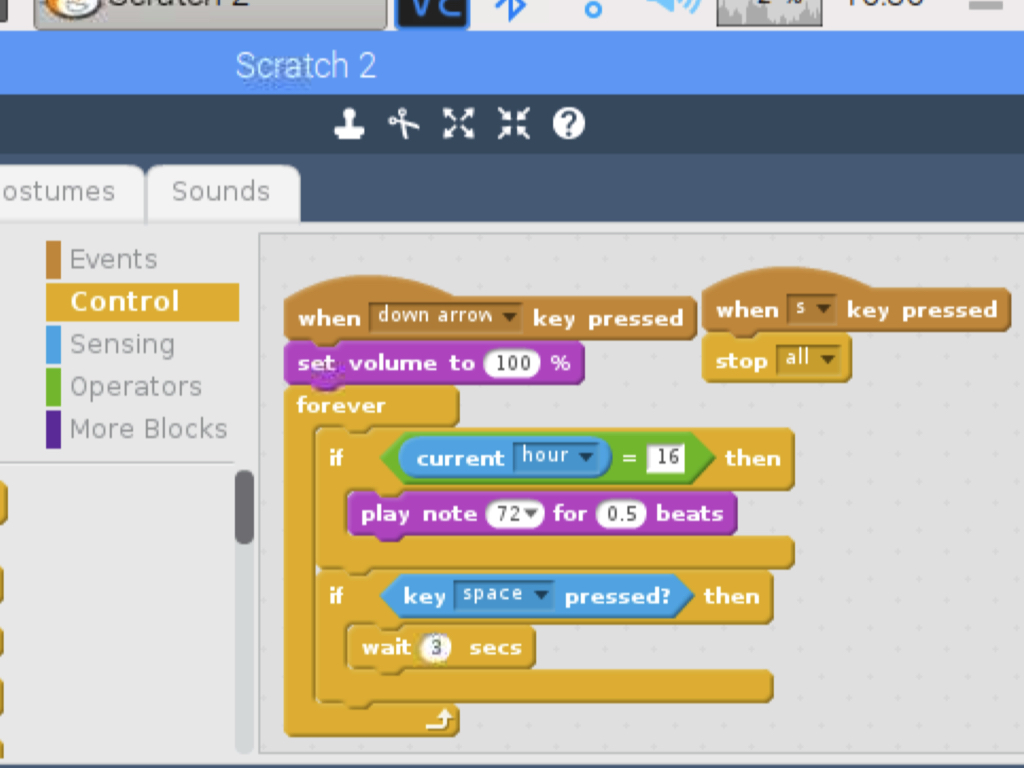
Add a 'when ... key pressed' block from Events. Set this block so that it reads 'when s key pressed'
From Control, add a 'stop all' block to 'when s key pressed'. When the ShakeUp is shook, the alarm will stop sounding because the program is stopped. Previously, it had just set the volume to 0%.
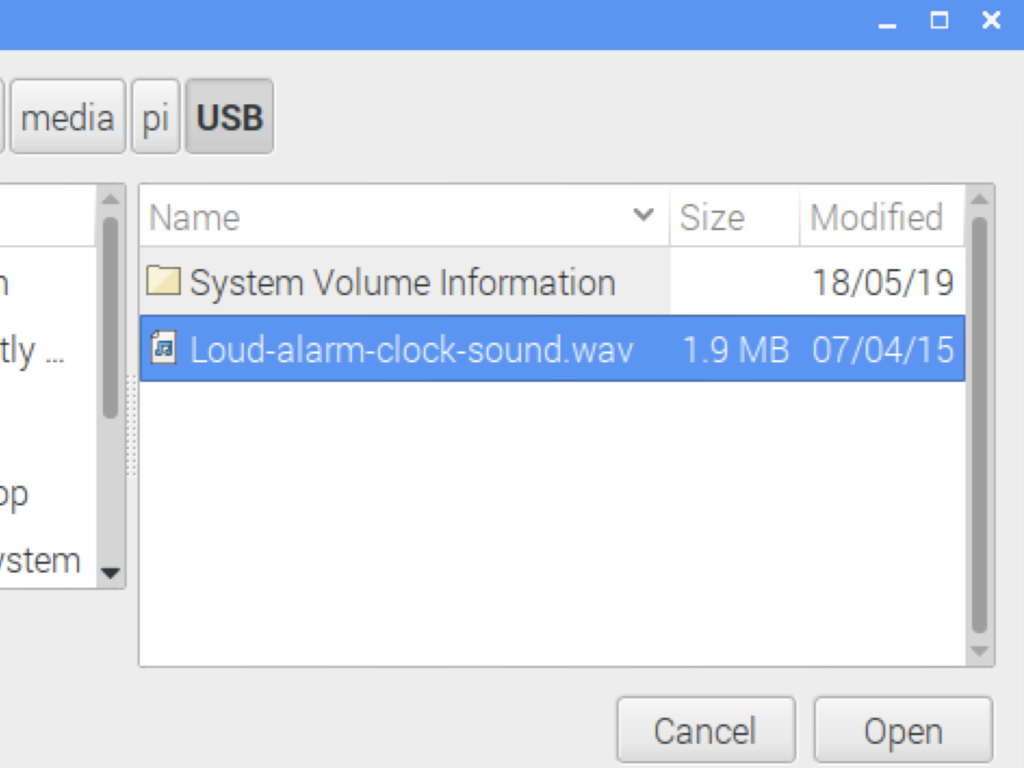
Click on the 'Open' button
You can download the alarm buzzer sound effect used in this guide here.
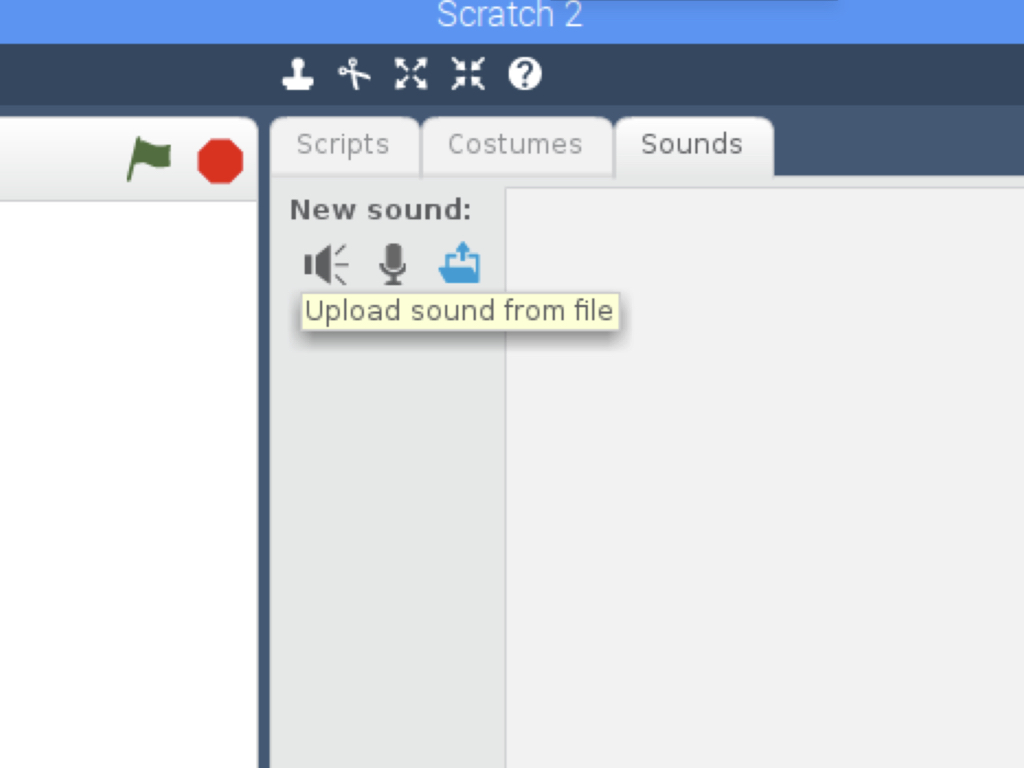
Click on the Sounds tab.
Click on the 'Upload sound from file' button
Navigate to where you've saved your buzzer sound effect.
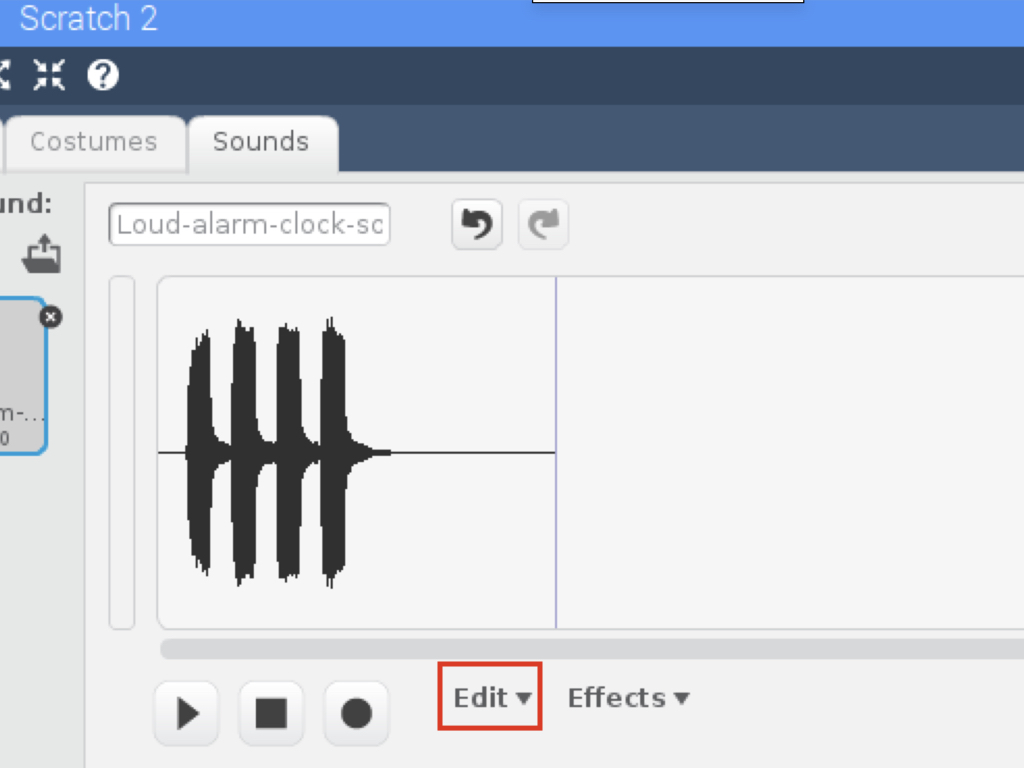
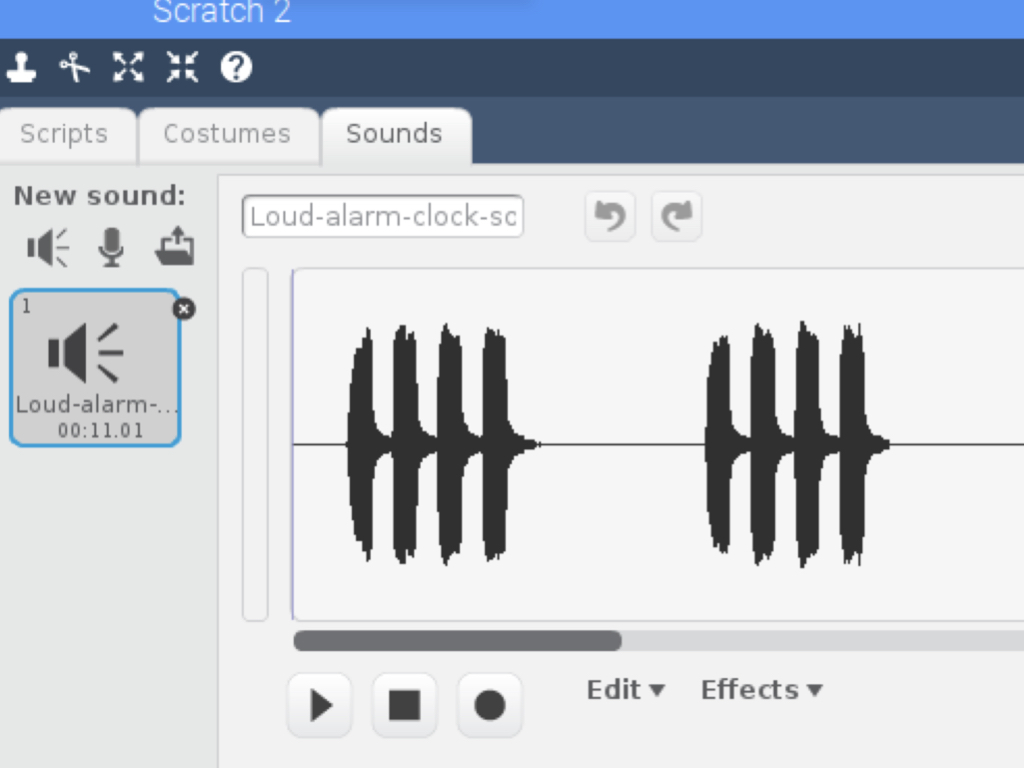
So that the alarm will immediately snooze when the 'space' button is pressed, we'll need to cut the .mp3 or .wav file. You can do so by clicking on 'Edit' and 'Delete'.
The file has been cut so that only one 'beep' will sound. This sound effect will be played to the end with the 'play sound Loud-alarm-clock-sound until done' block.
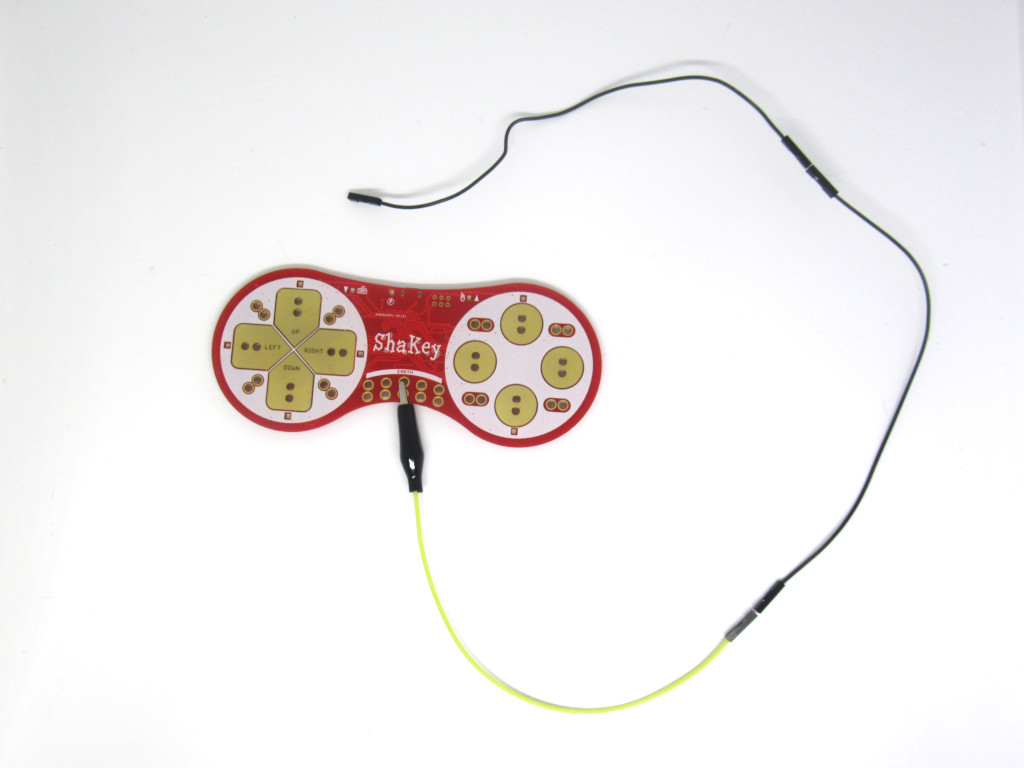
Clip an alligator to jumper wire to 'Earth' on the ShakeUp
Extend it with as many M-F jumper wires as needed.
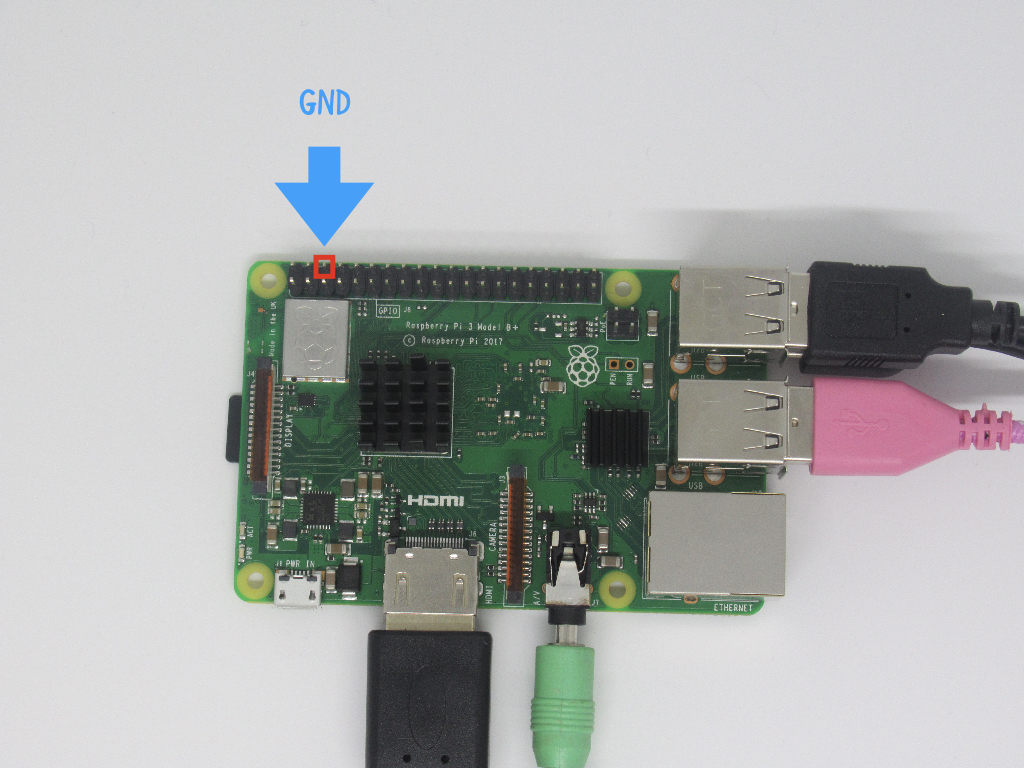
Plug the other end of the M-F jumper wire to 'GND' on the Raspberry Pi.
Unplug the power supply from the Raspberry Pi when plugging in the jumper wire.
Unplug the HDMI monitor, keyboard and mouse.
Give it a test! For full sound in the preview video, you can view the video here.
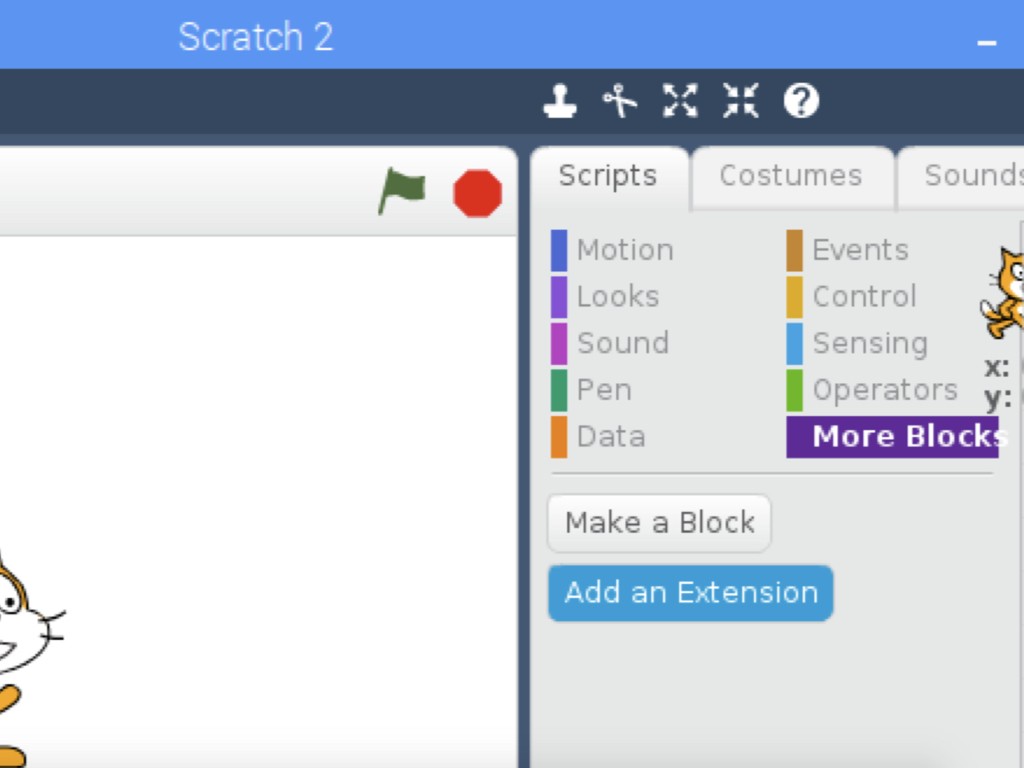
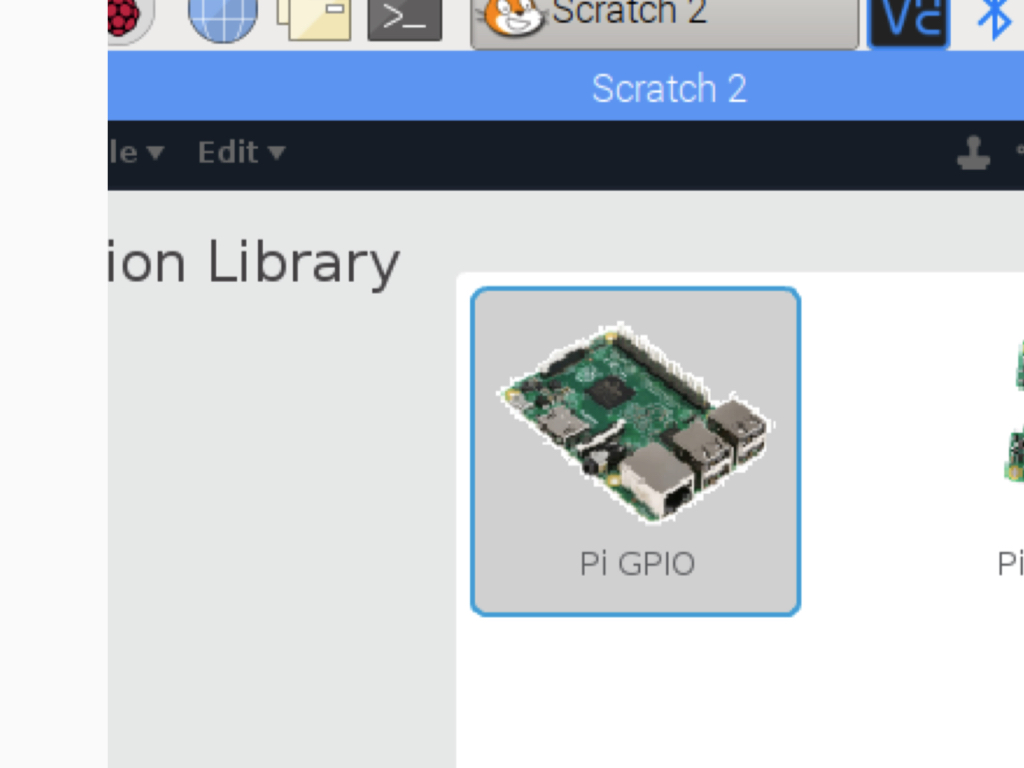
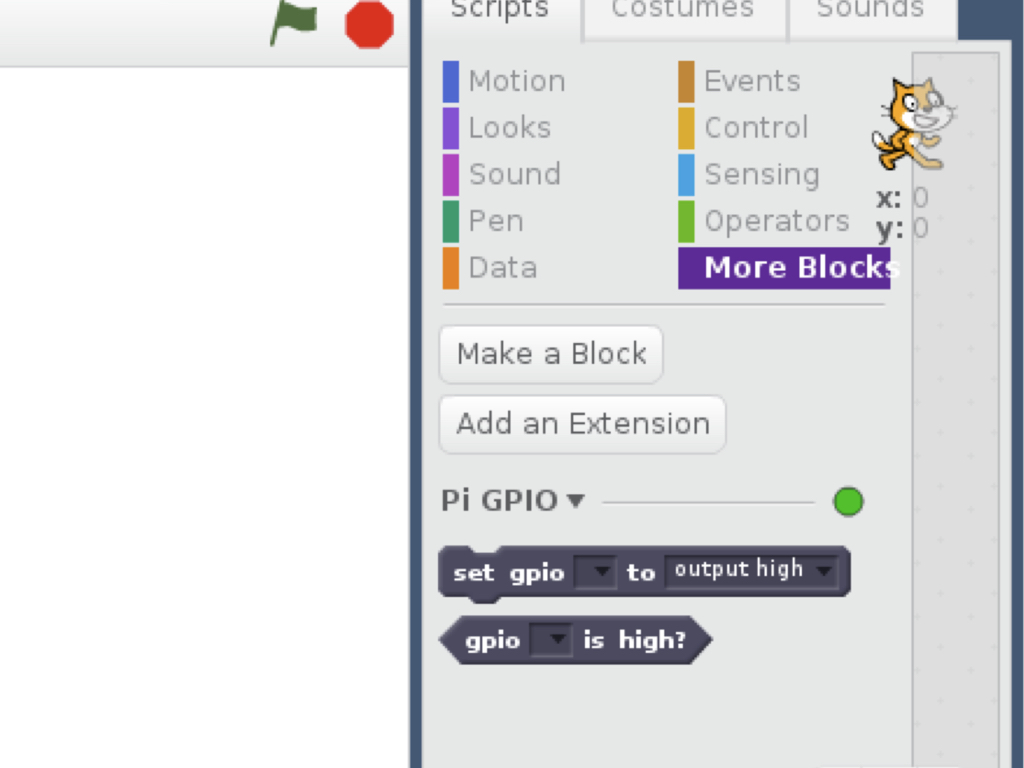
While not required, if you'd like to add additional buttons, lights, and other sensors to the ShakeUp alarm clock, you can. To program them, you'll need to add the 'Pi GPIO' extension.
Click on the More Blocks panel, click Add an Extension, and select Pi GPIO. You should then see two new blocks appear: 'set gpio ... to ...' and 'gpio ... is high!'
Click on the More Blocks panel, click Add an Extension, and select Pi GPIO. You should then see two new blocks appear: 'set gpio ... to ...' and 'gpio ... is high!'