Meet the Arduino IDE
Installing and running the Arduino Software
Written By: Cherie Tan
Difficulty
Easy
Steps
10
Getting familiar with the Arduino IDE is an essential first step. With the Arduino IDE, you can get started with Arduino programming.
In this guide, you will learn how to install the Arduino IDE, choose the right Arduino board type and serial port, before uploading a 'blink' example sketch. The code will then uploaded onto your Arduino board. A Little Bird Uno R3 is used in this guide, though other boards will work as well. If you will be using a different board, keep in mind that you will need to choose a different board type on the IDE.
Doing so will enable you to advance on with further projects that would involve adding your sketches onto the Arduino board.
Head to www.arduino.cc and download the software as seen in the video.
Open the Arduino Software by double clicking on the Arduino icon.
Wait for it to load. This can take up to 30 seconds.
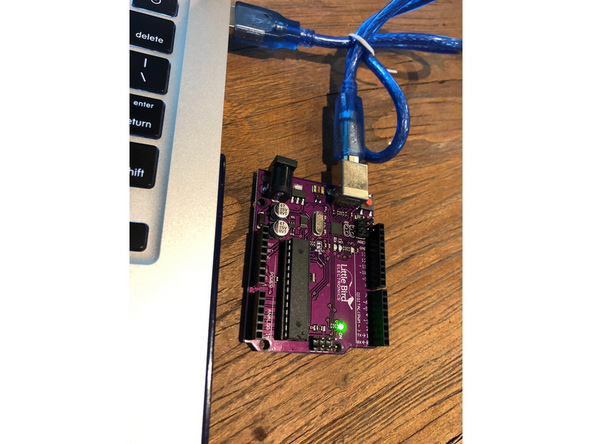
Plug the USB cable into an available port on your computer. This is called an A to B cable!
Plug the other end into your Arduino board. A power light should come on (Green in my case).
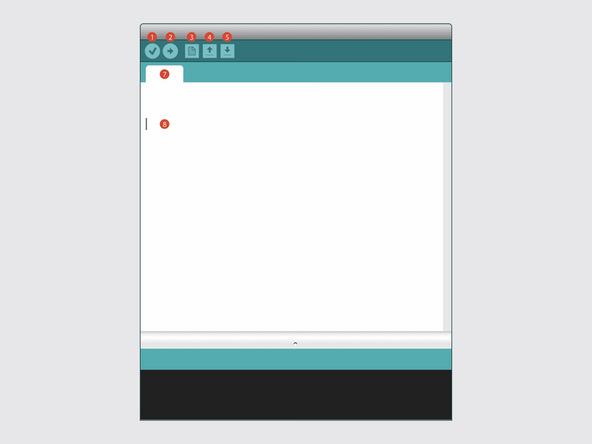
The Arduino Software is also called the Arduino IDE (Integrated Development Environment). The most important controls are the "Open", "Verify" and "Upload" buttons.
1. Verify Button
2. Upload Button
3. New Sketch Button
4. Open Sketch Button
5. Save Sketch Button
6. File
7. Code Area
2. Upload Button
3. New Sketch Button
4. Open Sketch Button
5. Save Sketch Button
6. File
7. Code Area
There is a heap of different types of Arduino Boards. We need to tell the Arduino Software what type of board we are using.
From the menu bar select: Tools → Board → Arduino/Genuino Uno.
We now need to tell the Arduino Software what Serial Port your Arduino is on. This will be different depending on your computer.
On Windows your Arduino will appear as a COM port, on macOS and Linux it will appear as a /dev/cu.usbmodemXXXXX.
In the Arduino Software, go to File → Examples → Basic → Blink.
This will open the "Blink" example sketch.
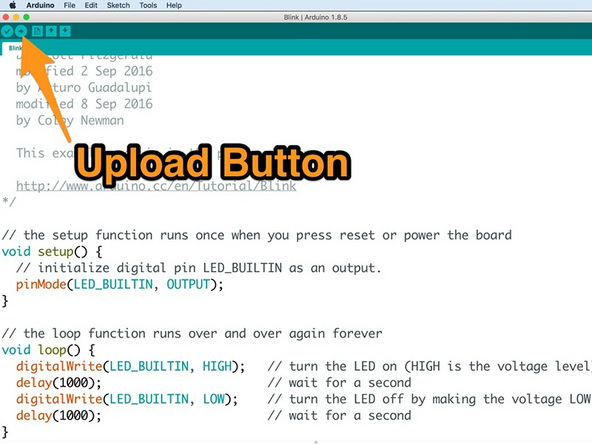
Click the "Upload" button (looks like an arrow) to verify and put the code onto the Arduino.
The "Upload" button verifies, compiles and uploads your code. If you just want to verify your code, click the "Verify" button.
The RX and TX lights on your Arduino will flash whilst the code is being uploaded to the board. After which, the onboard LED on pin 13 will continue to stay on for one second and turn off for one second.
Our Arduino Unos actually already come with the Blink Sketch pre-installed in the factory, so why don't we go an make some changes to the sketch so we can see a difference!
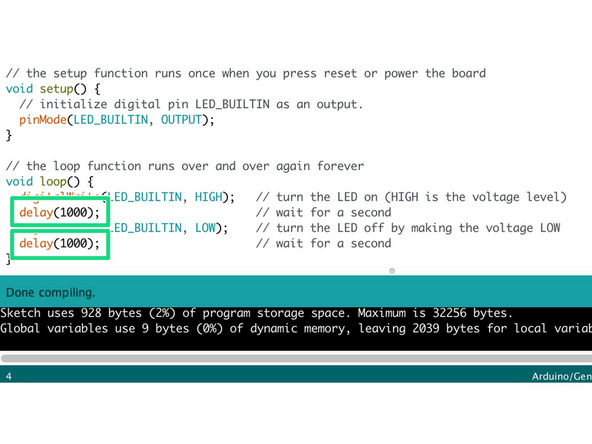
Change the delay values in the code. The value of 1000 is milliseconds, so this delay is 1 second. Try changing the numbers and then uploading to the board.
Change the delay value to 5000 and 2000, press the tick to make sure your code still compiles and the arrow to upload.
Your onboard LED should now turn on for 5 seconds and stay off for 2 seconds.
