Make Music with the EagLED
Get started with making music with the EagLED
Written By: Cherie Tan
Difficulty
Easy
Steps
10
At the heart of the EagLED is an Atmega32U4 chip. This means that the EagLED can also be used as a USB-MIDI device.
In this guide, get started with making music with the EagLED.
Complete this guide to learn about MIDI with the EagLED. You could go on to make your own wearable music-making devices!
In this guide, we'll look into how you can get started with making music by using the EagLED, its pushbutton, alligator clips, and an adjustable potentiometer module.
How will music be made? This will be done through the use of MIDI.
How will music be made? This will be done through the use of MIDI.
The acronym MIDI stands for Musical Instrument Digital Interface. It was created in the early 1980s as a communication standard that has made it possible for electronic musical instruments manufactured from different companies, to work together.
Absolutely no sound is sent via MIDI, rather, it expresses musical events (i.e. notes played, pitch bend etc) as a common language consisting of standardised digital data. This data is then processed by a computer, in order to record or create music.
What's so great about MIDI? While you could use an acoustic instrument next to a microphone while recording, this would record the 'sound' (the .wav file or .mp3 file) rather than the 'notes'. With MIDI, you can connect a MIDI instrument and play the notes you want. Then, the computer can change the 'sound' of these notes to whatever you want. For instance, you could use a MIDI keyboard to play drum beats or a bass guitar, without needing any of the actual instruments!
Yup, it's also possible to make your own MIDI instrument with its own unique interface. That's exactly what we will be doing in this guide! We will get started with building a MIDI device with the EagLED, an potentiometer module, and some pushbuttons.

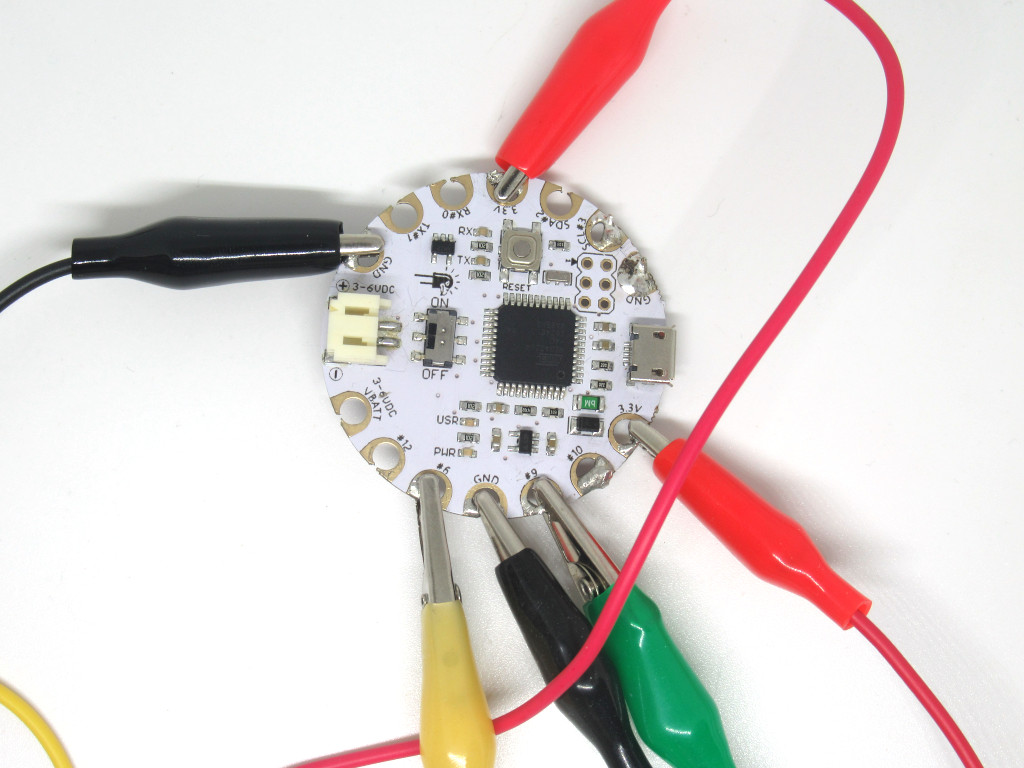
Finally, connect a red alligator clip to '3.3V' on EagLED.
For this prototype, we'll start with one button and connect it to the EagLED via alligator clips. Connect a yellow alligator clip as shown to '#12' on the EagLED.
Next, connect the black alligator clip to 'GND' on EagLED.
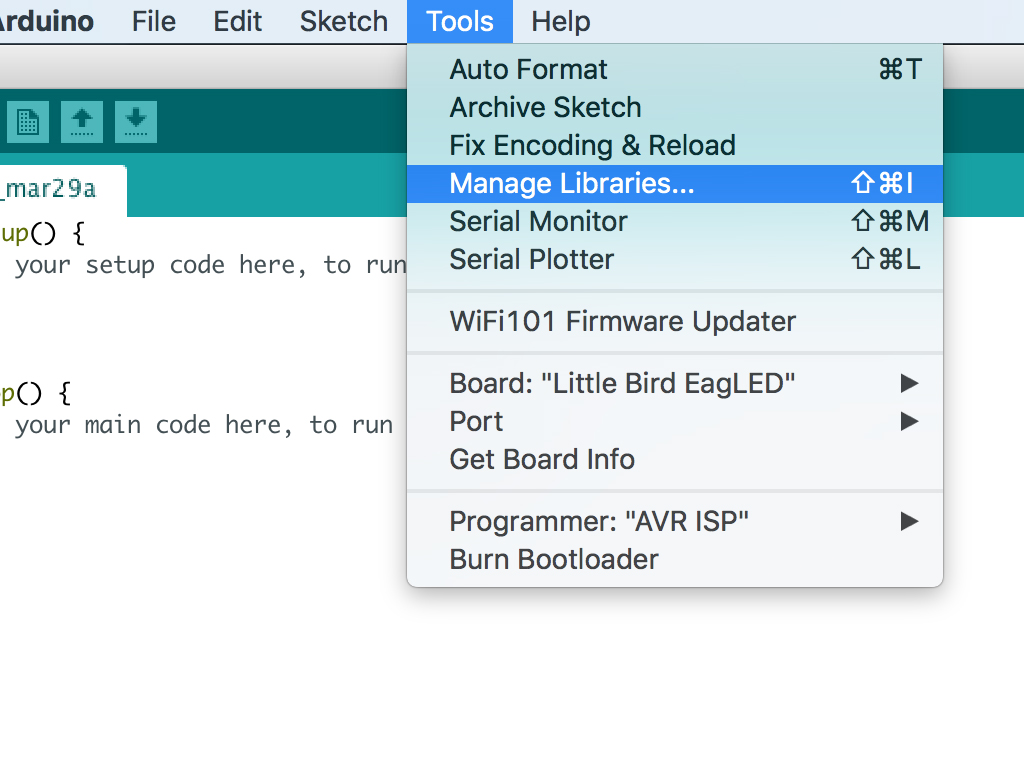
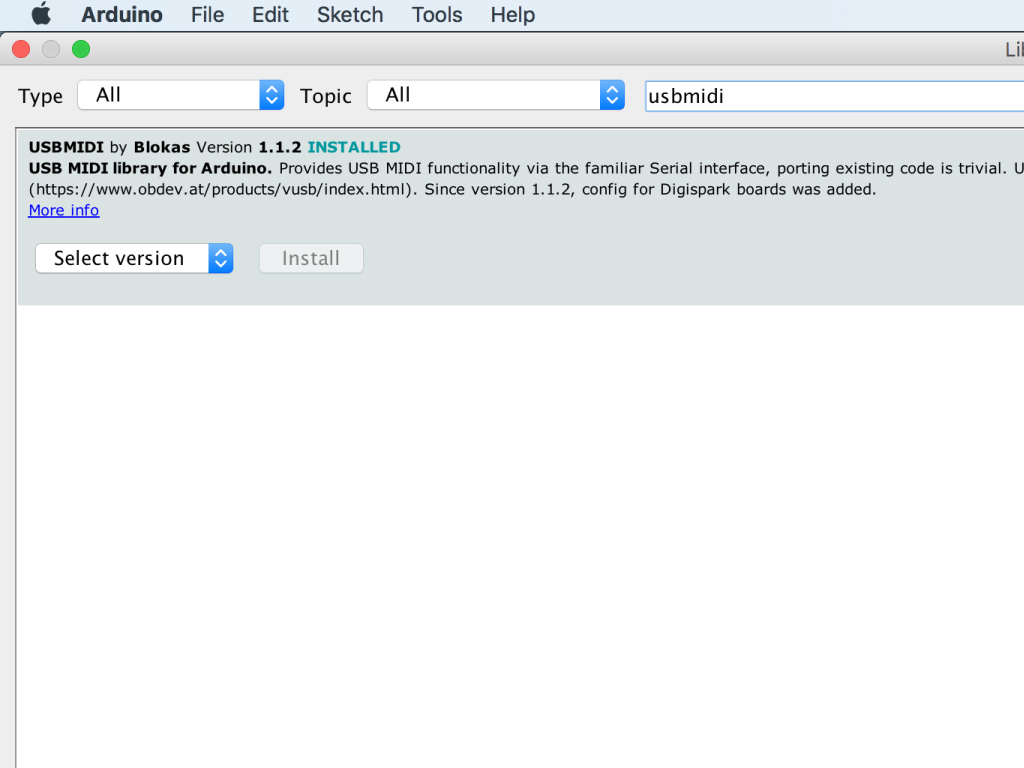
Download the USBMIDI library in the Arduino IDE. First, click on Tools > Manage libraries
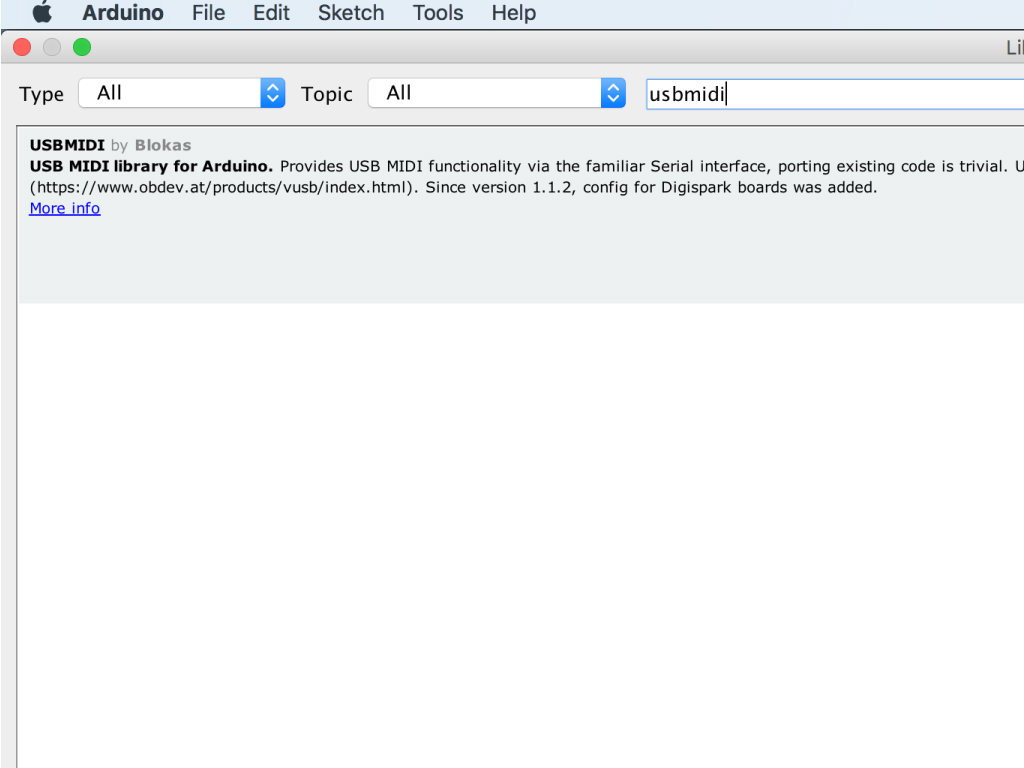
Type 'usbmidi' in the search field
Install USBMIDI by blokas
#include <midi_serialization.h>
#include <usbmidi.h>

void sendNote(uint8_t channel, uint8_t note, uint8_t velocity) {
  USBMIDI.write((velocity != 0 ? 0x90 : 0x80) | (channel & 0xf));
  USBMIDI.write(note & 0x7f);
  USBMIDI.write(velocity & 0x7f);
}


const int buttonPin = 12;

int buttonDown = 1;

int isButtonDown(int pin) {
  return digitalRead(pin) == 0;
}

void setup() {
  // Initialize initial values.
  pinMode(buttonPin, INPUT);
  digitalWrite(buttonPin, HIGH);
  buttonDown = isButtonDown(buttonPin);
}

void loop() {
  //Handle USB communication
  USBMIDI.poll();

  while (USBMIDI.available()) {
    // We must read entire available data, so in case we receive incoming
    // MIDI data, the host wouldn't get stuck.
    u8 b = USBMIDI.read();
  }


  int down = isButtonDown(buttonPin);

  if (down != buttonDown) {
    sendNote(0, 64, down ? 127 : 0);
    buttonDown = down;
  }


  // Flush the output.
  USBMIDI.flush();
}
Upload this sketch to the EagLED.
This is an edited version of the example sketch, 'midictrl' that can be found in the USBMIDI library. In this version, only one pushbutton is used. The button will control Note On/Off message for note 64.
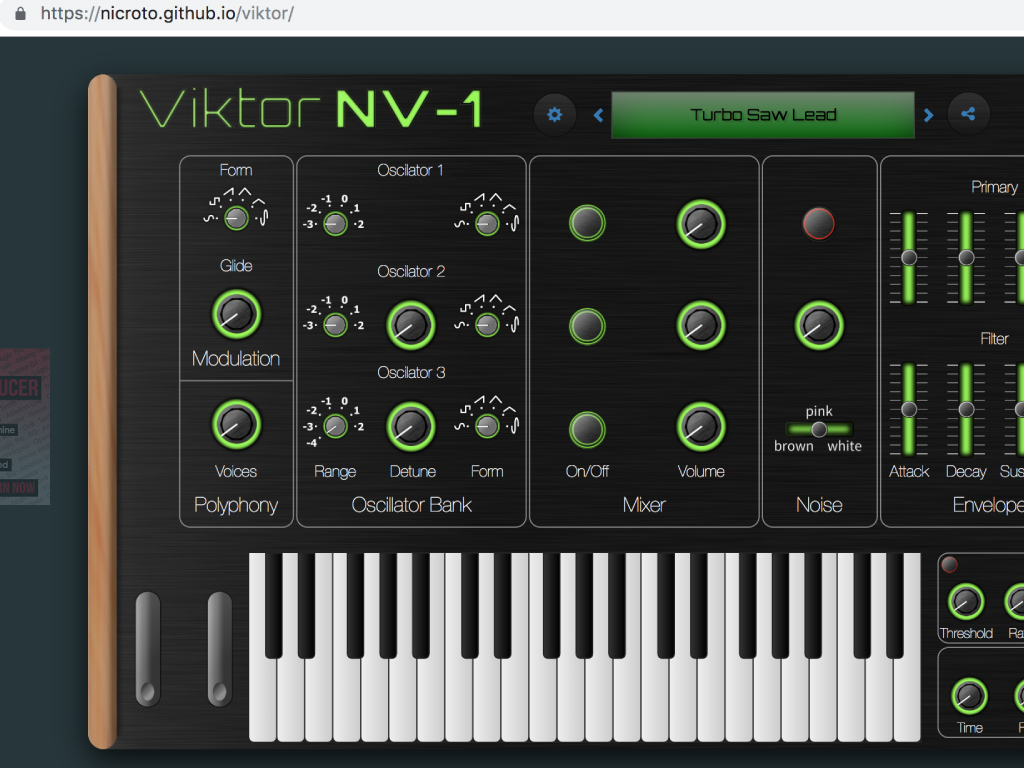
To give it a test, we'll use a virtual instrument. There are many virtual instruments available for use. For the sake of convenience, you can use this Viktor NV-1 Synth that is accessible online.
Click on 'Load Synth'
Then press the push button. You will hear a note being played. Note 64 should be ON as long as the button is pressed.
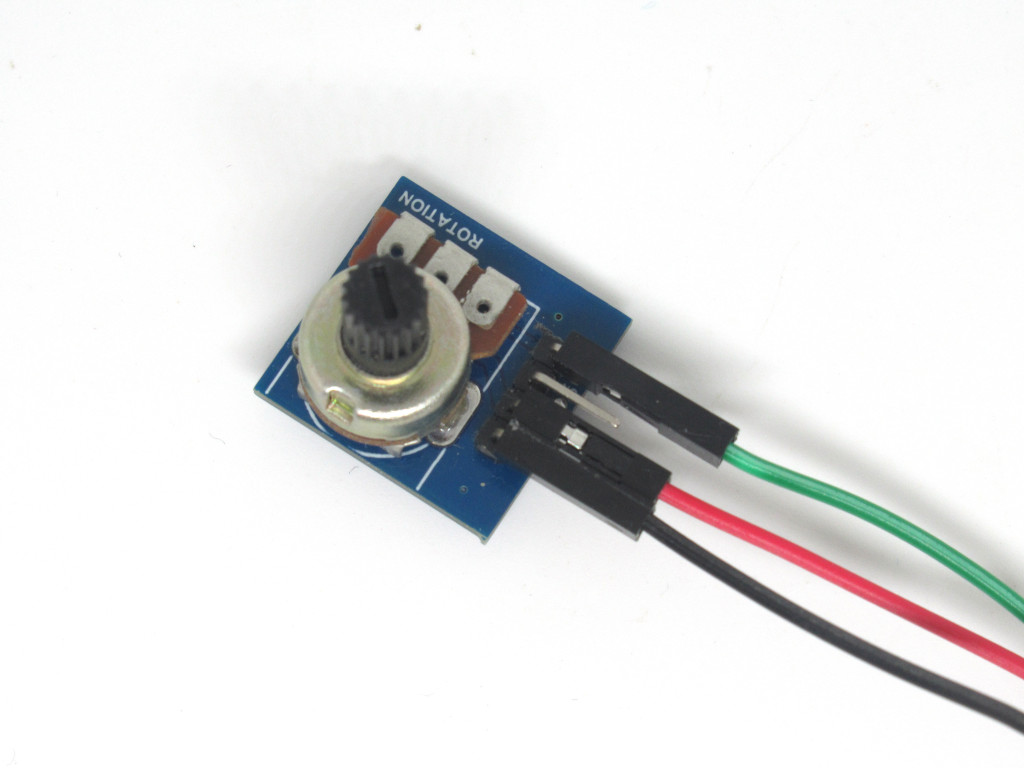
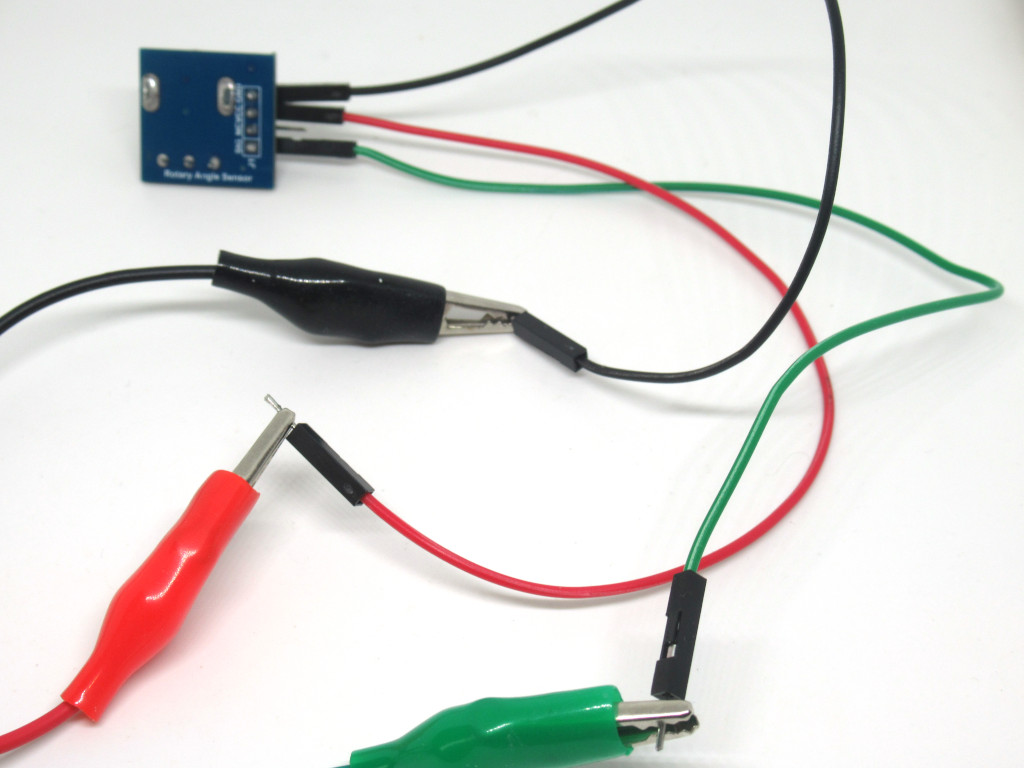
Next, let's try using the an analog input. Specifically, we'll be using one of the sew tabs on the EagLED, it is labelled as '#A9'. We can connect analog sensors to it, such as a potentiometer. First, connect a green alligator clip from "#A9" on EagLED to "SIG" on the adjustable potentiometer module.
Then connect a red alligator clip from "3.3V" to "VCC"
Finally, connect a black alligator clip from "GND" to "GND"
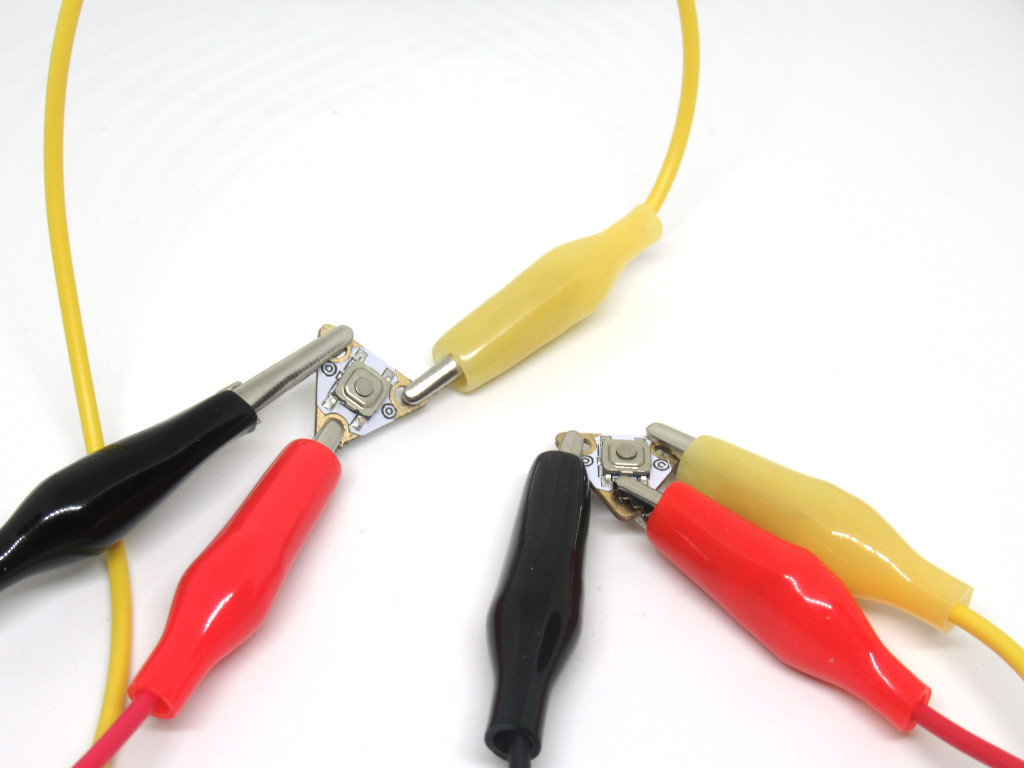
Have another EagLED development kit lying around? You could use a second pushbutton. To connect it to the EagLED: This time, connect it to '#6'
Connect the other two sew tabs to 'GND' and '3.3V' as shown before.
#include <midi_serialization.h>
#include <usbmidi.h>

void sendCC(uint8_t channel, uint8_t control, uint8_t value) {
  USBMIDI.write(0xB0 | (channel & 0xf));
  USBMIDI.write(control & 0x7f);
  USBMIDI.write(value & 0x7f);
}

void sendNote(uint8_t channel, uint8_t note, uint8_t velocity) {
  USBMIDI.write((velocity != 0 ? 0x90 : 0x80) | (channel & 0xf));
  USBMIDI.write(note & 0x7f);
  USBMIDI.write(velocity & 0x7f);
}

const int analogPin = A9;
const int buttonPin = 12;

int ccValues = 1;
int buttonDown = 1;


int readCC(int pin) {
  // Convert from 10bit value to 7bit.
  return analogRead(pin) >> 3;
}

int isButtonDown(int pin) {
  return digitalRead(pin) == 0;
}

void setup() {
  // Initialize initial values.
  pinMode(analogPin, INPUT);
  ccValues = readCC(analogPin);

  pinMode(buttonPin, INPUT);
  digitalWrite(buttonPin, HIGH);
  buttonDown = isButtonDown(buttonPin);
}

void loop() {
  //Handle USB communication
  USBMIDI.poll();

  while (USBMIDI.available()) {
    // We must read entire available data, so in case we receive incoming
    // MIDI data, the host wouldn't get stuck.
    u8 b = USBMIDI.read();
  }

  int value = readCC(analogPin);

  // Send CC message
  if (ccValues != value) {
    sendCC(0, 7, value);
    ccValues = value;
  }

  int down = isButtonDown(buttonPin);

  if (down != buttonDown) {
    sendNote(0, 64, down ? 127 : 0);
    buttonDown = down;
  }


  // Flush the output.
  USBMIDI.flush();
}
Upload this sketch to the EagLED if you're using one pushbutton and one potentiometer.
The button will control Note On/Off message for note 64.
The potentiometer will act as a continue controller/control change (CC) and its effects will vary depending on how the potentiometer is turned. Turning the potentiometer will result in values ranging from 0 to 127.
As it is assigned to channel 0 and the control change number as '7', the potentiometer will act as a volume control.
To swap out the control change number, change the second parameter in sendCC(0, 7, value);
#include <midi_serialization.h>
#include <usbmidi.h>

void sendCC(uint8_t channel, uint8_t control, uint8_t value) {
  USBMIDI.write(0xB0 | (channel & 0xf));
  USBMIDI.write(control & 0x7f);
  USBMIDI.write(value & 0x7f);
}

void sendNote(uint8_t channel, uint8_t note, uint8_t velocity) {
  USBMIDI.write((velocity != 0 ? 0x90 : 0x80) | (channel & 0xf));
  USBMIDI.write(note & 0x7f);
  USBMIDI.write(velocity & 0x7f);
}

const int BUTTON_PIN_COUNT = 2;

// Change the order of the pins to change the ctrl or note order.
const int analogPin = A9;
const int buttonPins[BUTTON_PIN_COUNT] = { 6, 12 };

int ccValues = 1;
int buttonDown[BUTTON_PIN_COUNT];

int readCC(int pin) {
  // Convert from 10bit value to 7bit.
  return analogRead(pin) >> 3;
}

int isButtonDown(int pin) {
  return digitalRead(pin) == 0;
}

void setup() {
  // Initialize initial values.

  pinMode(analogPin, INPUT);
  ccValues = readCC(analogPin);


  for (int i = 0; i < BUTTON_PIN_COUNT; ++i) {
    pinMode(buttonPins[i], INPUT);
    digitalWrite(buttonPins[i], HIGH);
    buttonDown[i] = isButtonDown(buttonPins[i]);
  }
}

void loop() {
  //Handle USB communication
  USBMIDI.poll();

  while (USBMIDI.available()) {
    // We must read entire available data, so in case we receive incoming
    // MIDI data, the host wouldn't get stuck.
    u8 b = USBMIDI.read();
  }

  int value = readCC(analogPin);

  // Send CC message
  if (ccValues != value) {
    sendCC(0, 7, value);
    ccValues = value;
  }


  for (int i = 0; i < BUTTON_PIN_COUNT; ++i) {
    int down = isButtonDown(buttonPins[i]);

    if (down != buttonDown[i]) {
      sendNote(0, 64 + i, down ? 127 : 0);
      buttonDown[i] = down;
    }
  }

  // Flush the output.
  USBMIDI.flush();
}
Upload this sketch to the EagLED if you're using two pushbuttons and one potentiometer.
The two buttons will control Note On/Off messages for notes 64 and 65.
If you'd like to add more buttons to your set up to control more notes, simply change const INT button_pin_count = 2; to the number of buttons.
Then add the pin it is connected to on the EagLED to int buttonPins[BUTTON_PIN_COUNT] = { 6, 12 };
Finally, to change the note it will play, alter the second parameter at sendNote(0, 64 + i, down ? 127 : 0);
The potentiometer will act as a continue controller/control change (CC) and its effects will vary depending on how the potentiometer is turned.
Turning the potentiometer will result in values will ranging from 0 to 127.
Turning the potentiometer will result in values will ranging from 0 to 127.
As it is assigned to channel 0 and the control change number as '7', the potentiometer will act as a volume control.
To swap out the control change number, change the second parameter in sendCC(0, 7, value);
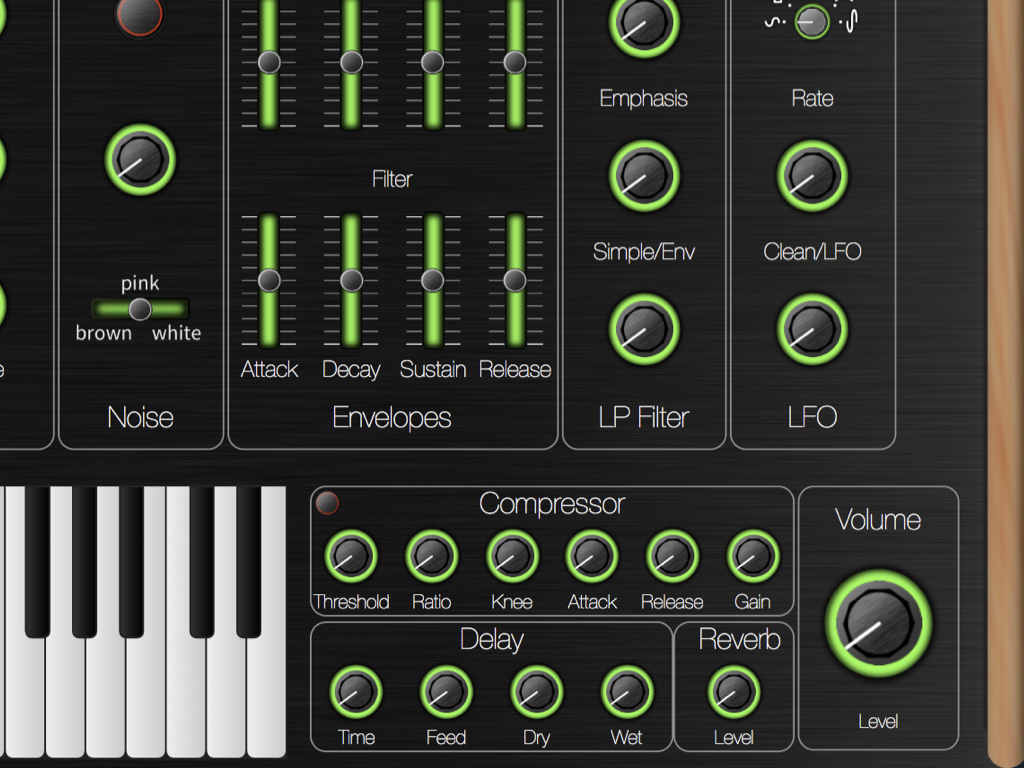
Now use the Viktor NV-1 Synth or a virtual instrument of your choice.
Turn the potentiometer knob. On the Viktor NV-1 Synth, the volume control will be adjusted.