Make Music with ShakeUp
Create a keyboard piano out of cardboard and get it to make some music!
Written By: Marcus Schappi
Difficulty
Easy
Steps
12
Wish you had a piano keyboard? Why not make your own?
In this guide, you will learn to make your own instrument out of craft paper, conductive tape and connect it to the ShakeUp by using alligator clips. We will program it in Scratch so it can be used to play the notes: Middle C, D, E, F, G, A, B and C. Optionally, it can also be programmed to play other instruments!
Complete this guide to play music on your own cardboard or paper craft instrument!
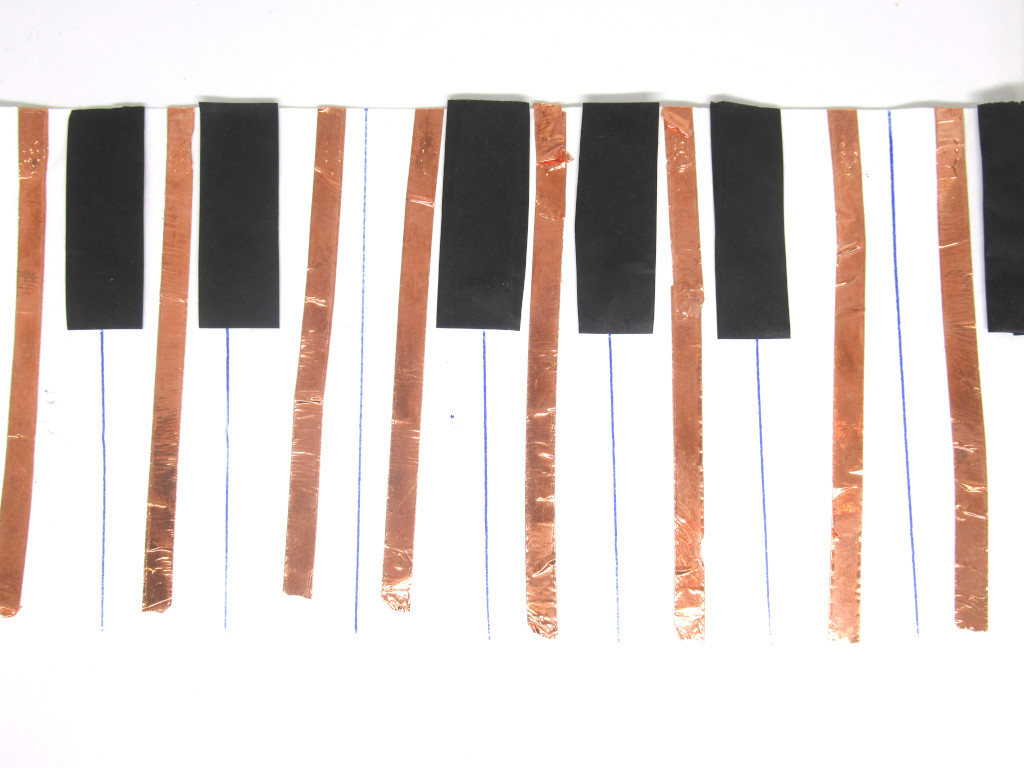
In this guide, we will use craft paper and conductive tape to make the keyboard instrument. We've used black and white craft paper, feel free to make your own design or print one off the internet.
Conductive tape is connected on each 'key'.
Make sure the conductive tape runs all the way to the back of the keyboard as shown. (See image 2)
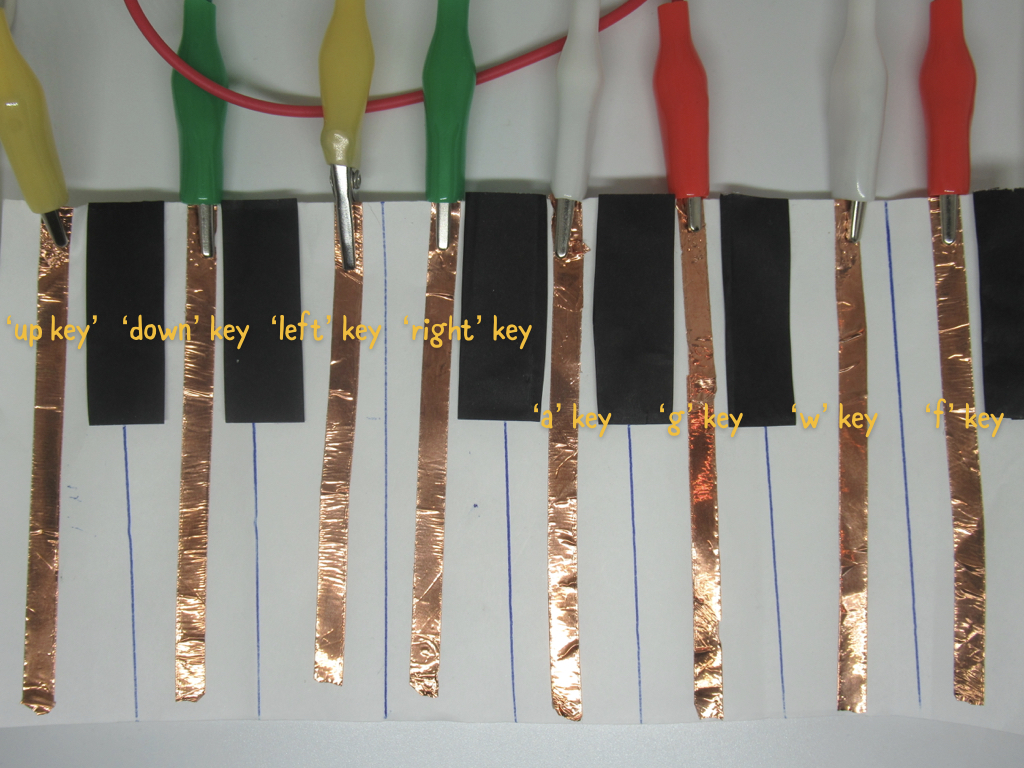
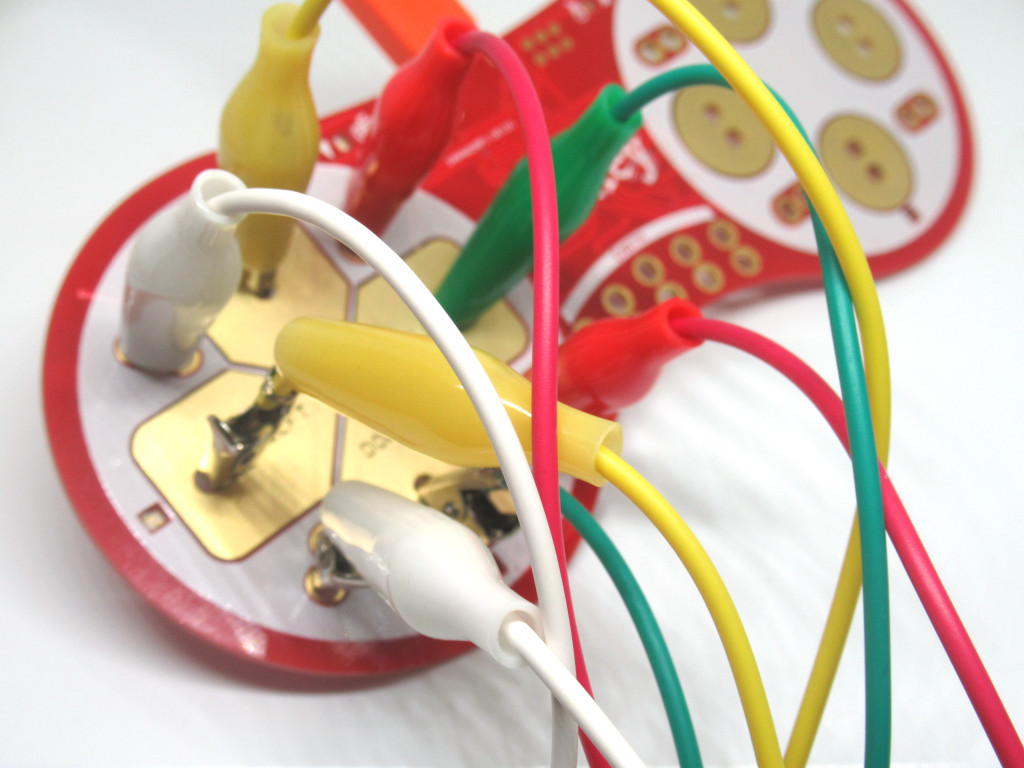
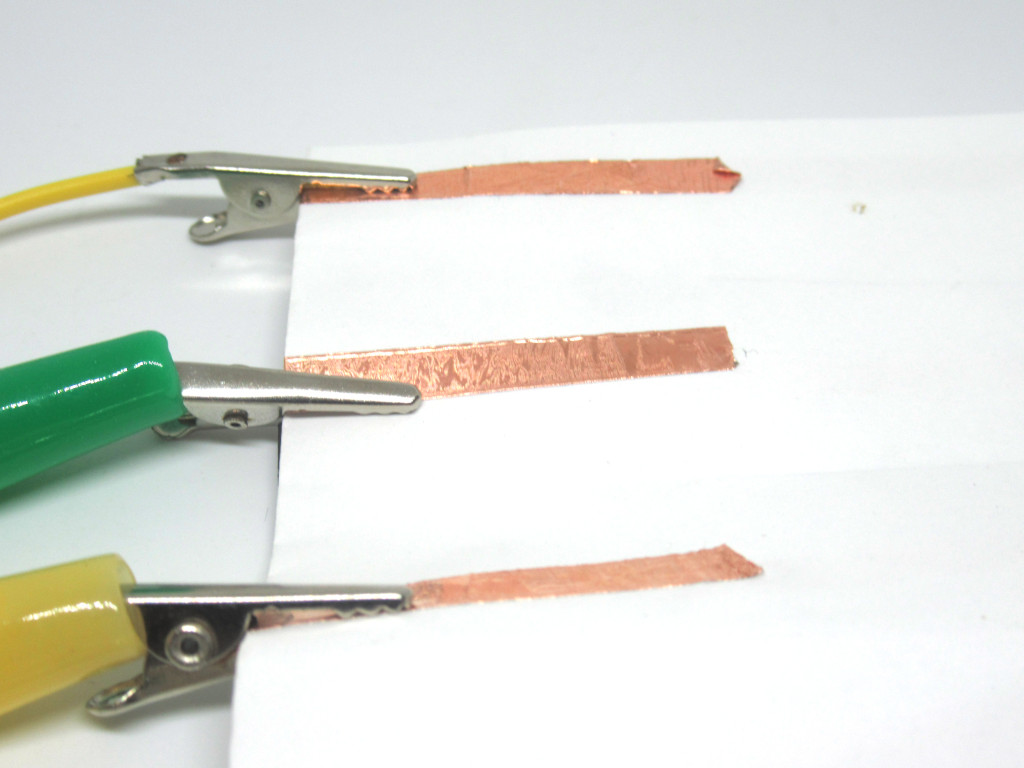
Next, connect an alligator clip from 'Middle C' key to 'Up 'key on the ShakeUp. If you're not sure which is the 'Up' key on the ShakeUp, please look at 'Meet the ShakeUp' guide for more information.
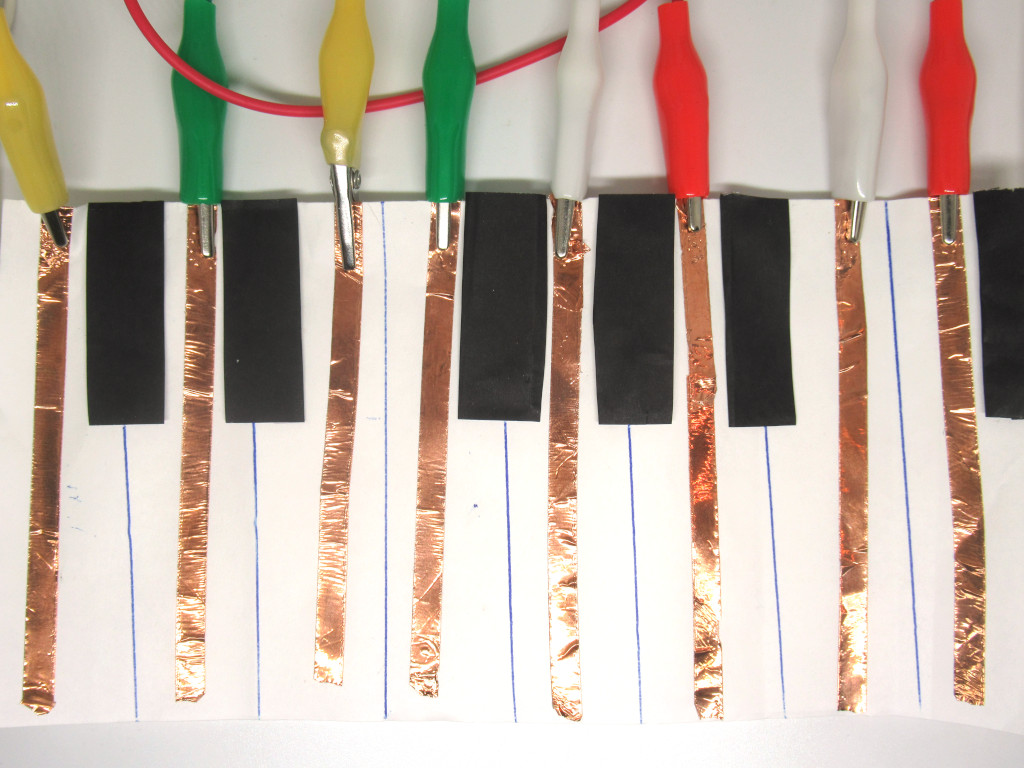
Connect each alligator like so:
'Up' to Middle C Note
'Down' to D Note
'Left' to E Note
'Right' to F Note
'A' input to G Note
'G' input to A Note
'W' input to B Note
'F' input to C Note
'Up' to Middle C Note
'Down' to D Note
'Left' to E Note
'Right' to F Note
'A' input to G Note
'G' input to A Note
'W' input to B Note
'F' input to C Note
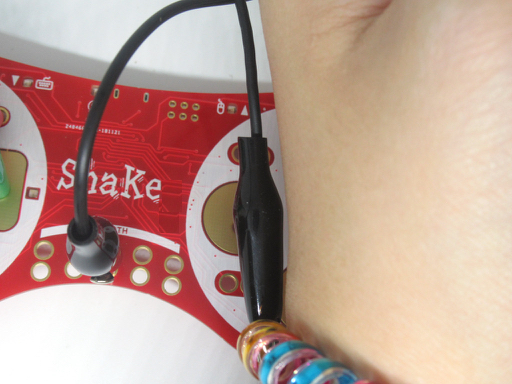
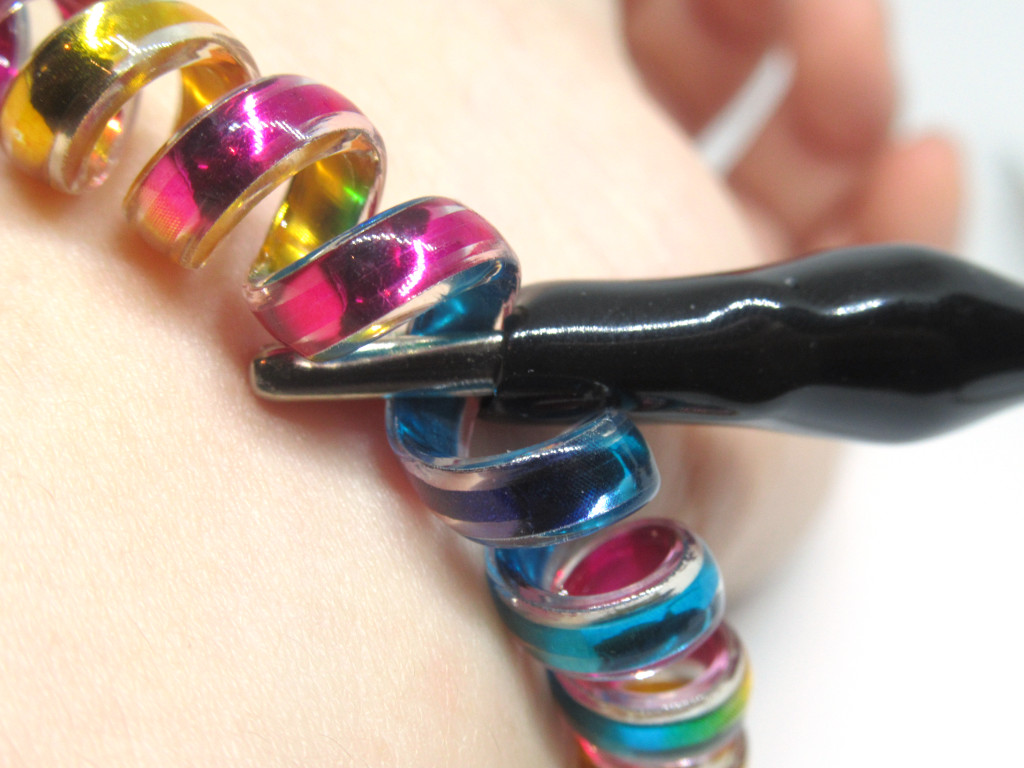
Finally, for the keyboard to work, we will need to connect an alligator clip to 'Earth' on the ShakeUp. We have used a black alligator clip, one end connects to the ShakeUp and the other end to a wearable wrist band.
Make sure the alligator clip is connected to the wrist band, but is still touching you. (See second image. Don't have a wrist band? Just hold the other end of the black alligator clip and it will still work.
Alright, let's get started with programming the ShakeUp instrument. Open up the Scratch editor, and start with a new project.
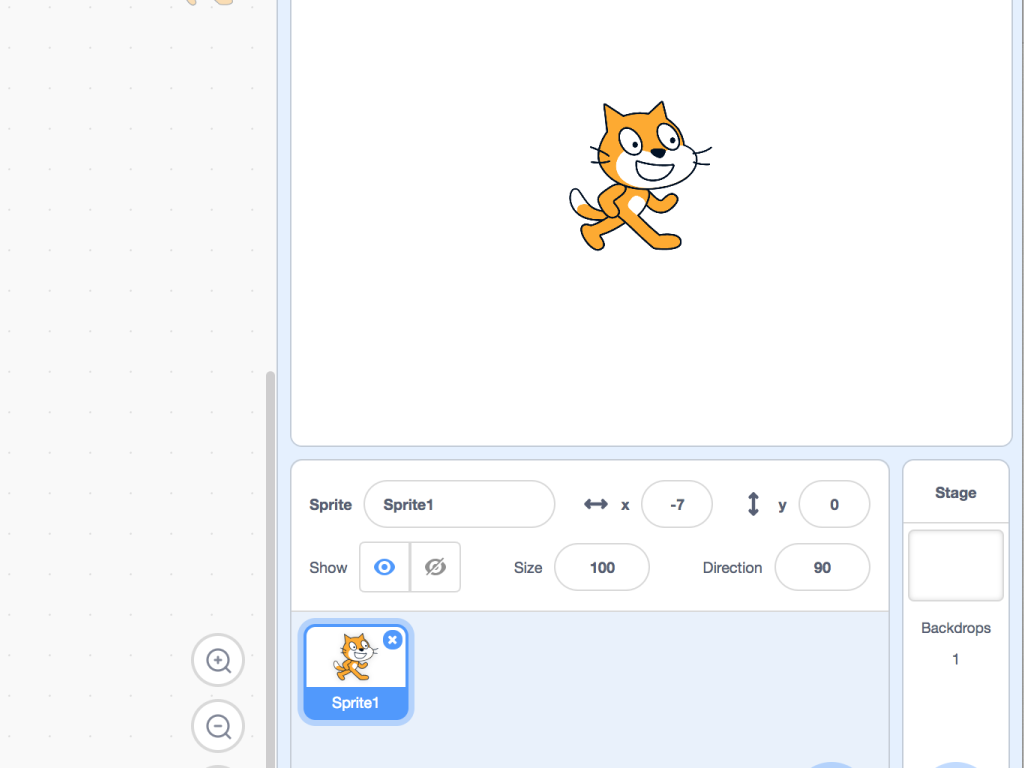
We won't be needing the 'cat' sprite in this one. So, where it says 'Sprite1', click on the 'x' to delete.
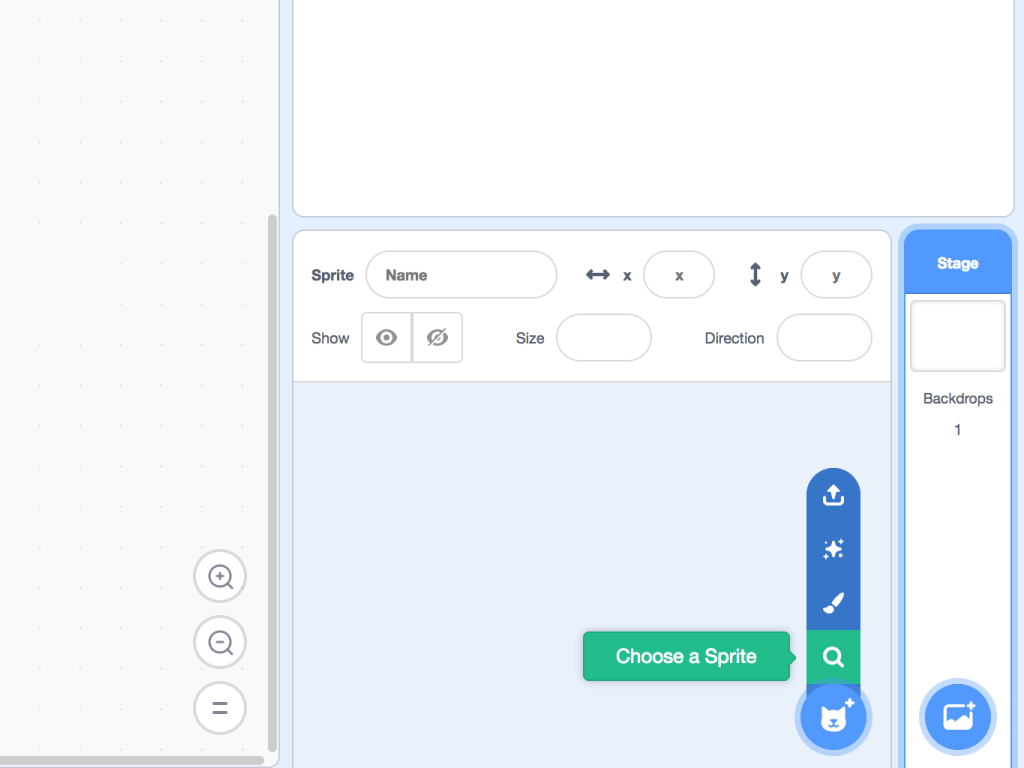

Hover your mouse pointer to the button with the cat icon, on the bottom right hand corner. You should now see more options like 'Choose a sprite'.
Click on 'Choose a sprite' and then click on 'Music'
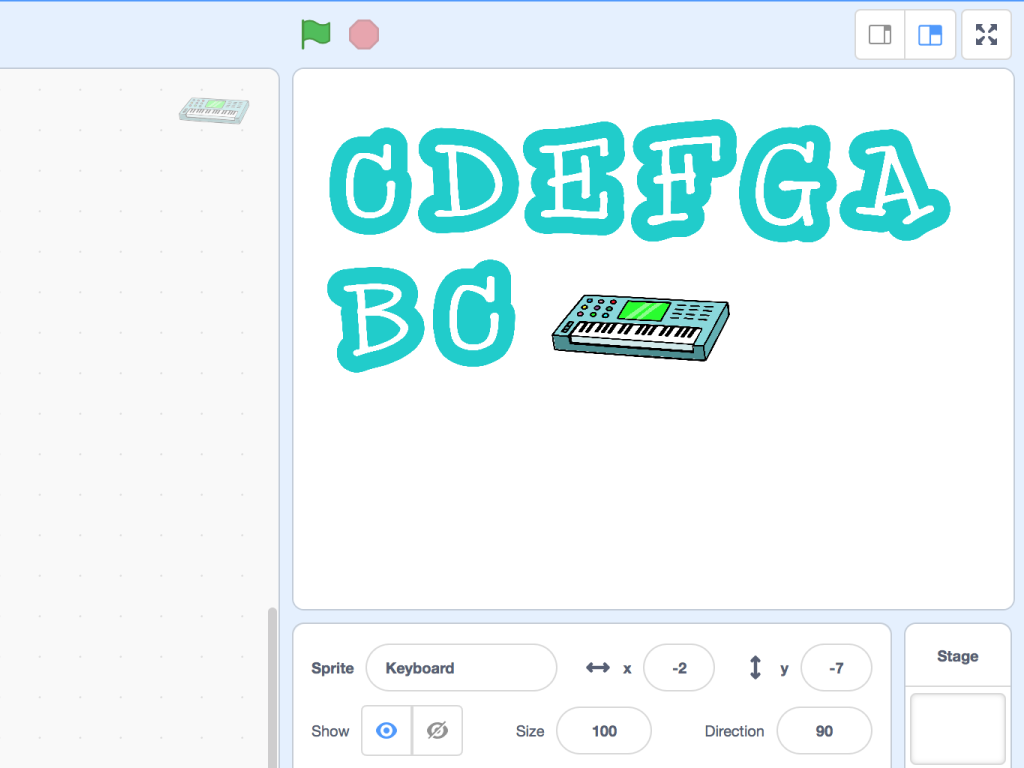
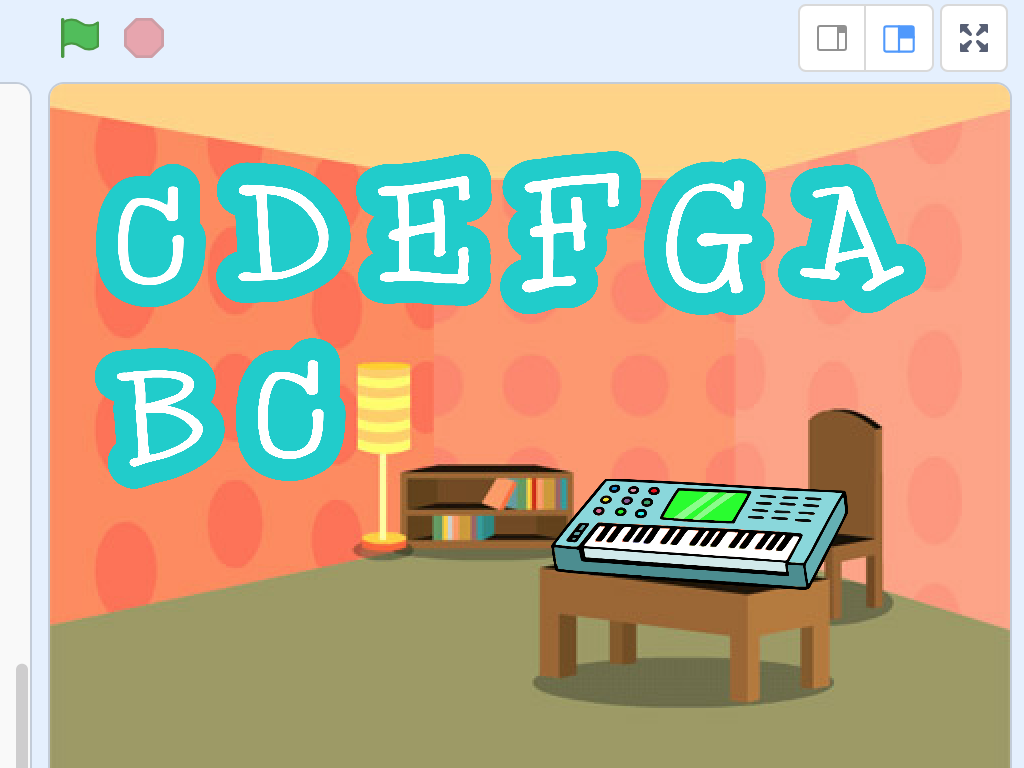
Grab a keyboard piano sprite. In 'Choose a Sprite', click on the 'Letters' button and get out the notes of a keyboard: C D E F G A B C
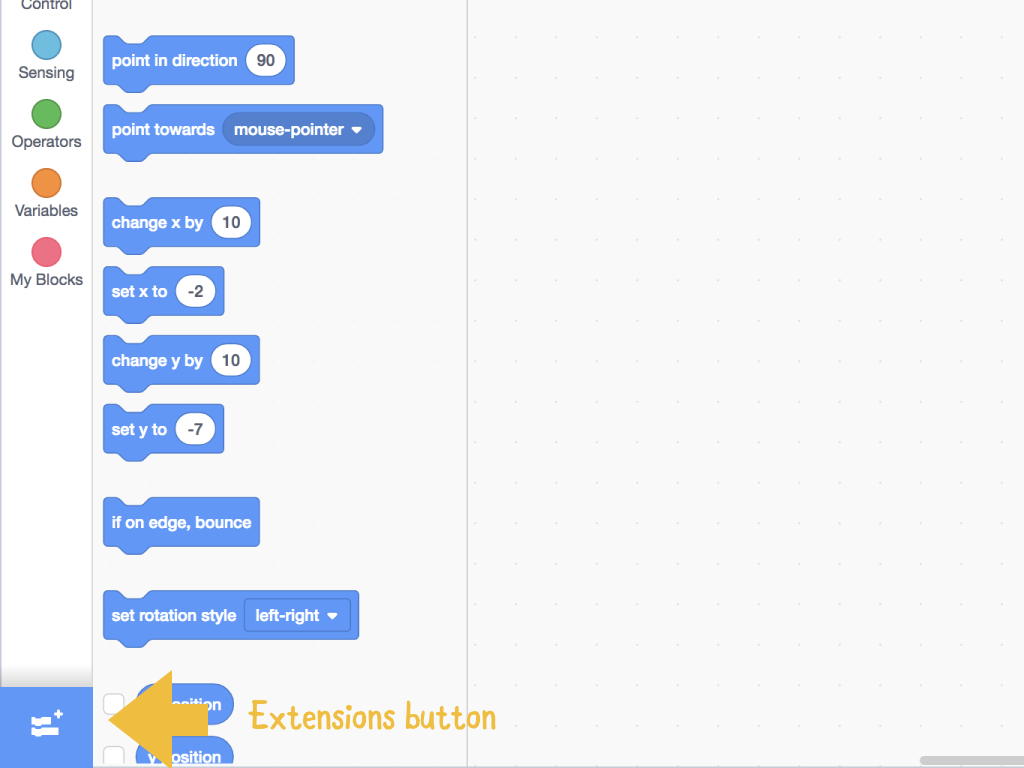
Next, we will need to add an extension, the 'Music' extension in Scratch. Click on the 'Extensions' button on the bottom left-hand corner.
Click on 'Music' and it will be added to the Scratch editor. A new tab called 'Music' will now be clickable.
Remember how we connected the ShakeUp with alligator clips, to the keys on the instrument?
'Up' to Middle C Note
'Down' to D Note
'Left' to E Note
'Right' to F Note
'A' input to G Note
'G' input to A Note
'W' input to B Note
'F' input to C Note
'Up' to Middle C Note
'Down' to D Note
'Left' to E Note
'Right' to F Note
'A' input to G Note
'G' input to A Note
'W' input to B Note
'F' input to C Note
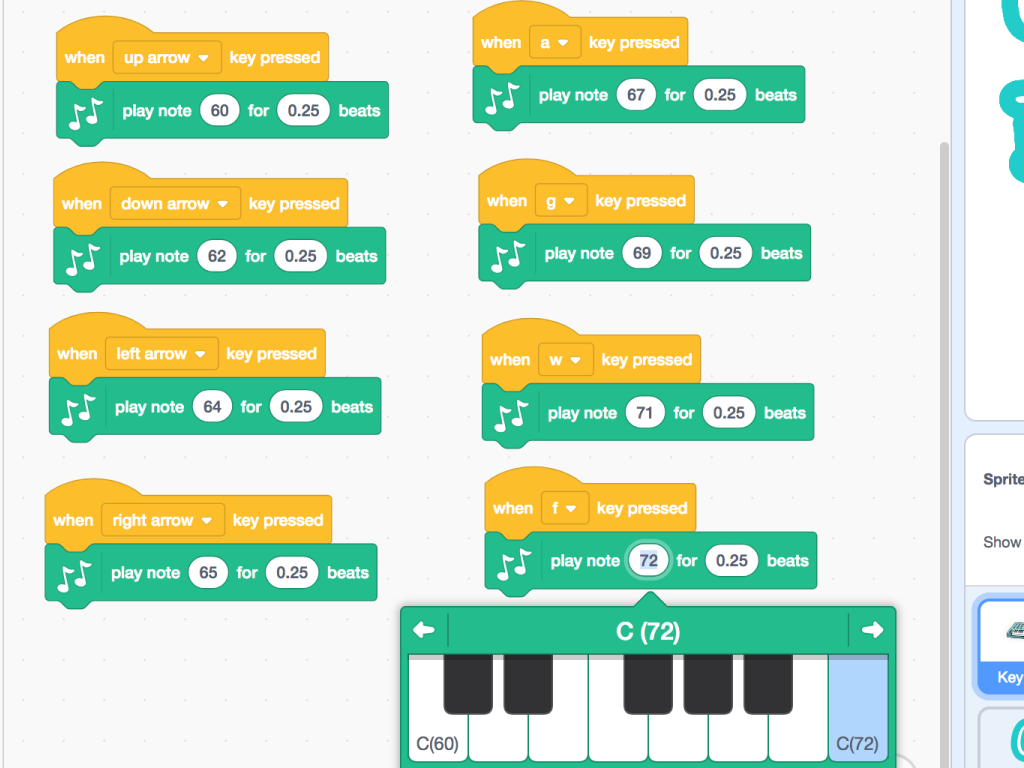
Using this, let's arrange the code blocks for the notes.
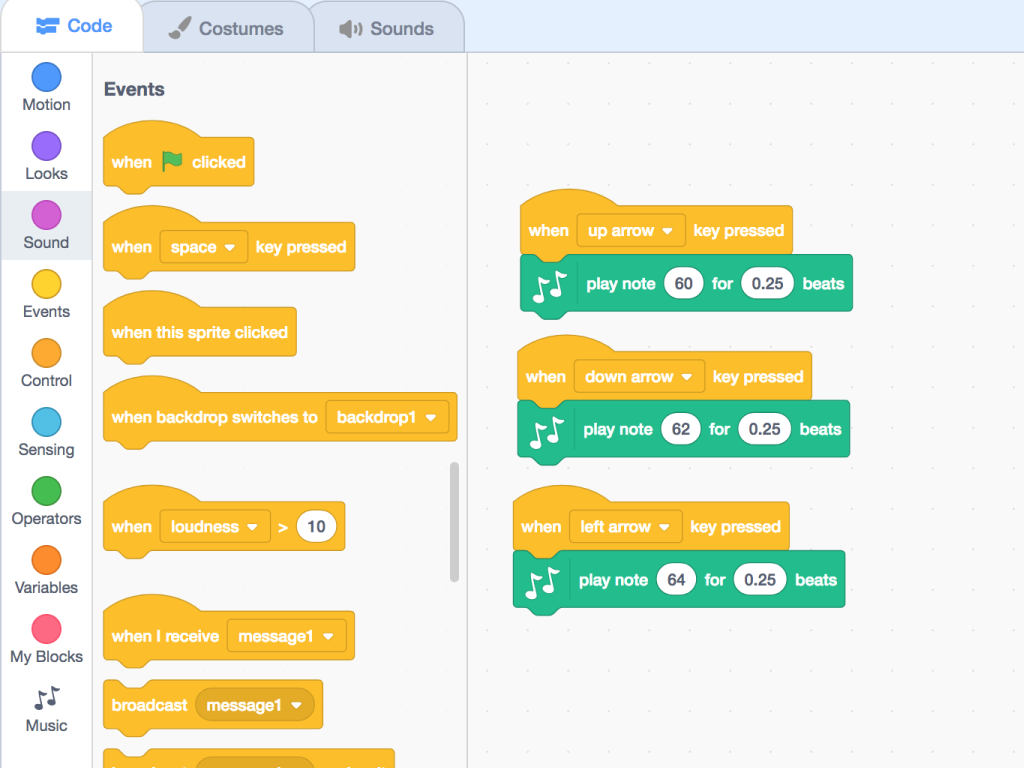
Grab eight 'When ... key pressed' blocks.
Grab eight 'When ... key pressed' blocks.
Click on them to change the key inputs to up, down, left, right, a, g, w and f.
Next, click on the 'Music' tab and get out eight 'play note ... for ... beats' blocks. Place each 'play note ... for ... beats' block under each 'When ... key pressed' block as shown in the third image
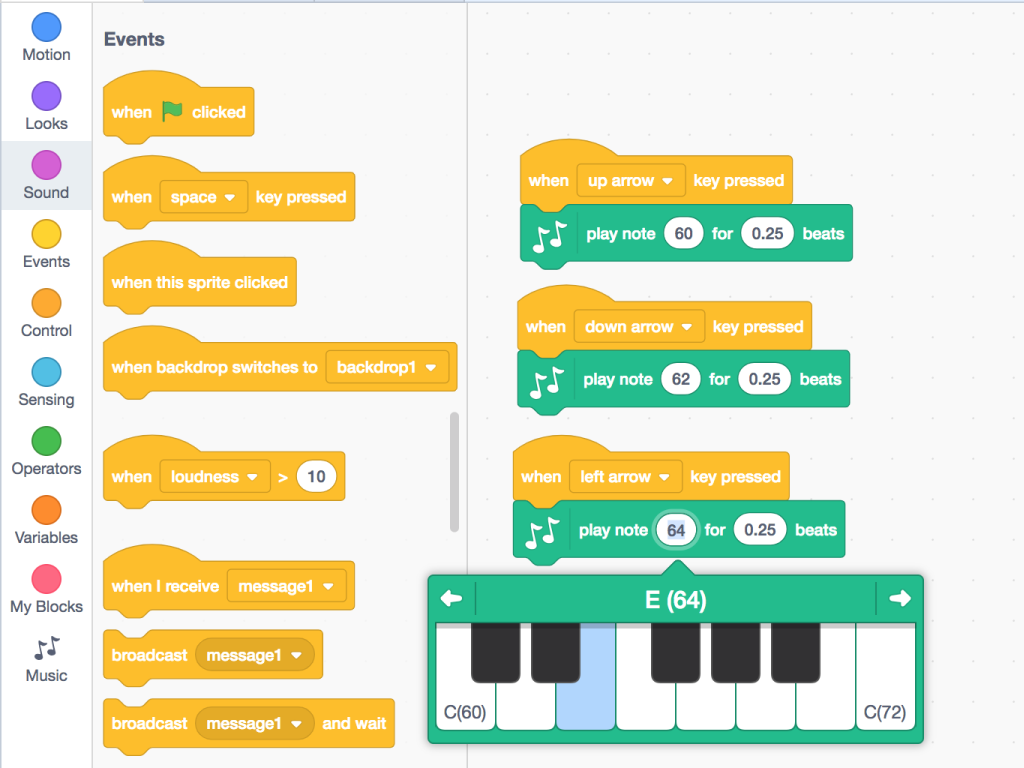
To set the note, click on the number between 'note' and 'for' on the block (See second image)

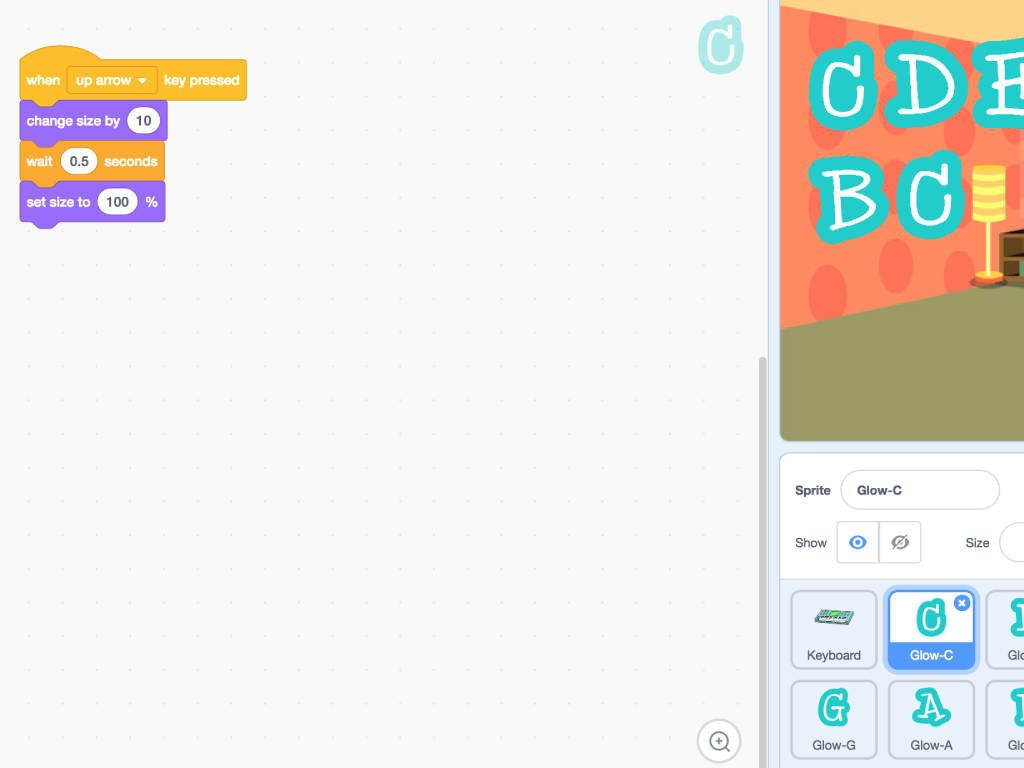
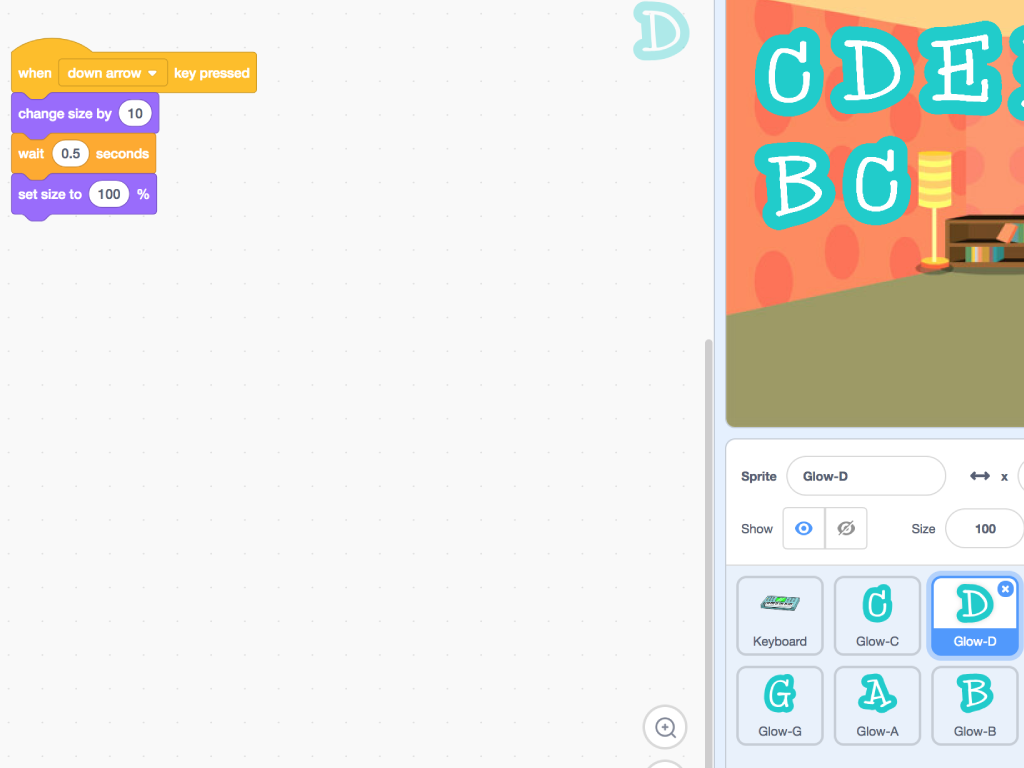
Next, let's make the sprites animate on each key press. Click on the 'Glow C' as shown in the first image
When the 'up' input key is pressed, the Middle C note is played. So we're going to make the 'Glow C' sprite look bigger when Middle C note is played.
To do this, get a 'when ... key is pressed' block, change it to 'up arrow'
To do this, get a 'when ... key is pressed' block, change it to 'up arrow'
Next, get a 'change size by ... ' block from 'Looks' tab. Change the number to 10.
Then get a 'wait ... seconds' block from 'Control' tab.
Finally, get a 'set size to 100%' block from 'Looks' tab. Use these same blocks for each sprite, changing 'up arrow' to the input key for each note i.e. 'down' key to 'Glow D' sprite, 'left' key to 'Glow E' sprite etc
Feel free to download the completed scratch file below: ShakeUp-instrument.sb3
Before the added code will work, we will need to change the input keys on the ShakeUp. Turn the ShakeUp board over to its back side.
Look at MOUSE-RIGHT, MOUSE-LEFT, MOUSE-DOWN, MOUSE-UP, MOUSE-RIGHT-CLICK, and MOUSE-LEFT-CLICK. These will be changed to h,i, j, k ,l and m. To remap the key inputs, you will need the Arduino IDE set up for ShakeUp.
Then download this sketch : ShaKey-remap.zip
Upload the sketch, 'ShaKey-remap.ino' to the ShaKey.
With all that done, head back to Scratch. Now when you tap on those input buttons on the ShaKey, the instrument will change.
Note: The last two steps are optional!
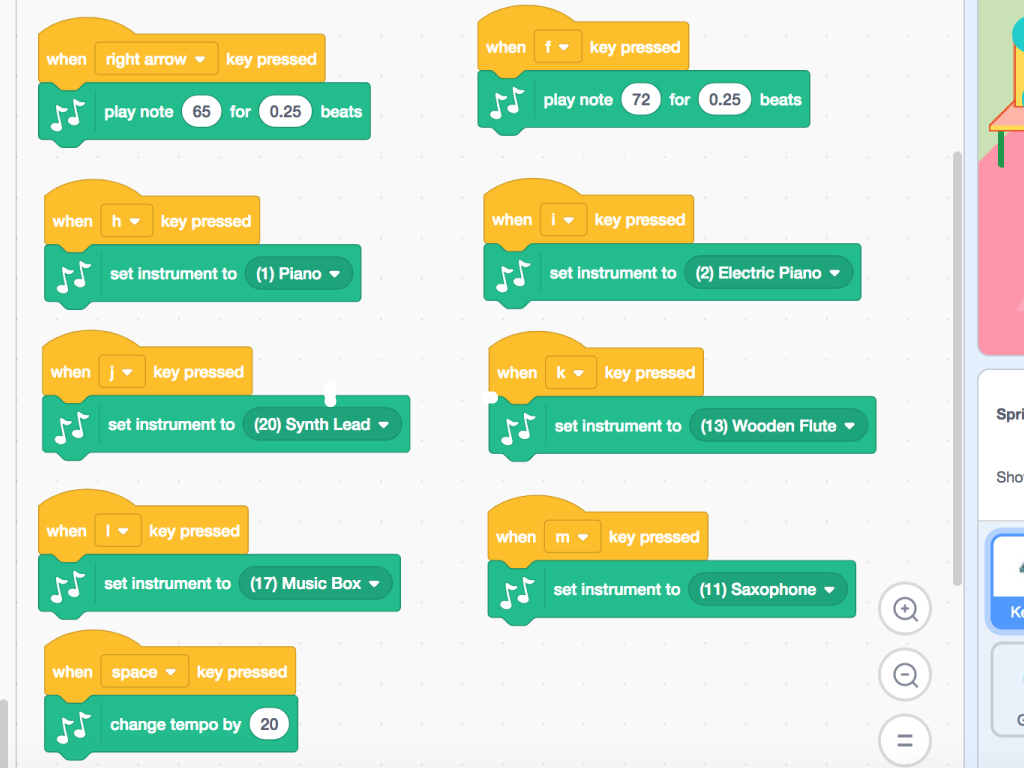
We can also get it to play different instruments such as an piano, electric piano, synth lead, and wooden flute. Add these code blocks in scratch:
Add another six 'when ... key pressed' blocks
We can also get it to play different instruments such as an piano, electric piano, synth lead, and wooden flute. Add these code blocks in scratch:
Add another six 'when ... key pressed' blocks
Change their values to h, i, j, k, l and m.
From 'Music' tab, grab six 'set instrument to ... ' blocks
Arrange them as shown in the picture
Want to download the completed Scratch program? Download here: Make-Music-with-ShaKey-Instruments.sb3
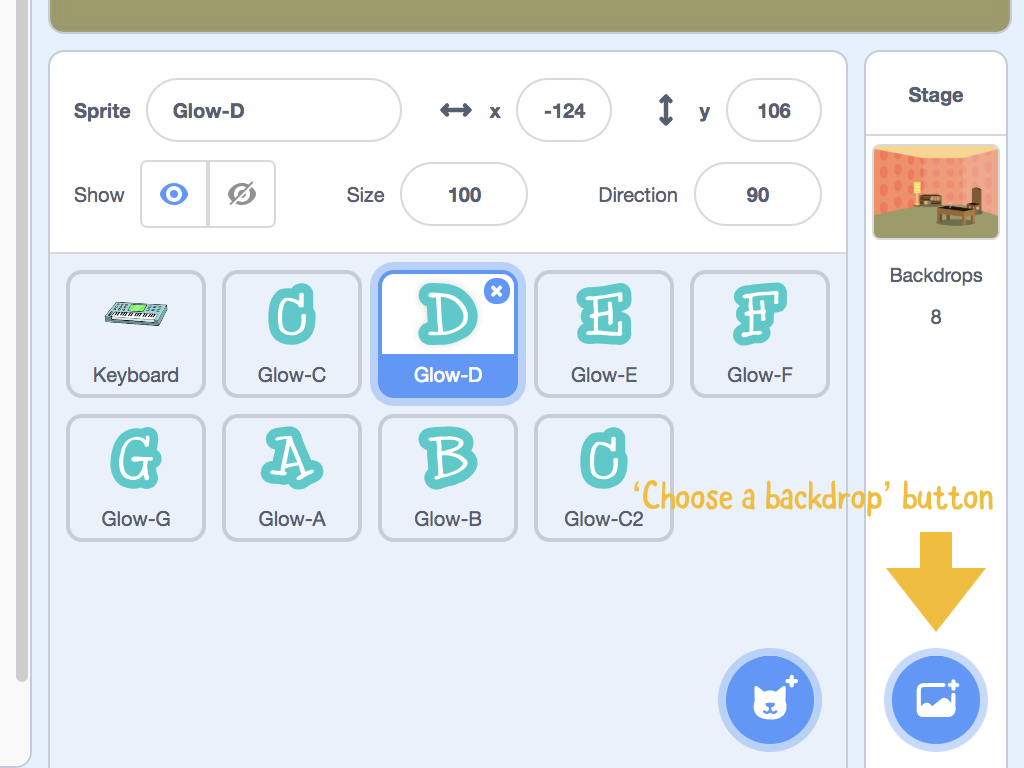
Want to add a pretty background to the stage? Click on 'Choose a backdrop' button.
We chose 'Room 2' backdrop from 'Indoors'.
