Draw with the ShakeUp
Learn to program the ShakeUp to draw with the Scratch programming language
Written By: Cherie Tan

Difficulty
Medium
Steps
9
Drawing in Scratch is easy, but you're usually tied to using a keyboard.
In this guide, you'll learn to program the ShakeUp to act as a paint brush in Scratch and create a paint drawing application.
Complete this guide to get familiar with using Scratch's pen code blocks, 'Events' blocks, as well as how to use randomly generated numbers in your programs.

Open up the Scratch editor and start a new project.
Delete the cat sprite, then click on 'Choose a Sprite'.


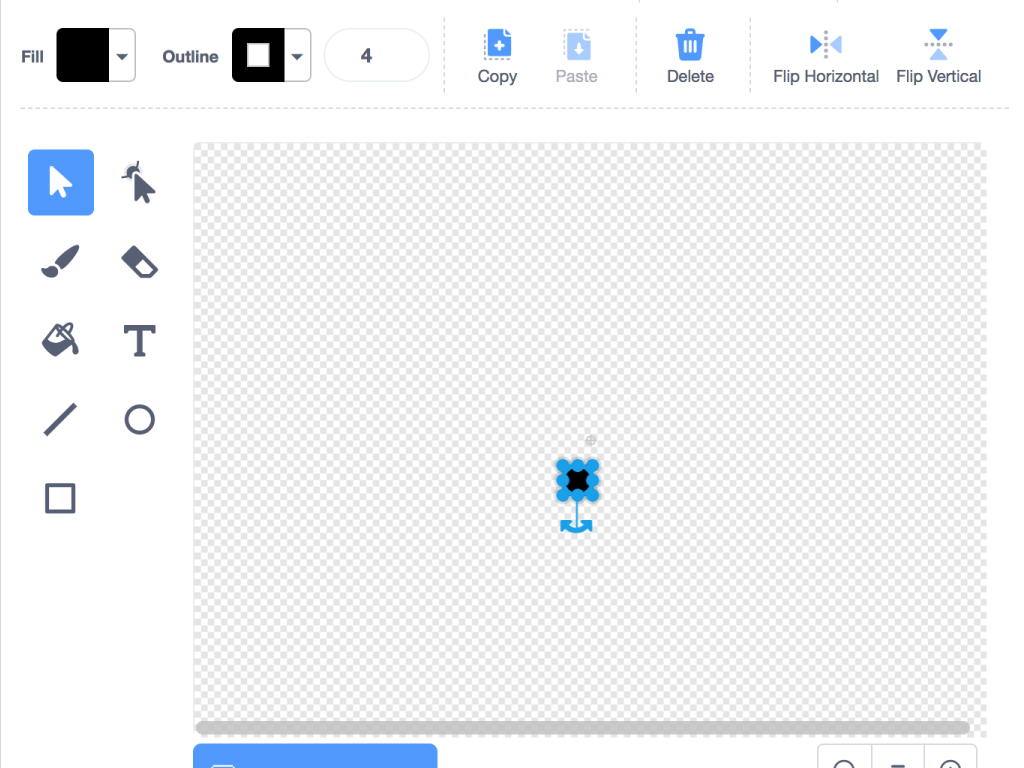
Next, create a sprite that will represent the point of your pen. Click on 'Create a sprite'
Use the 'Circle' tool to create a small dot
Name this sprite 'point'
Click on the brush 'point' sprite.
Click on 'Code' tab.
Add the following blocks
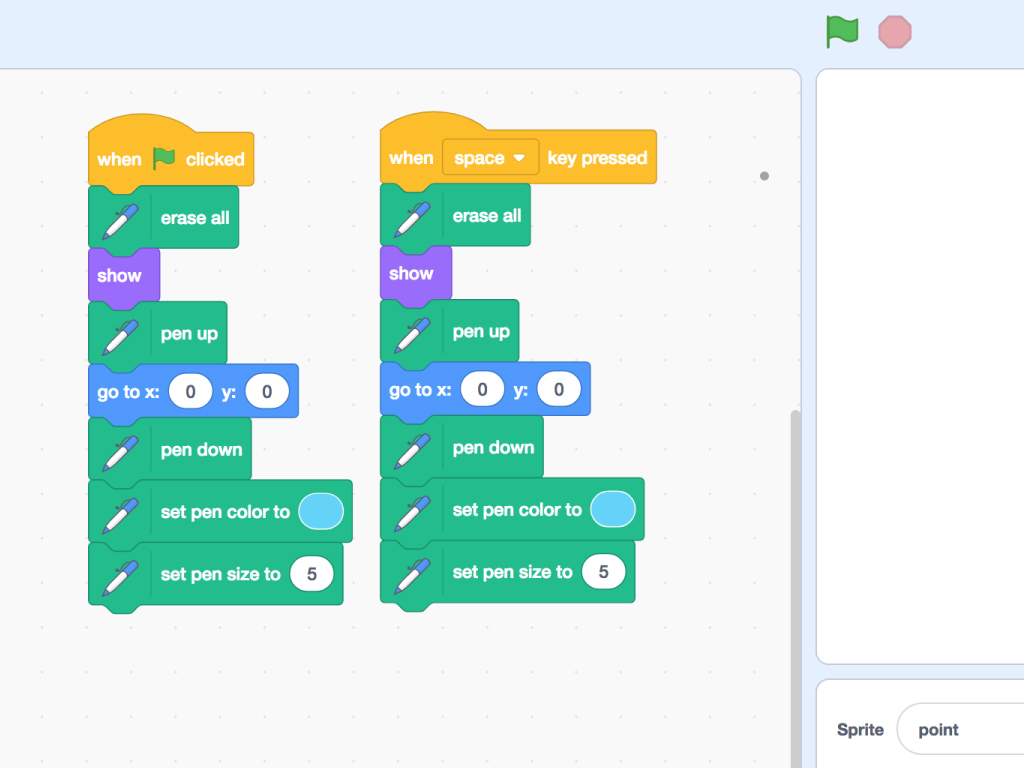
When the green flag icon is clicked (the green flag button is located in the upper right corner of the Scratch editor):
This will reset our drawing board
The brush 'point' sprite will be at x:0 y:0
The pen colour will be set to light blue
The pen size will be set to 5.
This will reset our drawing board
The brush 'point' sprite will be at x:0 y:0
The pen colour will be set to light blue
The pen size will be set to 5.
There's just one little problem with our drawing application! There is no way to clear the screen just yet without the hassle of clicking on the green flag icon each time. This can be easily fixed by using an 'Events' code block. Let's use the 'space' key input here.
Add the same blocks for 'when space key pressed' so that the board can be reset with the space input, too.
Add the same blocks for 'when space key pressed' so that the board can be reset with the space input, too.

Likewise, to control the brush, we'll use more 'Events' code blocks. We'll use the up, down, left and right inputs on the ShakeUp to control the brush point. Add the following blocks so that:
When up arrow key pressed, change y by 10
When down arrow key pressed, change y by -10
When left arrow key pressed, change x by -10
When right arrow key pressed, change x by 10
When up arrow key pressed, change y by 10
When down arrow key pressed, change y by -10
When left arrow key pressed, change x by -10
When right arrow key pressed, change x by 10
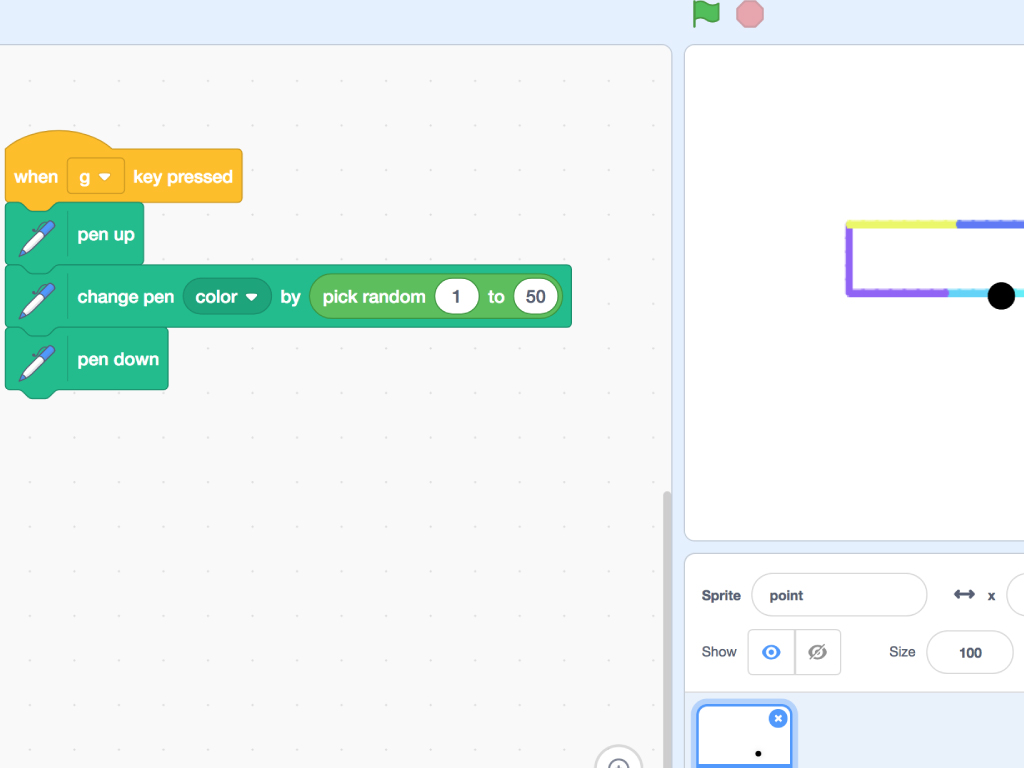
Next, we can add controls for changing the brush colour. Click on the 'Operations' tab
These blocks allows us to perform arithmetic operations, generate random numbers, and compare numeric values to determine their relationship to one another. Here, we'll generate a random number to pick a different colour for the brush.
Get a 'pick random ... to ... ' block.
Get a 'pick random ... to ... ' block.
Change its values to 1 and 50.
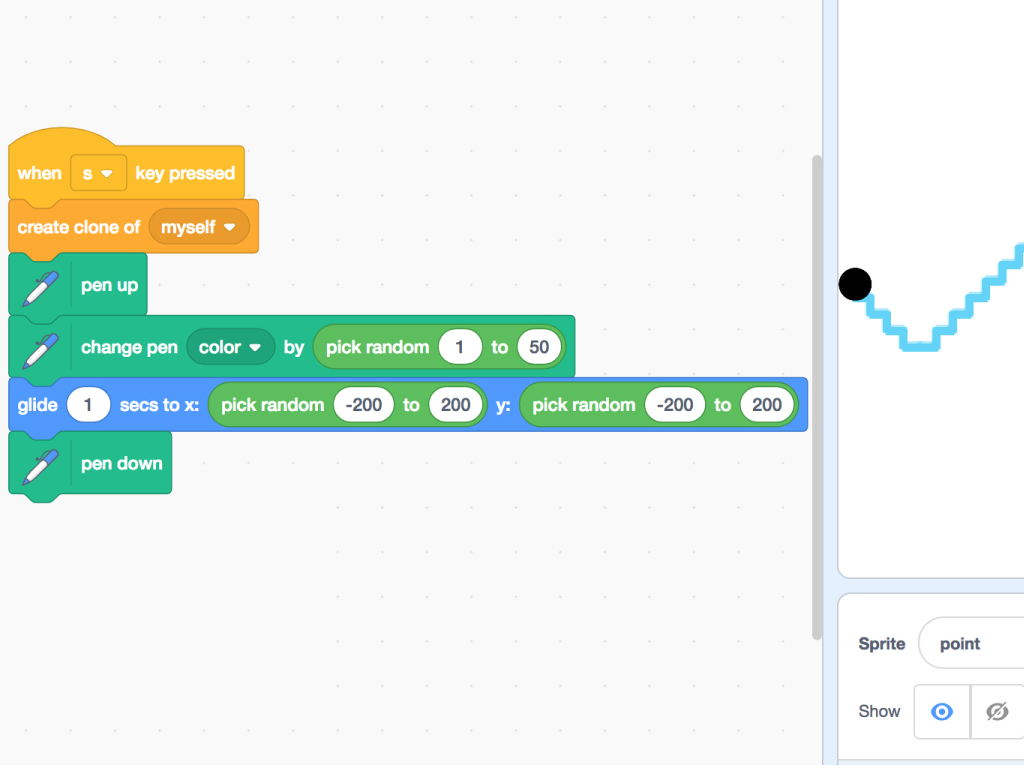
To make a clone of the brush, we'll use another 'Events' code block. Set it as 'when s key pressed' to use the ShakeUp's shake feature to create a clone.
We'll use a 'pick random ... to ... ' block to select a random colour for the pen, then again when choosing a position for the clone.
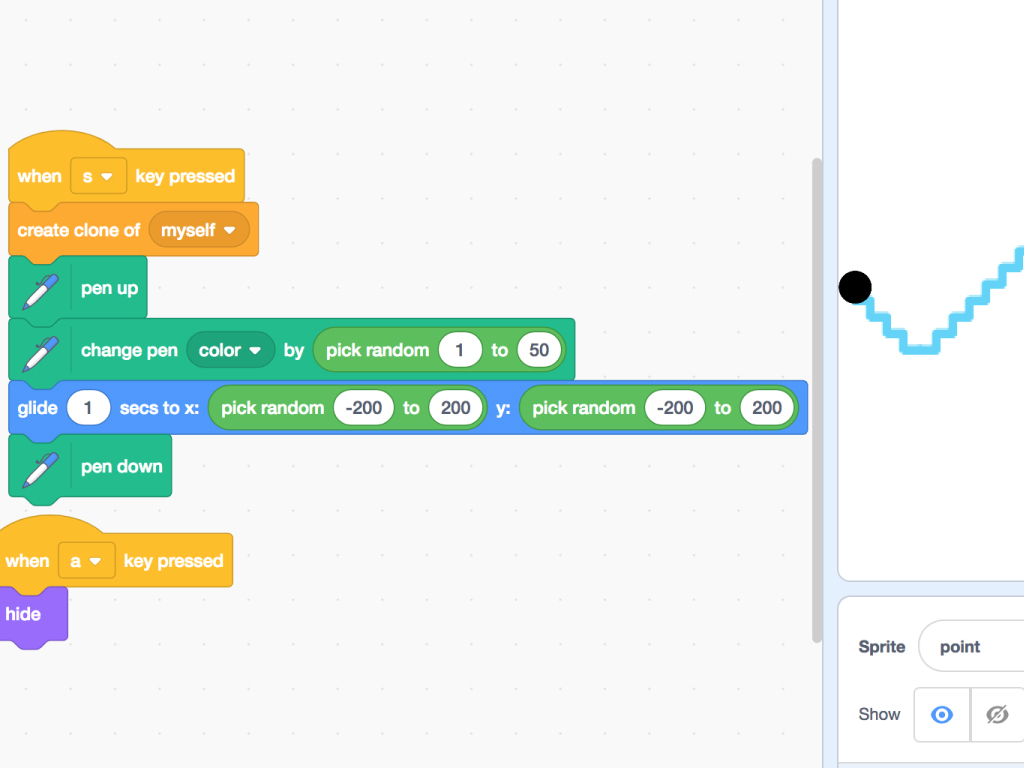
To hide the brush point, use another 'Events' block.
Attach it to a 'hide' block found under 'Looks' tab.
Download the full Scratch code here: Draw-with-ShaKey.sb3

Finally, we'll program the ShakeUp's shake feature. Before we can do so, we'll need the Arduino IDE set up for ShakeUp. If you haven't done so yet, check out Set up Arduino IDE for ShakeUp.
Connect the ShakeUp to your computer via a microUSB cable.
Then to get the ShakeUp's 'shake' feature working with Scratch, download this sketch: ShaKey-remap.zip
Verify and upload the 'ShaKey-modified.ino' file to the ShakeUp.
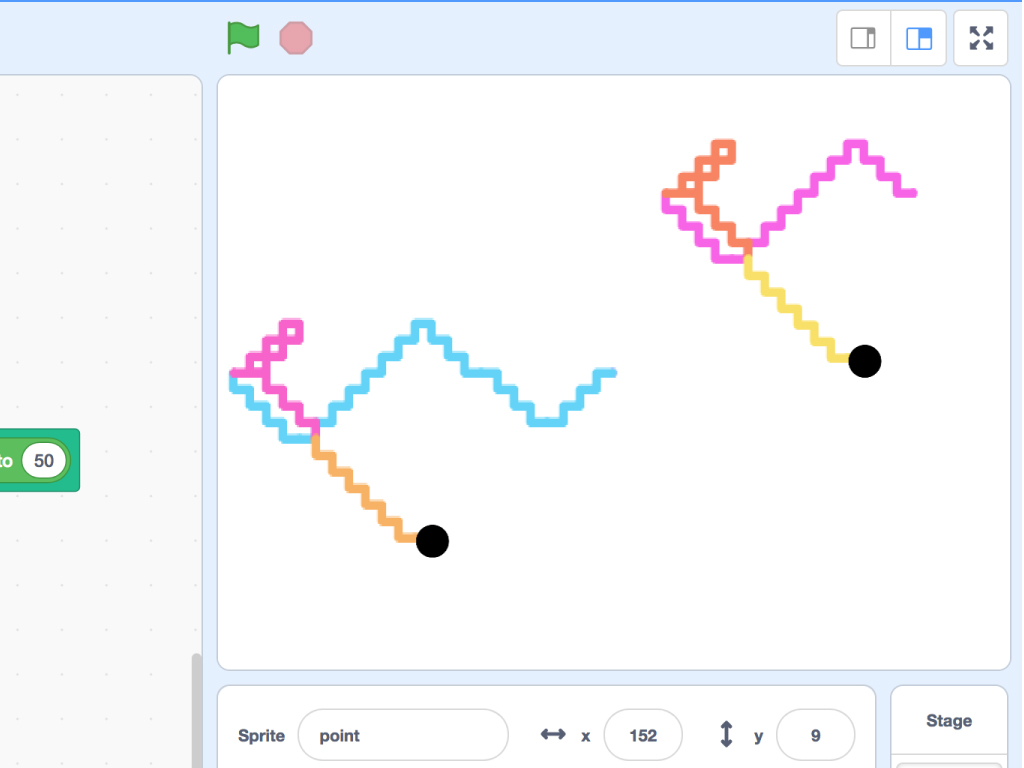
Start using the drawing application and ShakeUp in Scratch!