Coronavirus Monitor with Raspberry Pi
Keep up to date with the latest Coronavirus numbers with the COVID-19 API and Raspberry Pi!
Written By: Cherie Tan
Difficulty
Easy
Steps
9
We hope you've all been staying safe by washing your hands thoroughly and methodically. You may have spotted various projects on the internet with the goal of protecting from and educating yourself on the Coronavirus situation. These projects ranged from hand-washing timers to coronavirus counters.
In this guide, we'll show you how to build your own such counter or monitor using the simple to use COVID-19 web API with a Raspberry Pi, a display and some momentary pushbuttons.
Complete this guide to get started with creating your own COVID-19 monitor.
In this guide, we'll show you how to build your own such counter or monitor using the simple to use COVID-19 web API with a Raspberry Pi, a display and some momentary pushbuttons.
Complete this guide to get started with creating your own COVID-19 monitor.
In these strange times, it helps to stay informed of the facts. It can be tedious to sift through news articles to get down to the numbers. Having access to the number of new cases, recoveries and fatalities can be eye-opening.
Thanks to data from the John Hopkins Centre for Systems Science and Engineering and the COVID-19 API, you can build your own COVID-19 monitor for data on particular cities, states, countries or a global whole. In this guide, we’ll show you how to get started.

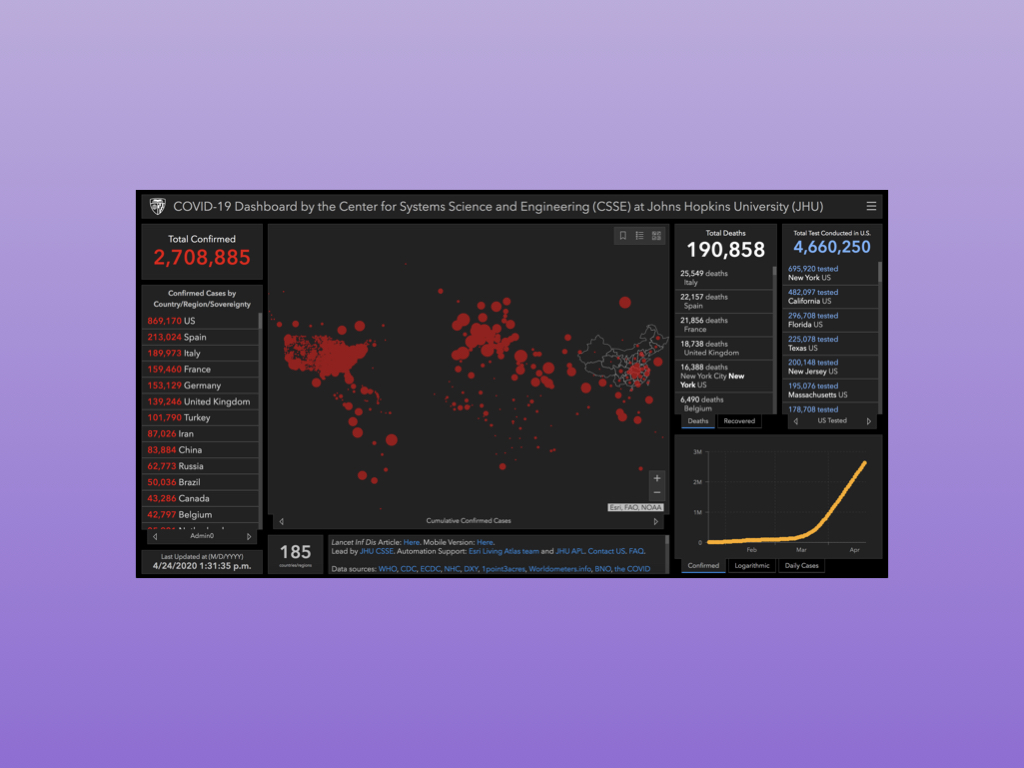
If you haven't already seen it, the COVID-19 Dashboard by the Center for Systems Science and Engineering at John Hopkins University is an useful reference to anyone tracking the progress of COVID-19. The data is collected from many sources all over the globe and is being updated constantly.
Thanks to data scientist Omar Laraqui, who has put together a handy COVID-19 web API, we can now easily see how many new cases or recoveries there are in specific areas of the world. You will need to experiment with the location codes since at this time of writing there isn’t a listing available.
However, once you find the ID for where to look, it’s easy to pull up the numbers.
So, go ahead and visit https://covid19api.herokuapp.com/ to find the location ID of your choice. Alternatively, for global data as a whole, you can view it at : https://covid19api.herokuapp.com/latest.
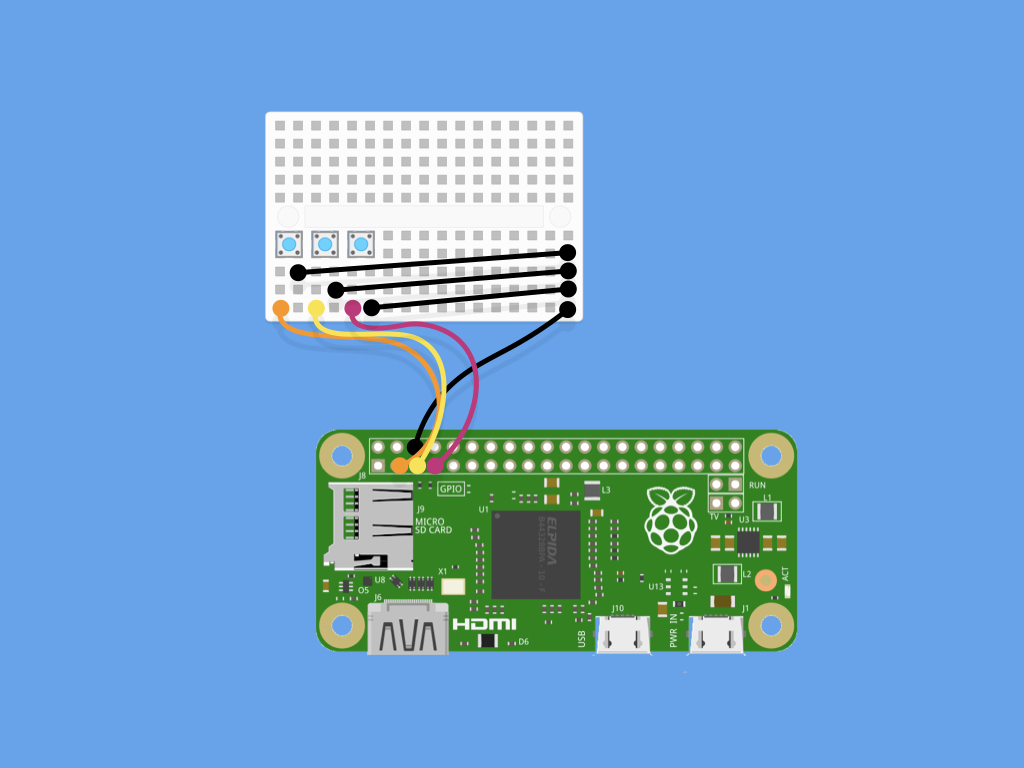
For this project, we will connect three momentary pushbuttons to the Raspberry Pi. For a refresher on connecting Digital Inputs to the Raspberry Pi and programming it with GPIO Zero library, view this guide.
Next, connect a black jumper wire from the ground rail of the breadboard to GND on the Raspberry Pi.
Connect the other end of all buttons to the ground rail on the breadboard
First, connect one end of a button to GPIO2
Next, connect one end of another button to GPIO3
Finally, connect one end of the final button to GPIO4
Insert the pushbuttons into the breadboard.
import requests
import time
from gpiozero import Button

btn1 = Button(2)
btn2 = Button(3)
btn3 = Button(4)


while True:
    if btn1.is_pressed:
        # Get data on only confirmed cases for location ID 15: Victoria, Australia
        api_response = requests.get('https://covid19api.herokuapp.com/confirmed')
        print("Number of confirmed cases:")
        print(api_response.json()['locations'][14]['latest'])
Create a new python file with sudo nano python-file-name.py
Change python-file-name to the file name of your choice.
Copy and paste the following code into the editor.
Press CTRL+X and then Y followed by Enter to save.
In this guide, we have used the location ID: 15 for data on Victoria, Australia.
import requests
import time
from gpiozero import Button

btn1 = Button(2)
btn2 = Button(3)
btn3 = Button(4)

while True:
    if btn1.is_pressed:
        # Get data on only confirmed cases for location ID 15: Victoria, Australia
        api_response = requests.get('https://covid19api.herokuapp.com/confirmed')
        print("Number of confirmed cases:")
        print(api_response.json()['locations'][14]['latest'])
    if btn2.is_pressed:
        # Get data on recoveries for location ID 15: Victoria, Australia
        api_response = requests.get('https://covid19api.herokuapp.com/recovered')
        print("Number of recoveries:")
        print(api_response.json()['locations'][14]['latest'])
Create a new condition if btn2.is_pressed to get the data for number of recoveries.
import requests
import time
from gpiozero import Button

btn1 = Button(2)
btn2 = Button(3)
btn3 = Button(4)


while True:
    if btn1.is_pressed:
        # Get data on only confirmed cases for location ID 15: Victoria, Australia
        api_response = requests.get('https://covid19api.herokuapp.com/confirmed')
        print("Number of confirmed cases:")
        print(api_response.json()['locations'][14]['latest'])
    if btn2.is_pressed:
        # Get data on recoveries for location ID 15: Victoria, Australia
        api_response = requests.get('https://covid19api.herokuapp.com/recovered')
        print("Number of recoveries:")
        print(api_response.json()['locations'][14]['latest'])
    if btn3.is_pressed:
        #Get data on deaths for location ID 15: Victoria, Australia
        api_response = requests.get('https://covid19api.herokuapp.com/deaths')
        print("Number of deaths:")
        print(api_response.json()['locations'][14]['latest'])
Finally, create a new condition if btn3.is_pressed to get the data for number of deaths.
For more displays, check out our range compatible with the Raspberry Pi here.
You could use any display of your choice, for instructions on using our 5-Inch Touch Screen Display with Raspberry Pi, you can find them here.
For instructions on using our 7-Inch Touch Screen Display with Raspberry Pi, you can find it here.
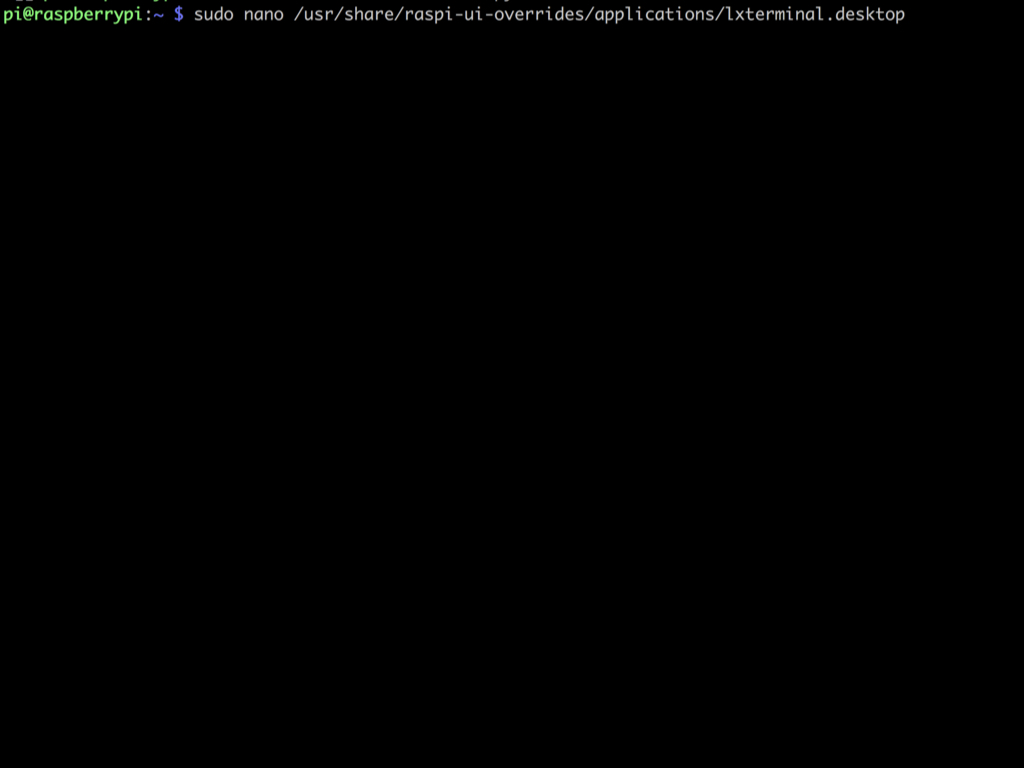
Type the following into the command line: sudo nano /usr/share/raspi-ui-overrides/applications/lxterminal.desktop
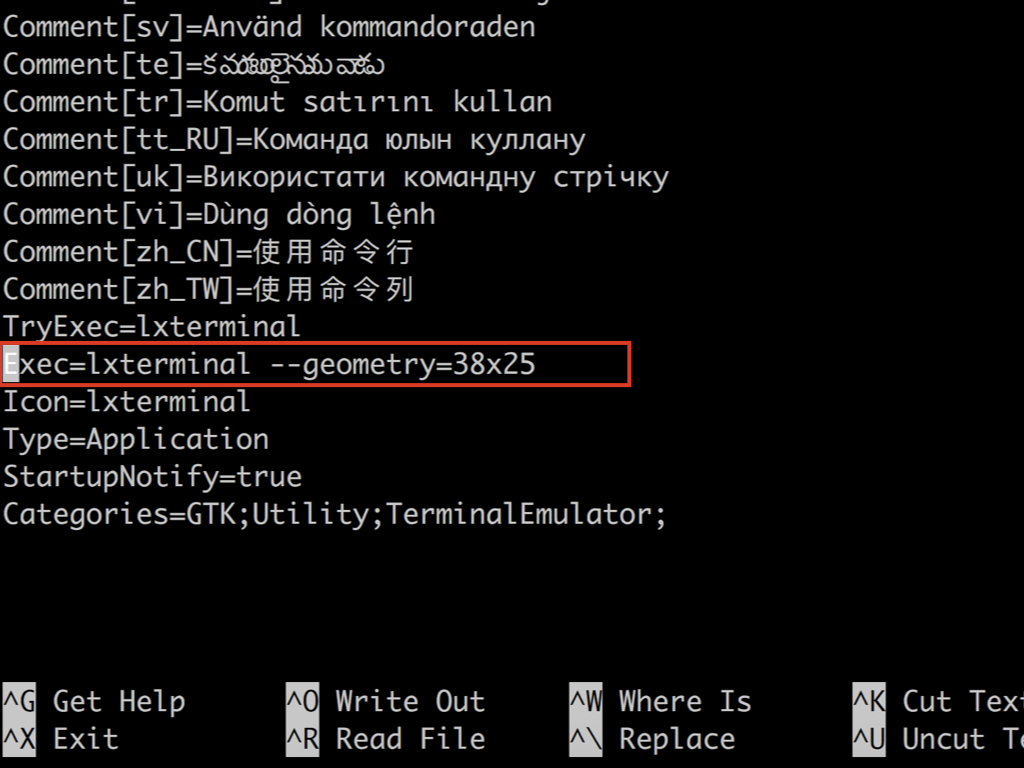
Scroll down to find this line near the end of file: Exec=lxterminal
Add --geometry=38x25 so that it reads:
Exec=lxterminal --geometry=38x25
Exec=lxterminal --geometry=38x25
Feel free to change the dimensions based on the screen you are using!
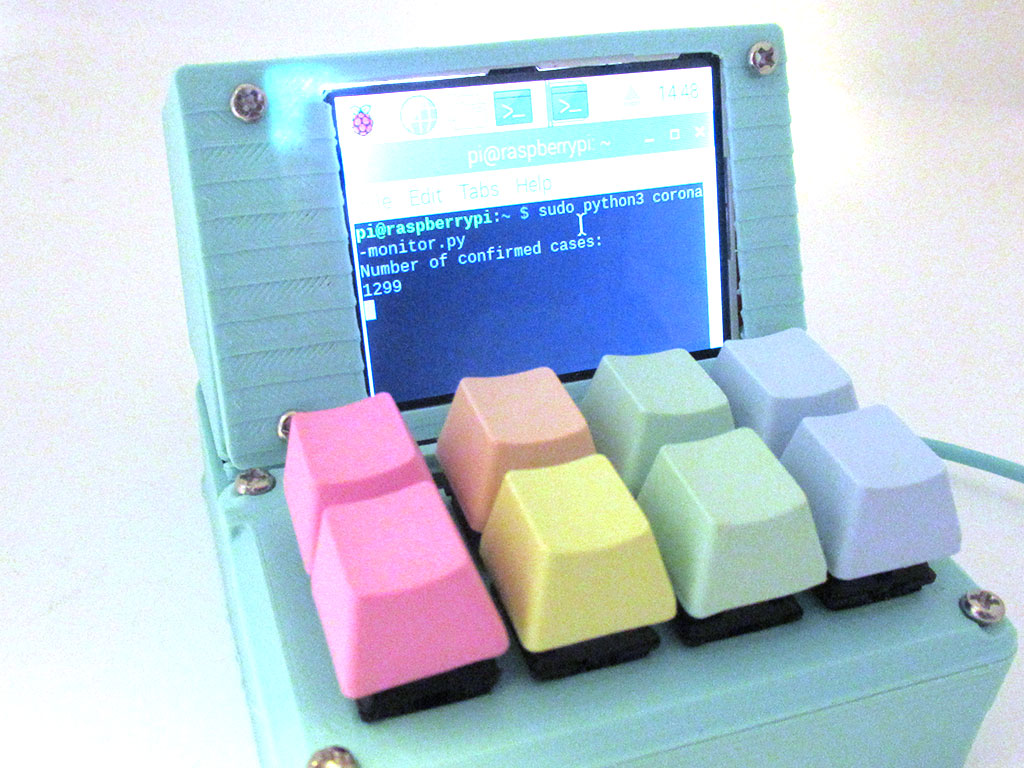
We're done with the basic steps on getting started. Go one step further and 3D print an enclosure, wire up some mechanical switches or momentary push buttons to an Arduino or Teensy board, and connect it to the Raspberry Pi! Not sure how? Take a look at one of our previous guides that shows you how to create a mechanical keypad. Our wide variety of 3D printing filaments are also available.
What other functionality would you add to it? Maybe instead of displaying the command line, a GUI with Tkinter? Perhaps a scheduler with Google Calendar integration to motivate your locked down self to stick with healthy routines?
That's all for now, check out our how to section for more guides on creating with the Raspberry Pi.