Plush Controller with EagLED
Make a plush controller with conductive fabric and EagLED
Written By: Cherie Tan
Difficulty
Medium
Steps
18
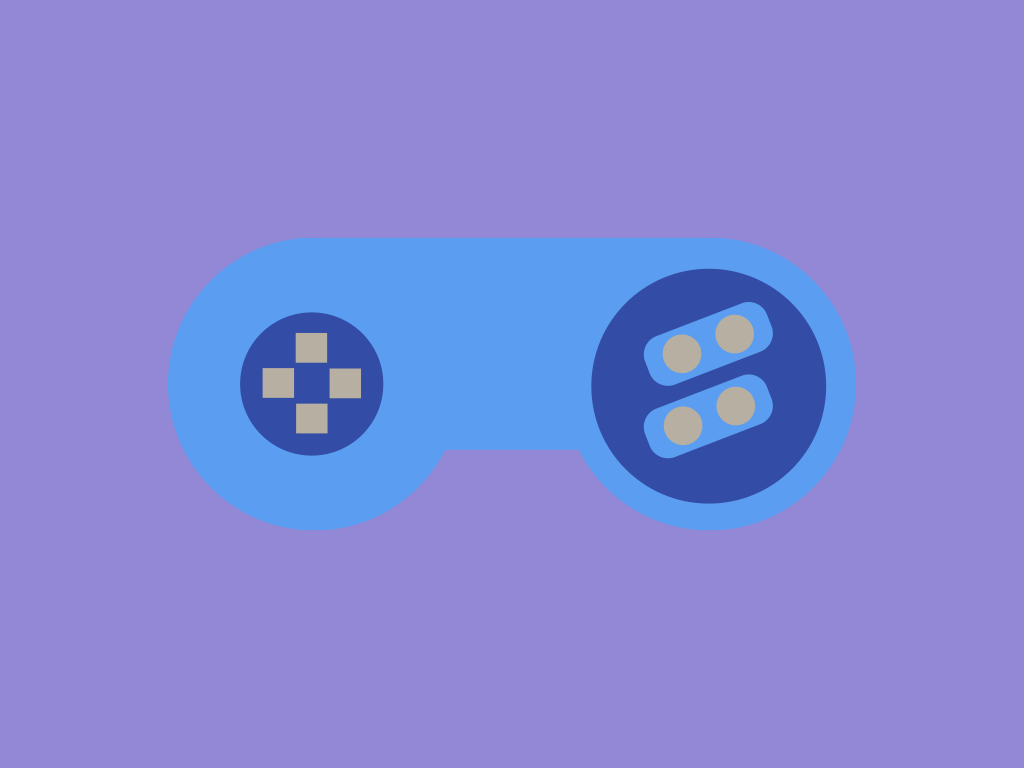
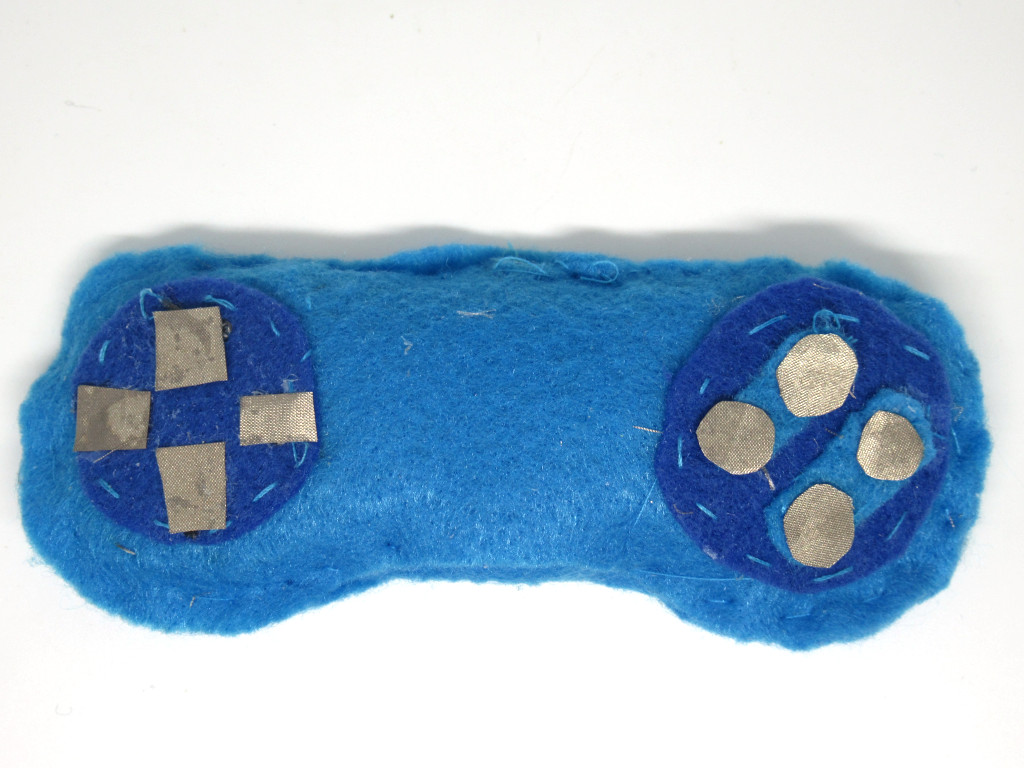
Build a fully working plush controller that you could use to play games or control your computer!
In this guide, you will learn to build a plush controller by stitching up a capacitive touch-sensing circuit with the EagLED, conductive fabric and conductive thread. This controller can be used as a Human-interface device (HID) such as a computer keyboard.
Complete this guide to create your own plush controller.
Wearable technology has come a long way, starting with the simple watch. These days, getting started with designing your own wearable electronics and/or soft circuit is easy, especially with specialised boards such as the EagLED.
What are soft circuits? A soft circuit is any circuit that is embedded into a soft or flexible material, and are often composed of flexible conductive materials such as conductive thread or conductive fabric along with discrete electronic components that are sewn in or attached by other means.
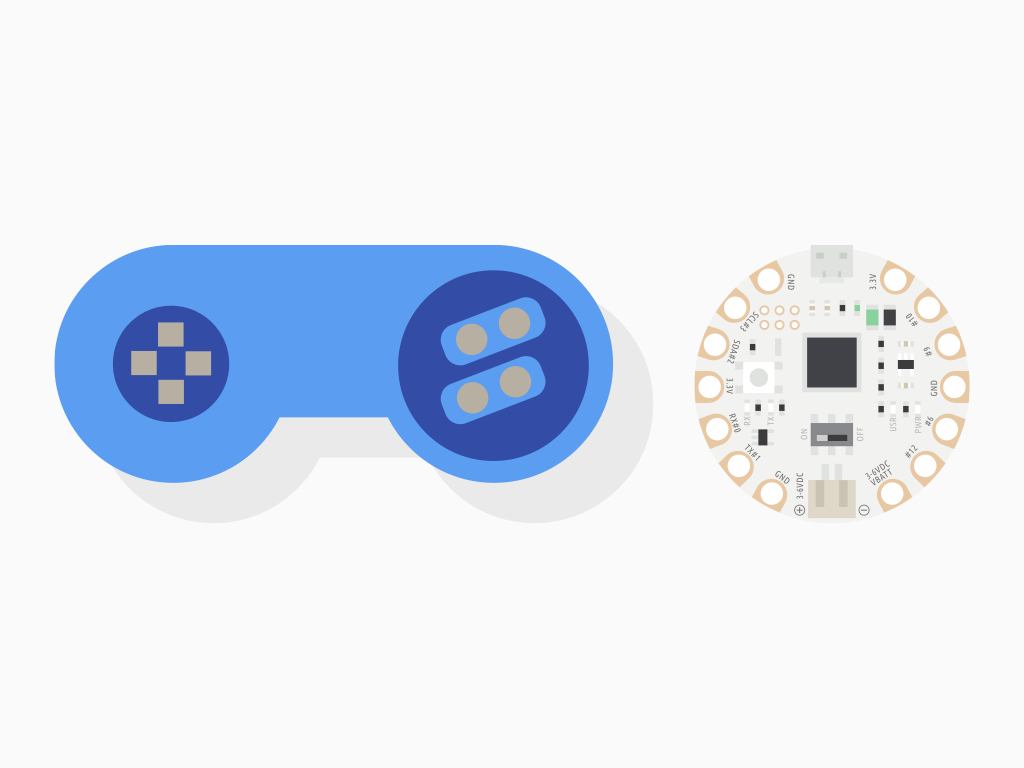
In this guide, we will build a plush controller using the EagLED, conductive fabric and conductive thread to stitch up a capacitive touch-sensing circuit. This controller can be used as a HID device like a computer keyboard.
A Human-Interface Device or HID is a device that takes an input from us and gives an output.
Some examples of HID devices include a keyboard, mouse, gamepad controller, and joystick controller.
The EagLED has an Atmega32U4, which has a USB transceiver and this means that it can emulate a HID USB device
No external LiPo battery is required here. It will be directly powered and connected via USB cable to the computer.
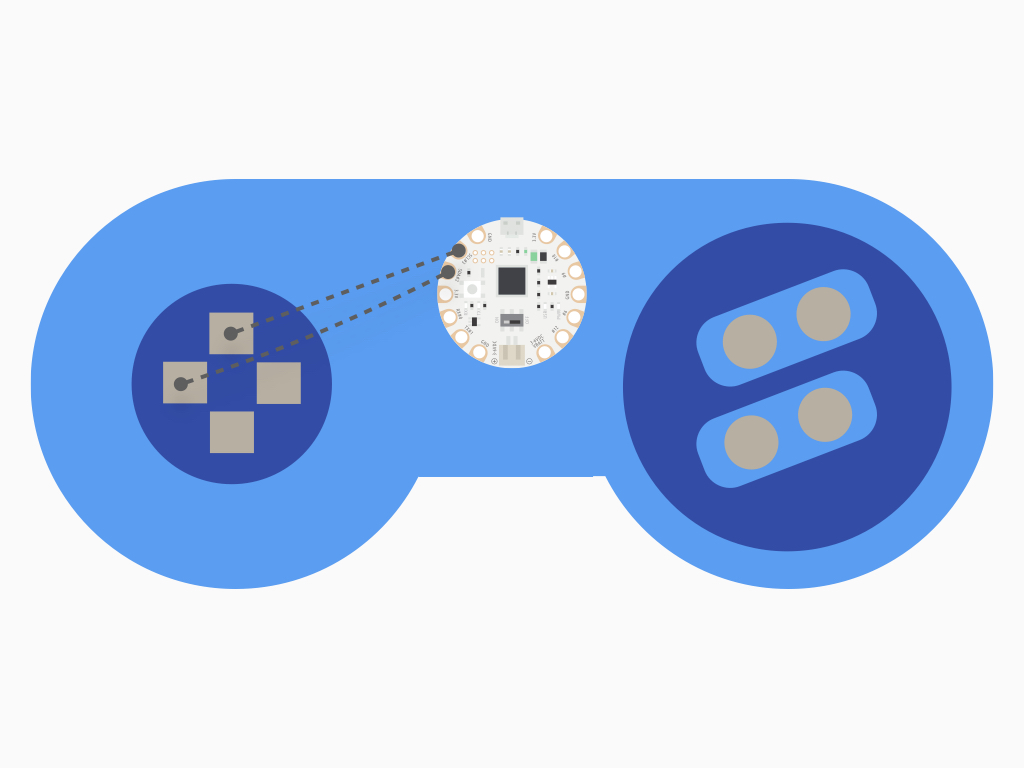
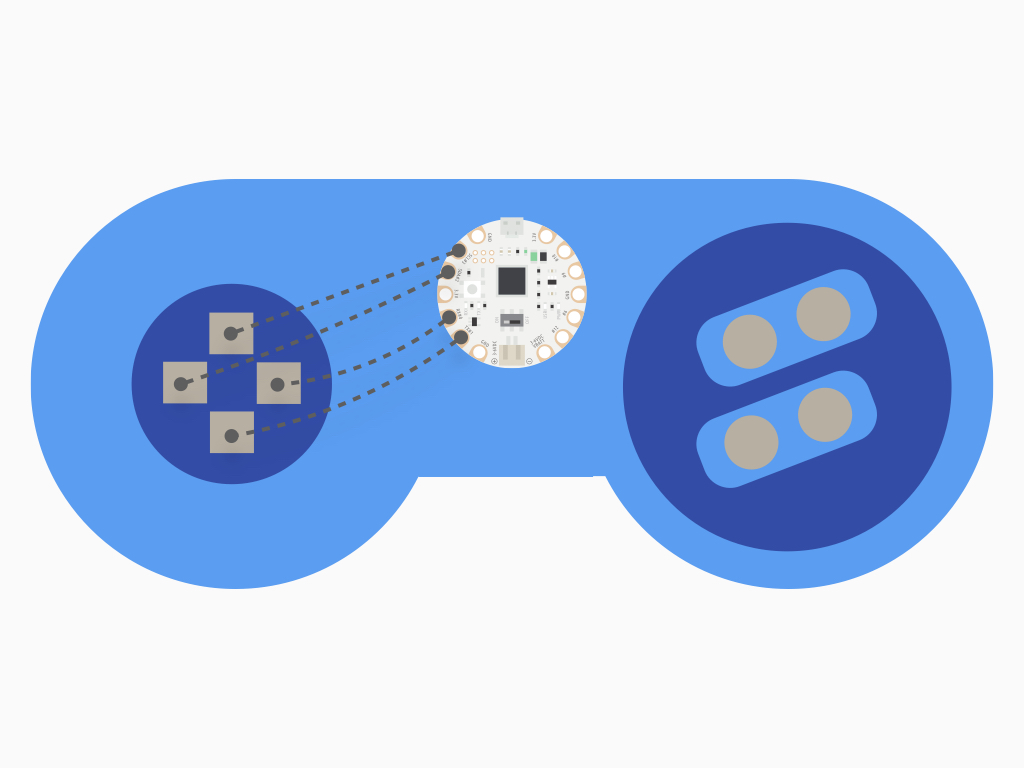
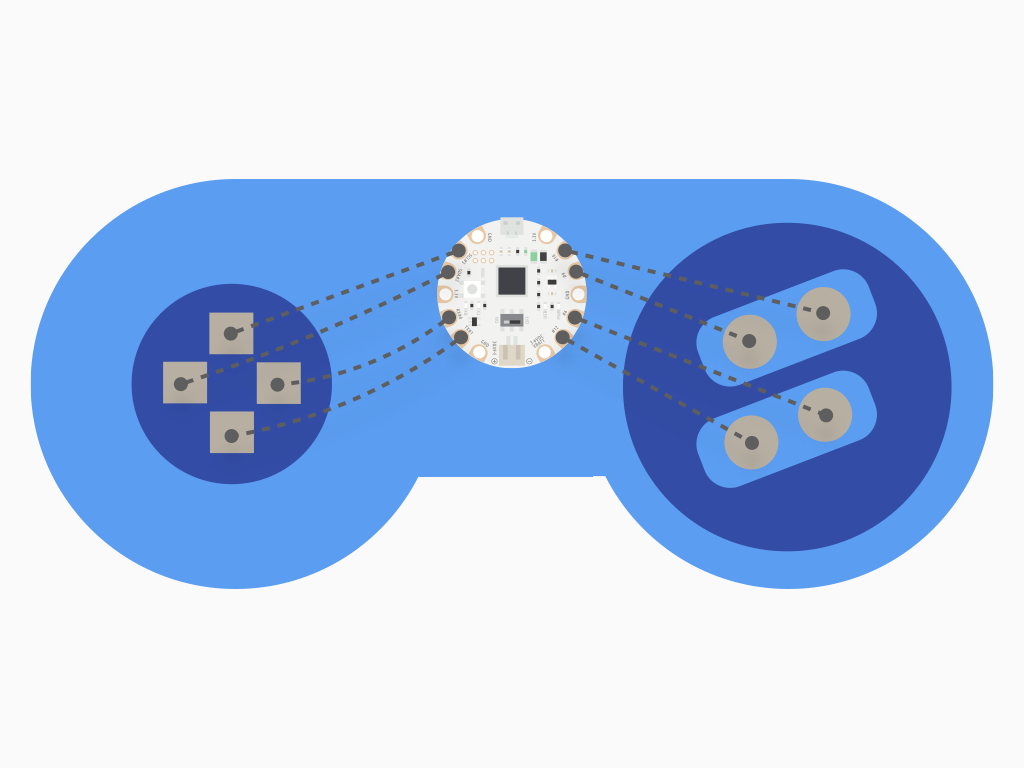
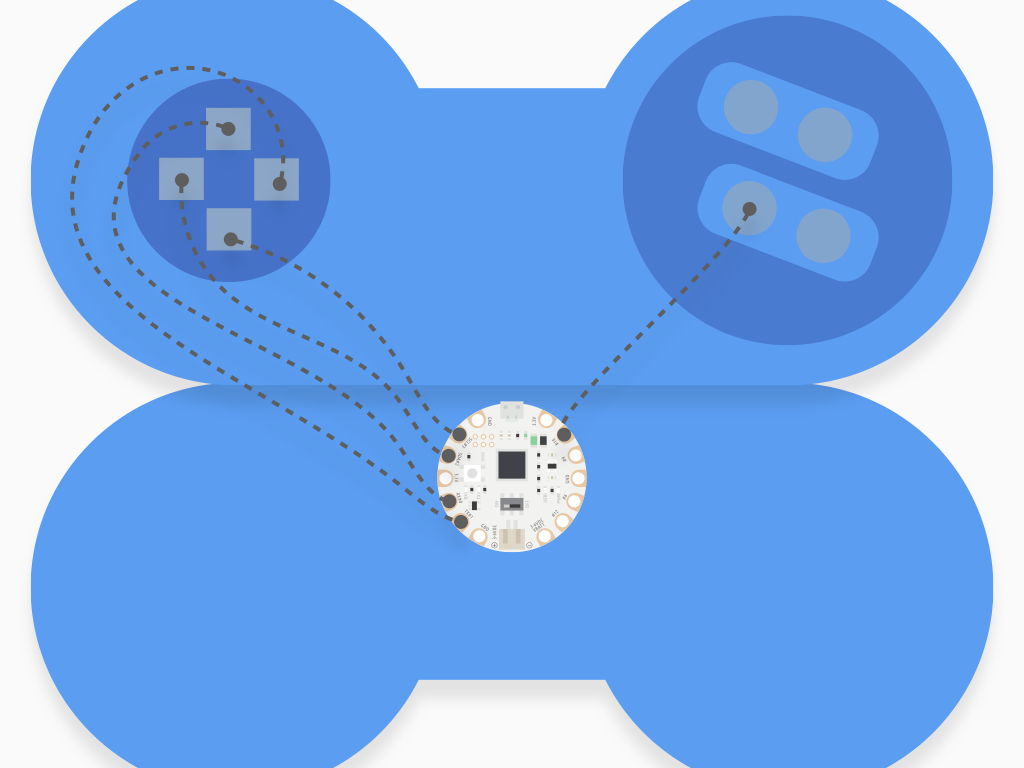
The plush controller will have eight input buttons connected to eight pins on the EagLED:
Up to SCL#3
Up to SCL#3
Left to SDA#2
Down to RX#0
Right to TX#1
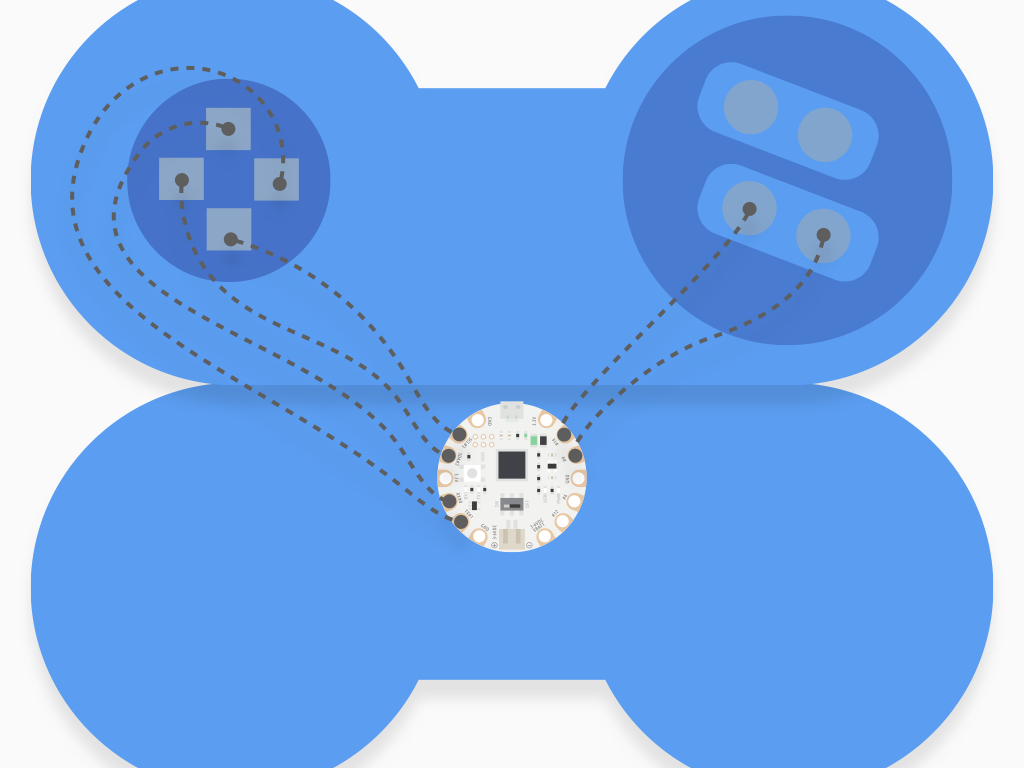
Y to #10
X to #9
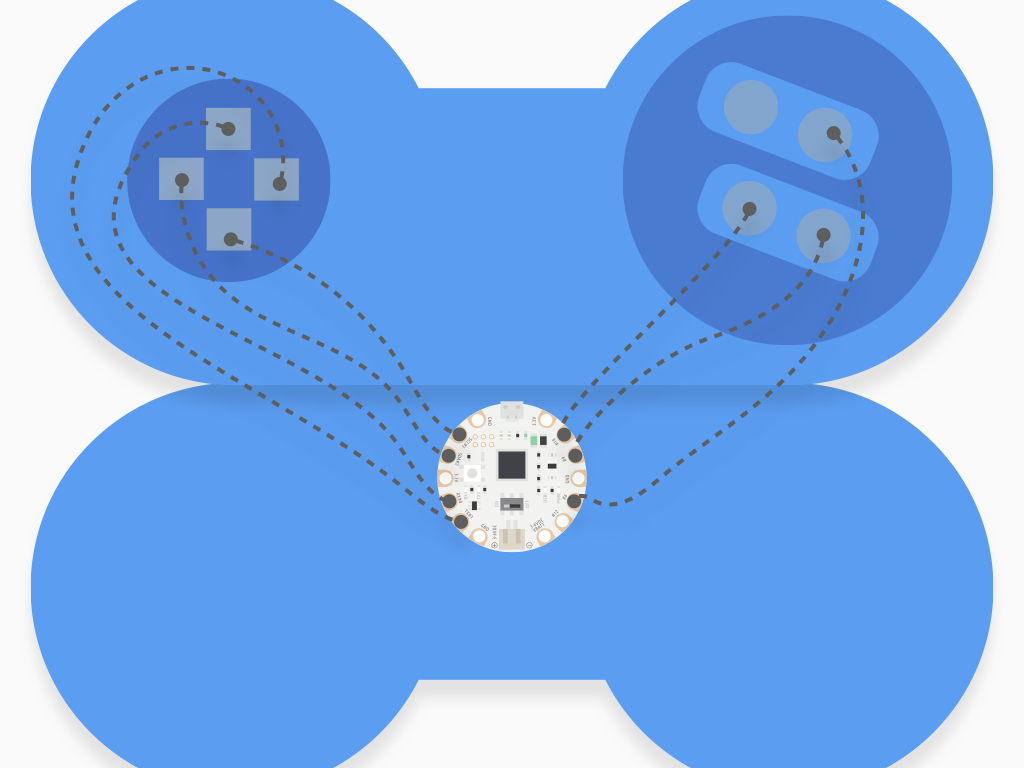
A to #6
B to #12

First, prepare the felt fabric or non-conductive fabric of your choice. Cut out a front, a back side, and any decorative bits
Then cut out eight button shapes out of conductive fabric.

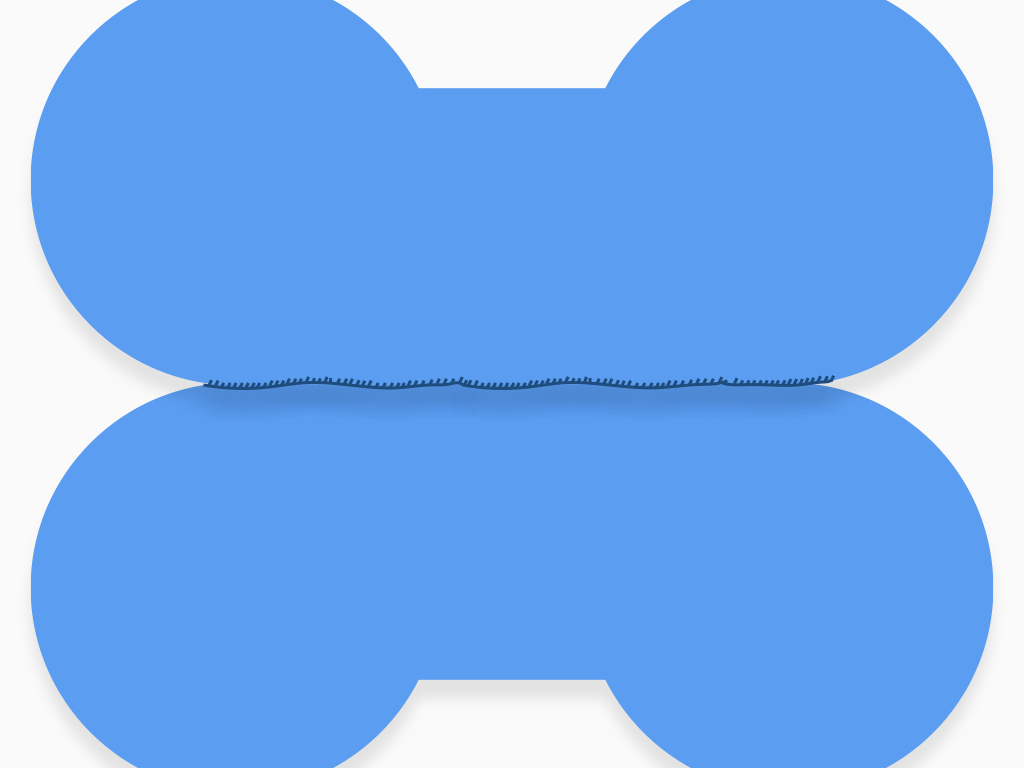
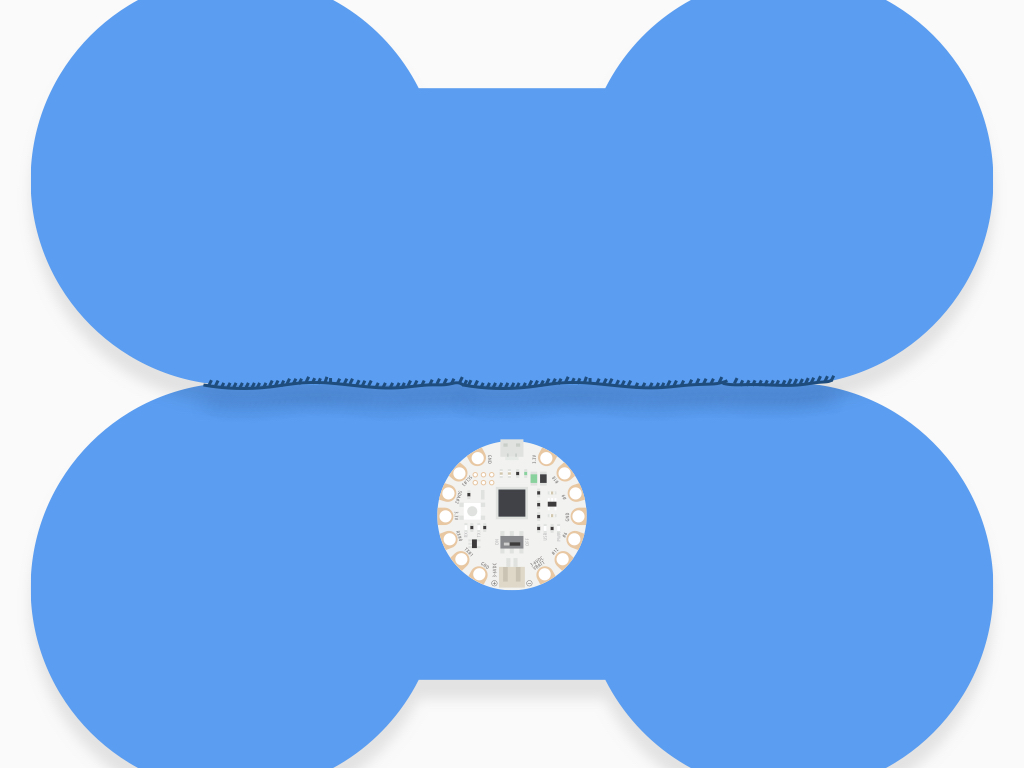
Align the front and back sides of felt fabric as shown.
Stitch the edge together, leaving a hole in the center where the EagLED's microUSB port is left accessible.
Place the EagLED as close to the edge as possible

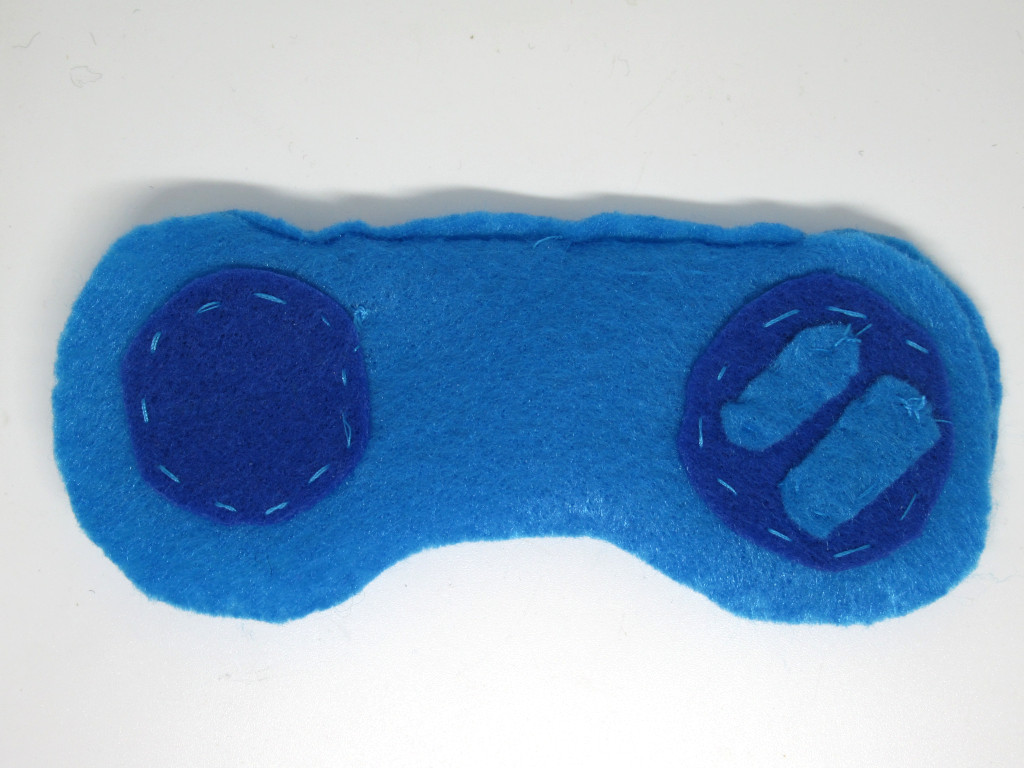
Now get out the decorative bits of fabric and stitch them to the front side.
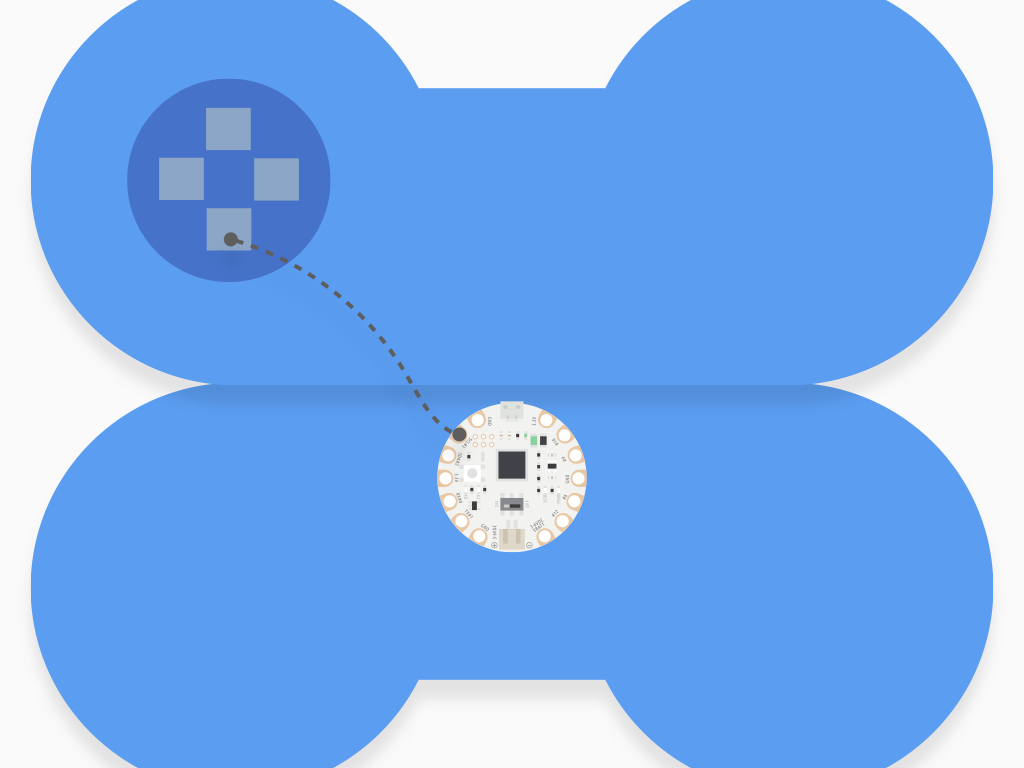
Start by stitching a line of conductive thread from SCL#3 to the 'Up arrow' button.
Poke the sewing needle through to the front.
Create a finishing knot at the area where the conductive fabric button will be placed
In this guide, we will later connect the conductive fabric buttons to these finishing knots with fabric glue.

Next, stitch a line of conductive thread from SDA#2 to the 'Left arrow' button.
Do the same as before, by poking the sewing needle through to the front.
Create another finishing knot at the area where the conductive fabric button will be placed
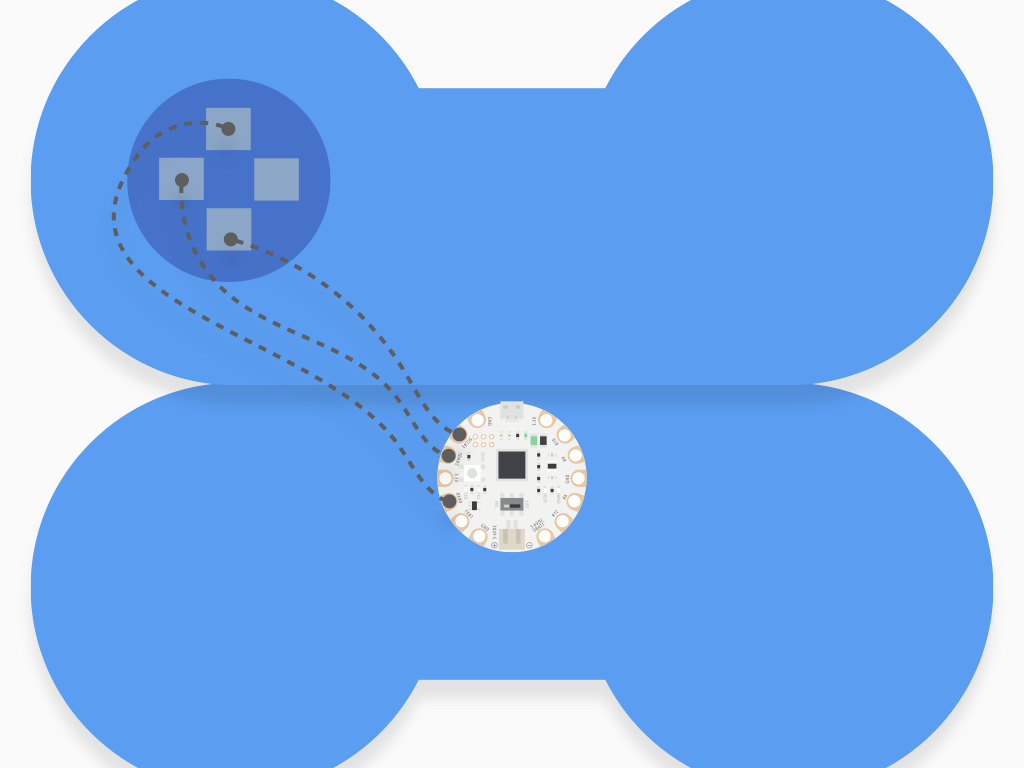
Stitch a line of conductive thread from RX#0 to the 'Down arrow' button
Repeat the same steps as done for the other buttons.
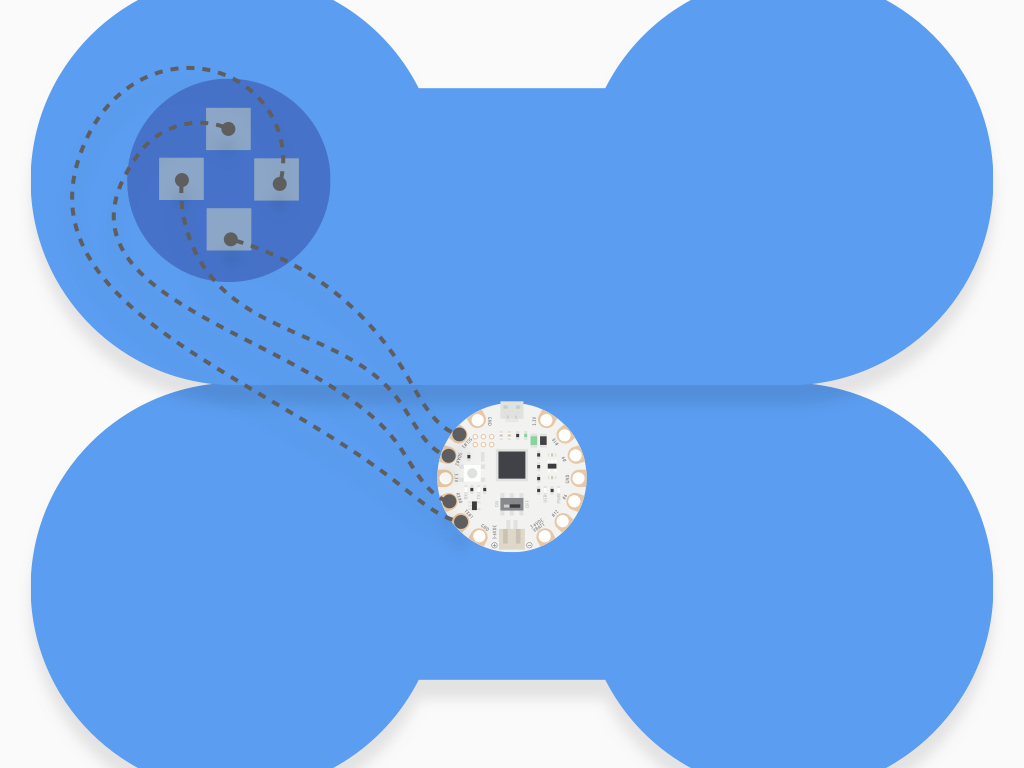
Stitch a line of conductive thread from TX#1 to the 'Right arrow' button
Repeat the same steps as done for the other buttons
Stitch a line of conductive thread from #10 to the 'Y' button
Repeat the same steps as done for the other buttons.
Stitch a line of conductive thread from #9 to the 'X' button
Repeat the same steps as done for the other buttons.
Stitch a line of conductive thread from #6 to the 'A' button
Repeat the same steps as done for the other buttons.

Stitch a line of conductive thread from #12 to the 'B' button
Repeat the same steps as done for the other buttons.
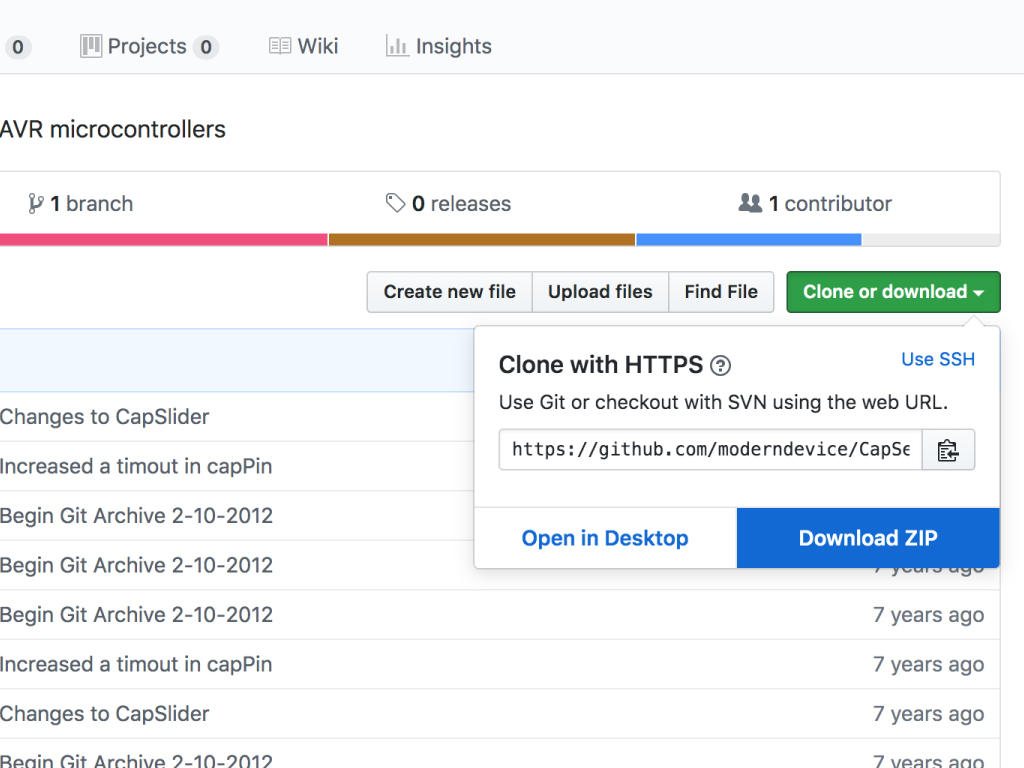


Before we program the EagLED, you will need to download the CapSense library by moderndevice.
Click on the 'Clone or download' button
Click on 'Download Zip'
Place the folder into the 'libraries' folder found in the 'Arduino' folder
#include <Keyboard.h>
#include <CapPin.h>

CapPin cPin_0 = CapPin(0);    // read pin 0 (RX#0 on EagLED) - connect to Down arrow
CapPin cPin_1  = CapPin(1);     // read pin 1 (TX#1 on EagLED)   - connect to Right arrow
CapPin cPin_2  = CapPin(2);     // read pin 2 (SDA#2 on EagLED)   - connect to Left arrow
CapPin cPin_3 = CapPin(3);    // read pin 3 (SCL#3 on EagLED) - connect to Up arrow
CapPin cPin_6  = CapPin(6);     // read pin 6 (#6 on EagLED)   - connect to 'A' button
CapPin cPin_9  = CapPin(9);     // read pin 9 (#A9 on EagLED)   - connect to 'X' button
CapPin cPin_10  = CapPin(10);     // read pin 10 (#10 on EagLED)  - connect to 'Y' button
CapPin cPin_12 = CapPin(12);     // read pin 12 (#12 on EagLED)  - connect to 'B' button

CapPin pins[] = {cPin_0, cPin_1, cPin_2, cPin_3, cPin_6, cPin_9, cPin_10, cPin_12};

char Keys[] = { KEY_DOWN_ARROW, KEY_RIGHT_ARROW, KEY_LEFT_ARROW, KEY_UP_ARROW, 'a', 'x' , 'y' , 'b'};

boolean currentState[] = {false, false, false, false, false, false, false, false};

#define THRESHOLD 1000

void setup() {
  Keyboard.begin();
}

void loop() {

  for (int i = 0; i < 8; i++) {
    delay(1);
    long total =  pins[i].readPin(2000);

    // check if a finger is touching the pad and it was not already pressed
    if ((total > THRESHOLD) && (! currentState[i])) {
      currentState[i] = true;

      Keyboard.press(Keys[i]);
    }
    else if ((total <= THRESHOLD) && (currentState[i])) {
      currentState[i] = false;

      Keyboard.release(Keys[i]);
    }

    delay(5);
  }

}
Connect the EagLED to the computer via a microUSB cable.
Upload the following code to the EagLED.
To change the assigned keys, you can do so by modifying what is in: char Keys[] = { KEY_DOWN_ARROW, KEY_RIGHT_ARROW, KEY_LEFT_ARROW, KEY_UP_ARROW, 'a', 'x' , 'y' , 'b'};
To change the sensitivity of the buttons, adjust: #define THRESHOLD 1000

Add a dollop of fabric glue to the conductive fabric buttons
Carefully place them against where the finishing knots were made
Insert stuffing into the plush controller
Combine the front and back fabric pieces together by sewing along its edge
