Use a Push Button with Arduino
Turn an LED on and off with the Arduino
Written By: Cherie Tan

Difficulty
Easy
Steps
8
In this guide, we will learn how to use a push button switch together with an Arduino, to turn an LED on and off. The circuit we will be building, uses a Little Bird Uno R3, a fully compatible Arduino development board. A mini pushbutton switch, a 5mm LED, jumper wires, and a mini breadboard is also required.
Other uses for push buttons are in custom gamepads, DIY radio buttons, MIDI controllers with push buttons that in conjunction with LEDs would light up when pressed, and many more!

Insert an LED into the breadboard with the Anode (positive leg) on the left and the Cathode (negative leg on the right).
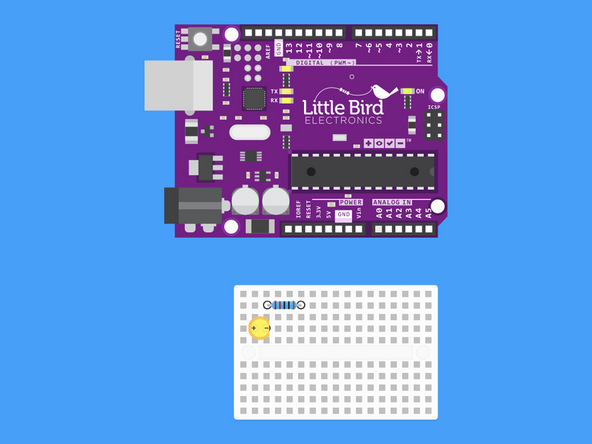
Insert a 220 Ohm Resistor so that one leg is inline with the LED's Cathode leg.
Resistors are not polarised, so orientation doesn't matter.
This resistor will be used to limit the current going to our LED.
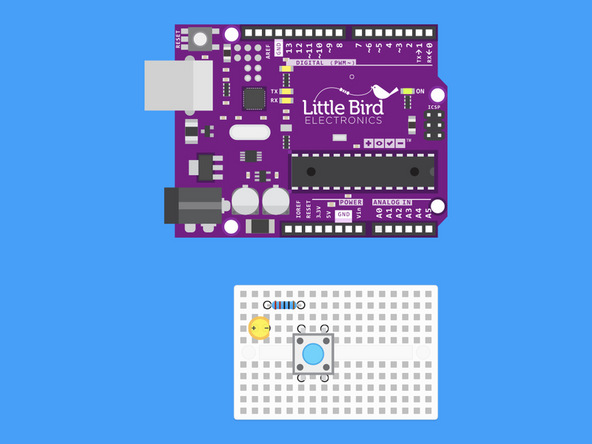
Insert your push button so that one leg is in line with the other end of the resistor.
Be sure to really push down on the push button so that the bottom of the push button is flush with the breadboard (this will feel like you're pushing too hard).


const int ledPin = 13;// We will use the internal LED
const int buttonPin = 7;// the pin our push button is on

void setup()
{
  pinMode(ledPin,OUTPUT); // Set the LED Pin as an output
  pinMode(buttonPin,INPUT_PULLUP); // Set the Tilt Switch as an input
}

void loop()
{
  int digitalVal = digitalRead(buttonPin); // Take a reading

  if(HIGH == digitalVal)
  {
    digitalWrite(ledPin,LOW); //Turn the LED off
  }
  else
  {
    digitalWrite(ledPin,HIGH);//Turn the LED on
  }
}
Upload this code to your Arduino.
When you run this code, the LED on Pin 13 will turn on when the button is held down. That is all.
const unsigned int buttonPin = 7;
const unsigned int ledPin = 13;

int buttonState = 0;
int oldButtonState = LOW;
int ledState = LOW;

void setup() {
  pinMode(ledPin, OUTPUT);
  pinMode(buttonPin, INPUT_PULLUP);
}

void loop() {
  buttonState = digitalRead(buttonPin);

  if (buttonState != oldButtonState &&
      buttonState == HIGH)
  {
    ledState = (ledState == LOW ? HIGH : LOW);
    digitalWrite(ledPin, ledState);
    delay(50);
  }
  oldButtonState = buttonState;
}
Upload this code to your Arduino.
This program will toggle on and off the LED every time you push the button.